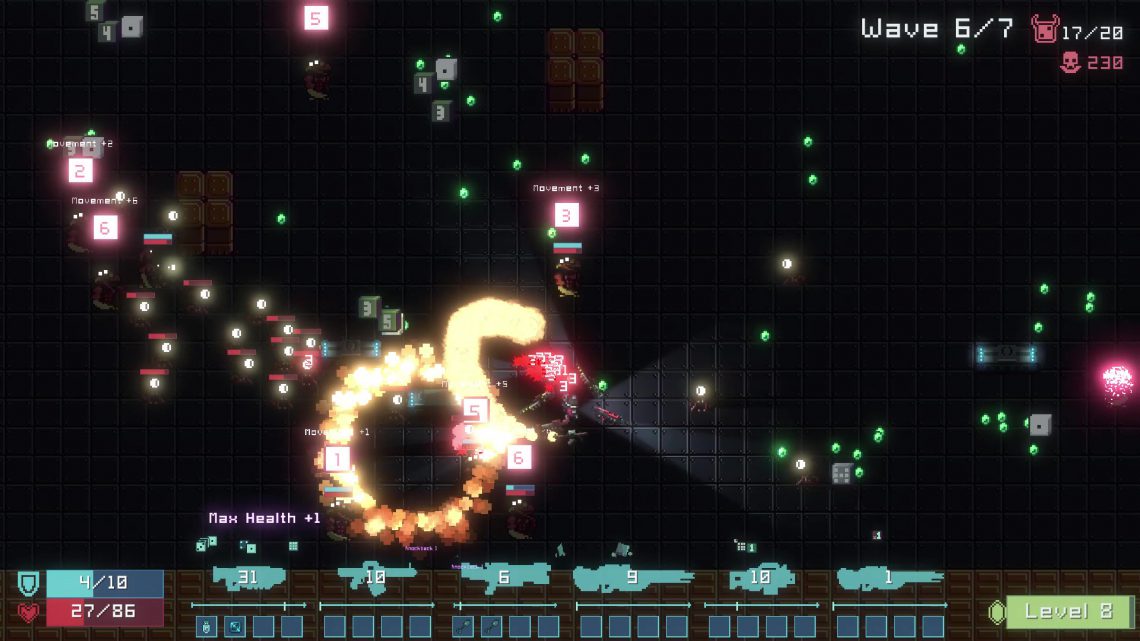
I’m working on a new game, Dice Gun Commando, and we just released our public demo! It’s a dice-builder survivors-like where guns roll dice, dice trigger mods, and mods cause MAYHEM!
Long story short (which I plan to write about someday), Dice Tower needs funding to continue development, we didn’t get it, so it’s on hiatus for awhile.
Dice Gun Commando is our pivot to making a smaller game that incorporates the dice mechanics of Dice Tower in a more accessible action genre, on a faster release timeline (targeting middle of 2026). Early playtests and feedback show signs that this could be a big game!
If you want to following Dice Gun Commando progress, join the Loonicy server!
In May of 2025, I took a break from working on my game, Dice Tower, and flew out to Boston, Massachussetts to attend GodotCon. It’s a convention centered around the game engine I work with, Godot; it was the first time the event was held in the United States of America, my home country. GodotCon was amazing, and I want to share my experience!
Yes, this is the same Dice Tower that I said a few years ago we were going to finish quickly. That’s a story for another day.
Arrival in Boston – Sunday
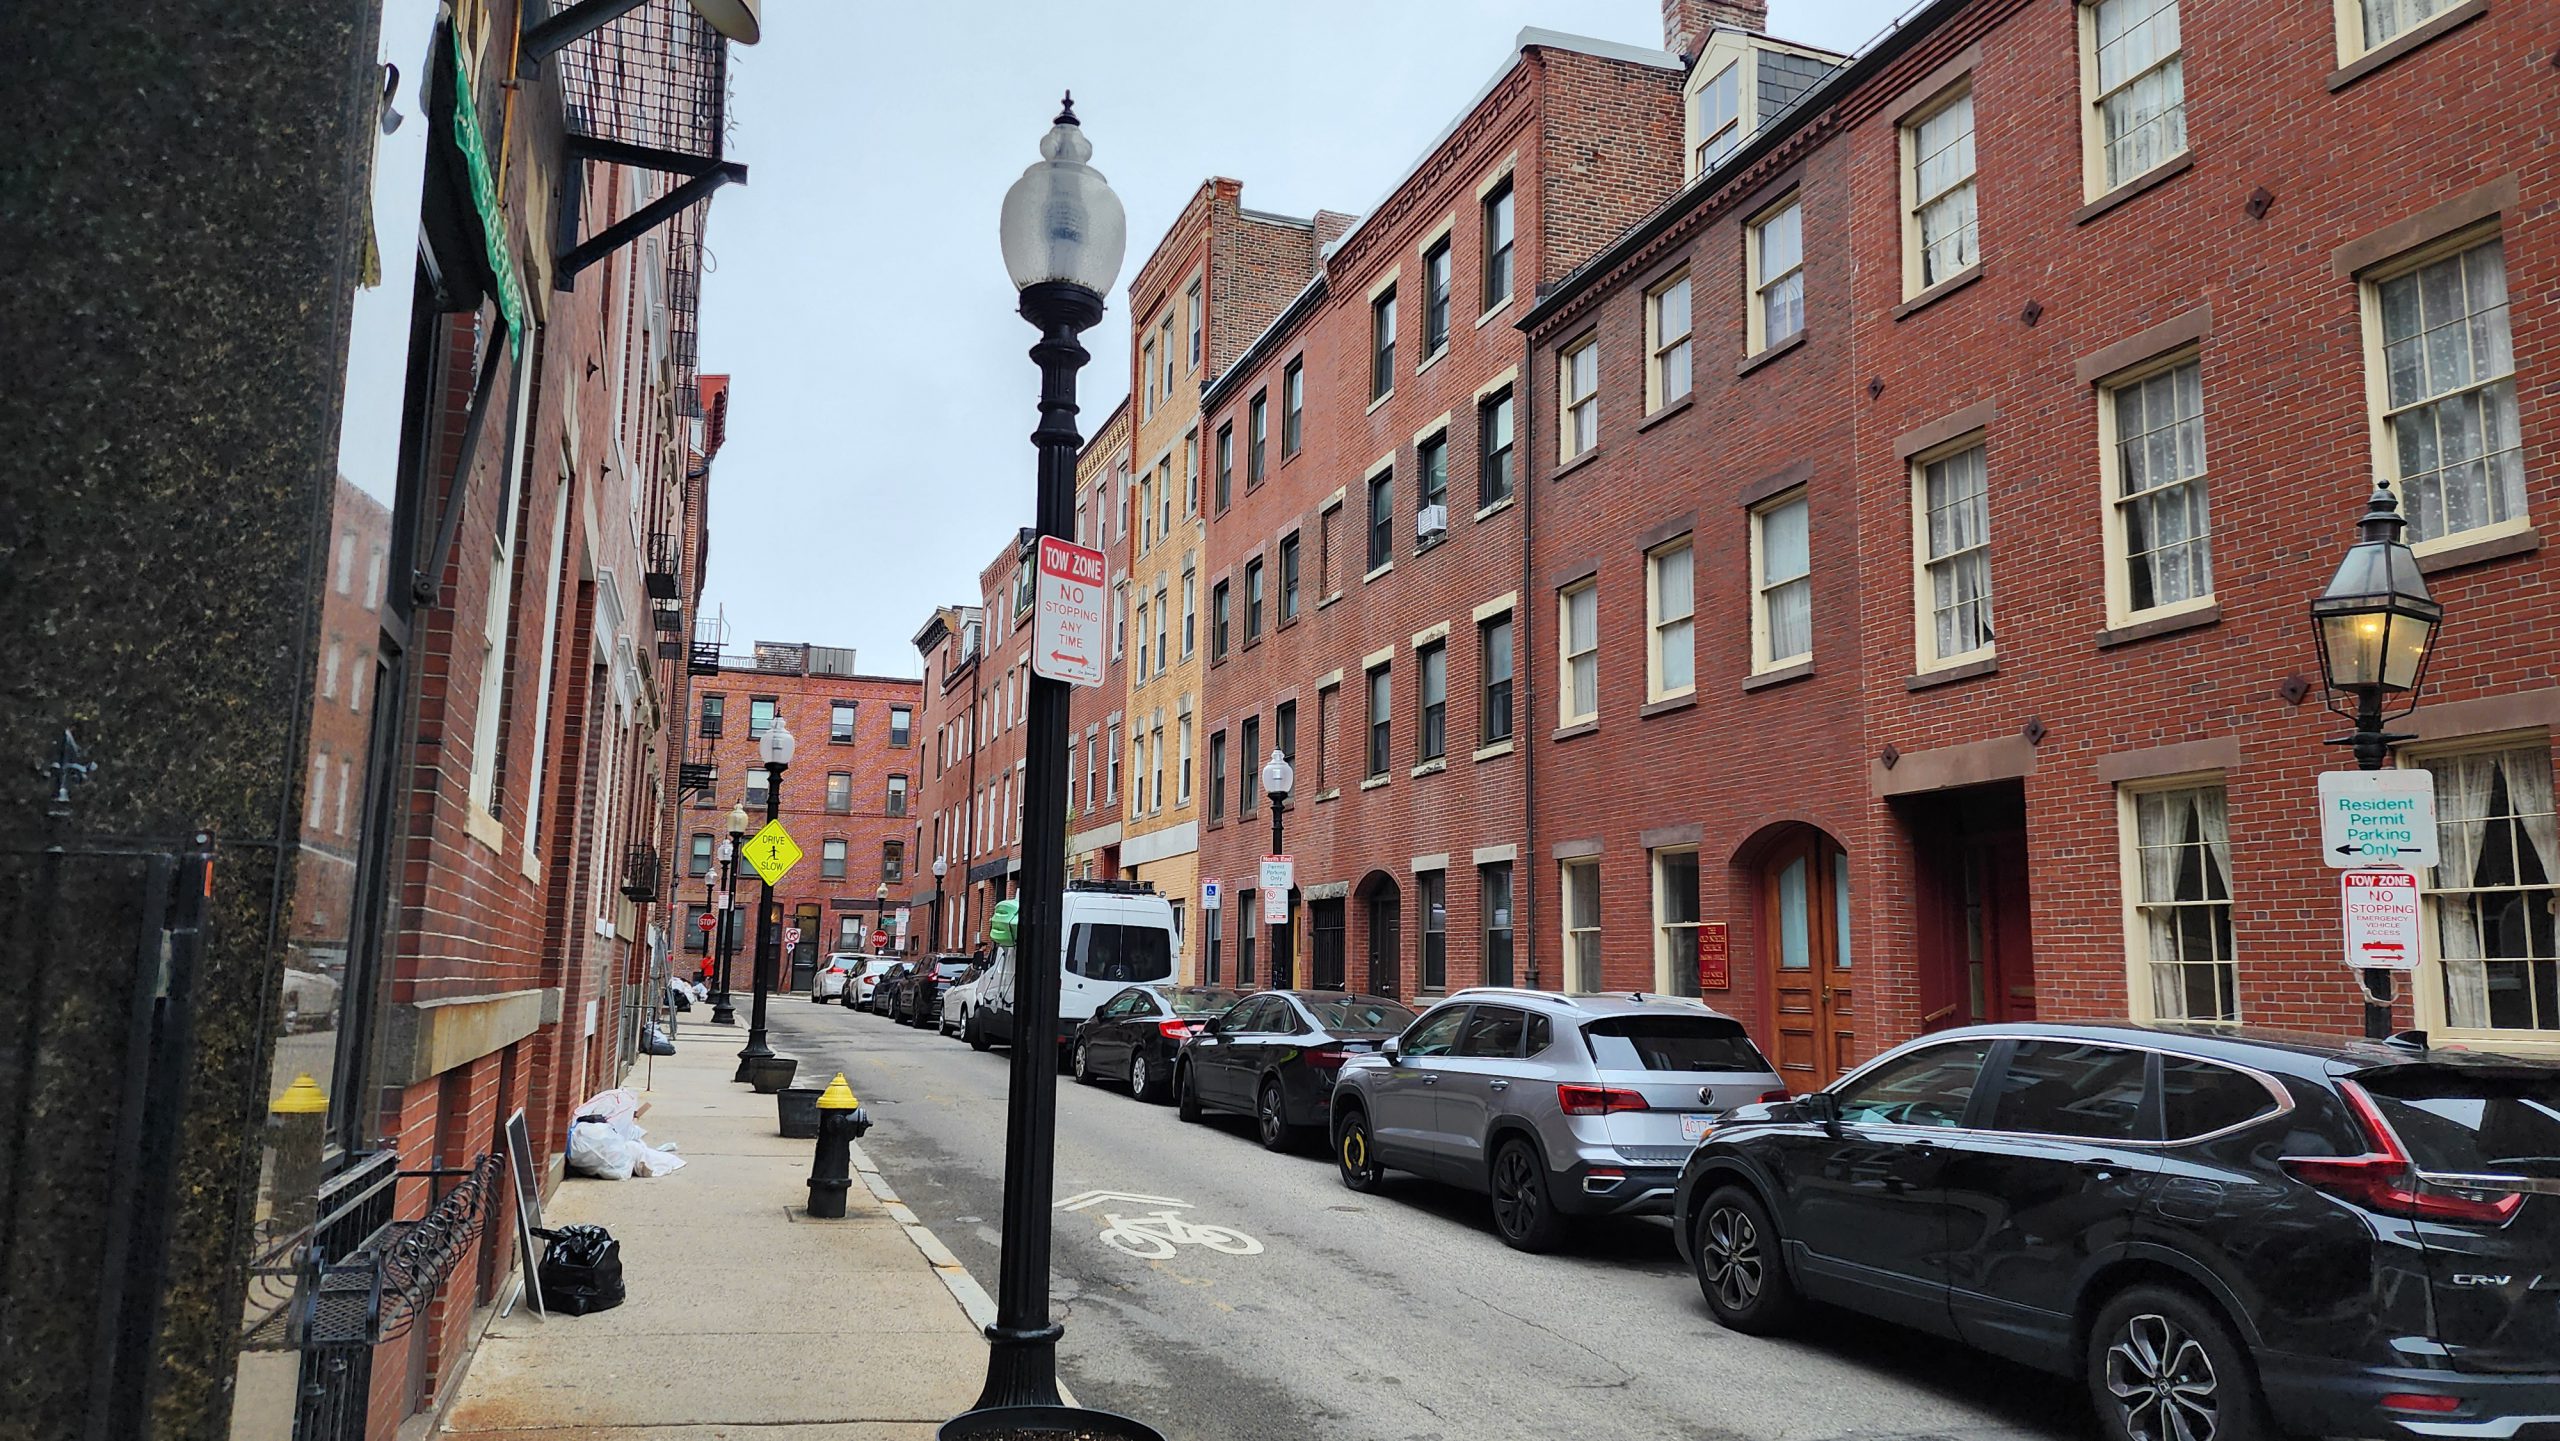
I flew into Boston on Sunday morning, which gave me a bit of time to explore the city before GodotCon started on Monday. This is a city steeped in American history, and I felt that as I explored the downtown area. I took a duck boat tour of the city, and got to hear more about Boston’s history. I also spent some time in the New England Aquarium, which has a unique 250,000 gallon aquarium pillar and an open-air penguin exhibit I found fascinating.
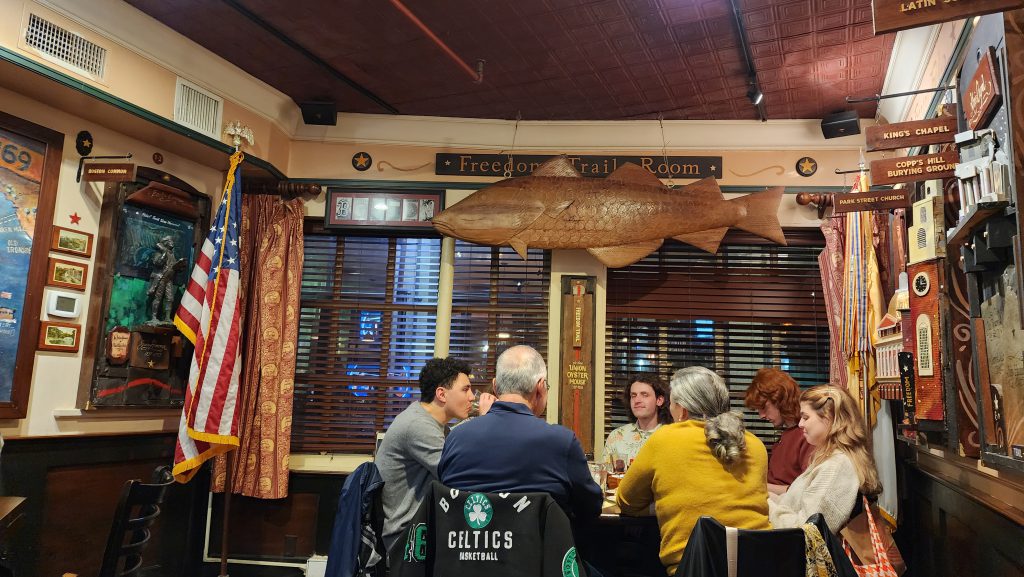
I walked to Neptune Oyster Bar for supper. As a Minnesotan, I rarely get a chance to experience fresh seafood, and Neptune served some amazing oysters and lobster roll. Afterwards, I meandered my way back to the car and drove to my hotel, ready to call it a night and rest up for three days of GodotCon.
Boston is the oldest city I’ve visited. I could feel the history this city is steeped in.
GodotCon Day 1 – Monday
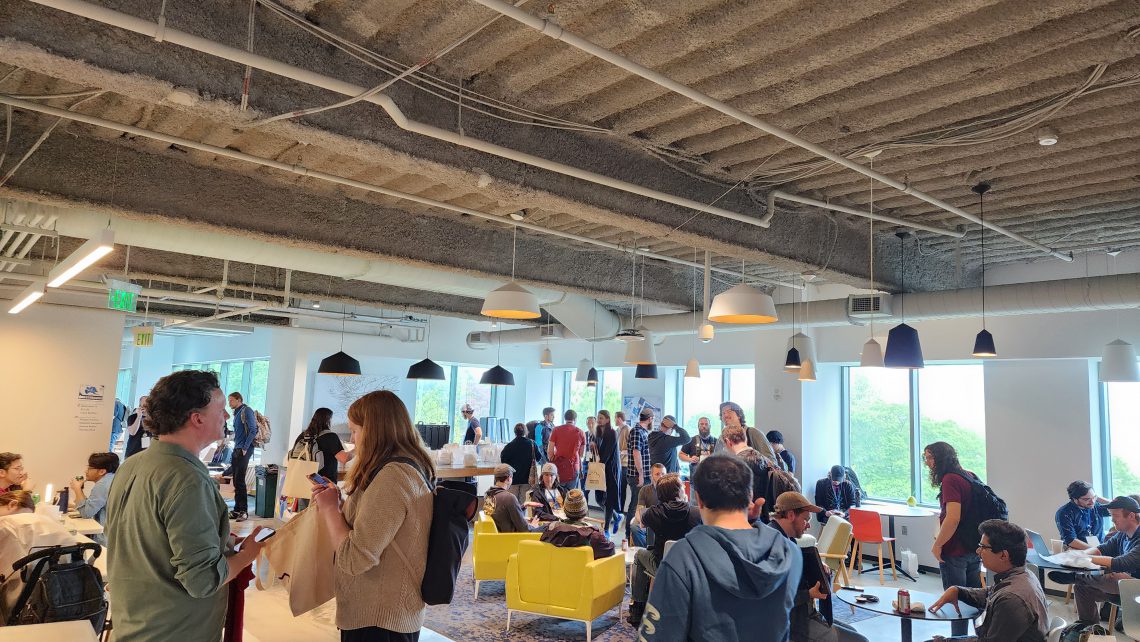
On Monday, I drove to the Microsoft N.E.R.D. campus, where GodotCon was being hosted. After checking in and getting my badge, I made my way to the GodotCon floor and spent the day chatting with fellow Godot devs and attending two workshops:
Building a Godot Plugin with GDExtension I’ve never worked with GDExtension before, so this was my first opportunity to try it out. Its ability to take any language (in this case, C++, which I also got a first-time experience with) and bind it as a Godot API is incredibly powerful, and this is something I’d love to tinker around with more in the future.
Narrative Design for Solo Devs I’ve not had many chances yet to design narrative-driven games, so this was a chance for me to create something using narrative concepts and a Godot/Inkle integration called inkgd. My output won’t win any awards, for sure, but it was nice to finally flex my narrative muscles in a project!
Afterwards, we hung out at a nearby bar, where I spent hours more talking with fellow convention goers, as well as members of the Boston Gamedev scene (whose group was largely responsible for bringing GodotCon to America). Many great conversations were had, and I didn’t head back to the hotel until late at night.
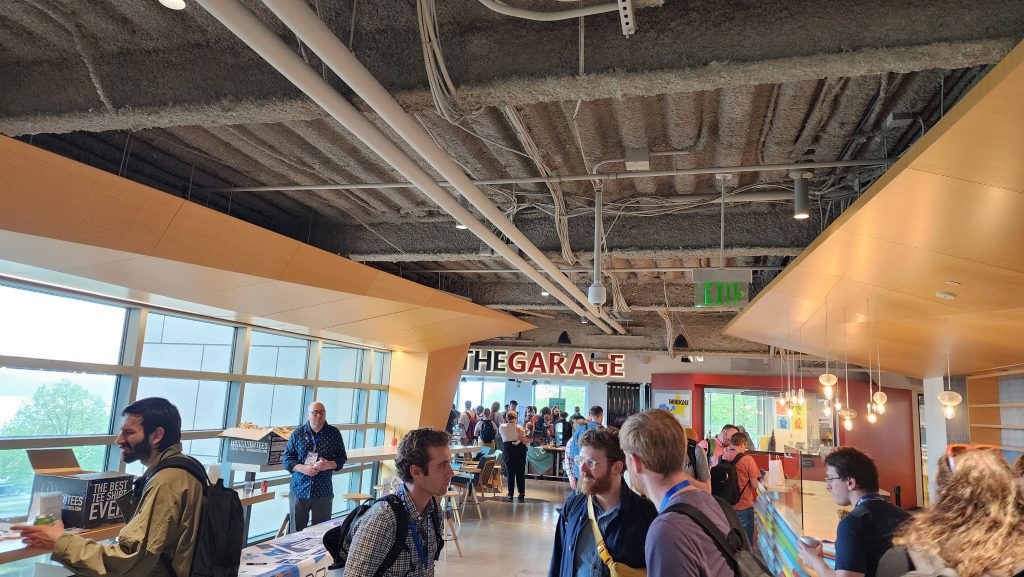
There was a sizable cadre of Godot games to play in The Garage, from released games to pre-alpha demos.
GodotCon Day 2 – Tuesday
Tuesday opened with a keynote by Emi Coppola, executive director of the Godot Foundation. From there, I spent the morning playing various Godot games at the showcase, and the afternoon attending presentations.
The games I played:
Neongarten, a roguelike city builder (developed by a fellow Josh!)
Dunderbeck, a backpack autobattler with meaty lore
Dante’s 9, a roguelite platformer where abilities are drawn as a hand of cards
Burrito Bear, an arcade came about a bear eating falling burritos
The talks I attended:
Making Operation Outbreak … into a Godot game Andres Colubri told the story of how Operation Outbreak, an in-person game designed to model viral spread in outbreaks, was made into a Godot game. The story was fascinating, and the impetus for this project is a cool example of using games for study and research.
What’s new in XR & Android (2025) David Snopek, Fredia Huya-Kouadio, and Logan Lang presented an official update on the progress made with Godot for XR (which is virtual reality and augmented reality combined in one term) and on the Android platform. I’m not familiar with this side of Godot, so it was great to dip my toes in those waters.
Scratching the itch.io – Godot Game Distribution Strategies Danny Silvers talked about Itch.io, one of the more well-known games distribution platforms outside of Steam, and why it’s beneficial and simple for devs to have a presence there. His points got me thinking about doing this for Dice Tower; in particular, I learned that people who buy games on Itch.io can be more loyal, since they have reason to go to Itch.io instead of Steam.
Improving Your UI in Godot Rawb Herb built a pause menu in Godot, sharing UI and design insights along the way. I enjoyed seeing his takes, and plan to reference the notes I took as I continue developing Dice Tower’s UI.
I went out to eat at the oldest restaurant in the United States: Union Oyster House. The food was great, especially the clam chowder!
GodotCon Day 3 – Wednesday
Wednesday was mostly spent attending talks and chatting with people in between.
The talks I attended:
LibGodot – Embed Godot Engine Everywhere This was about Migeran‘s efforts developing LibGodot and using it to embed the Godot engine into multiple different programs, leveraging the GDExtension API introduced in Godot 4; targets include Unreal, TypeScript, and Java. It was eye-opening to see this kind of tech; while I don’t yet have a need to embed Godot in other places, it’s now something in the back of my mind for, perhaps, some future effort.
I Work for Godot, AMA Emi, David Snopek, and Adam Scott answered questions around their work, encompassing a good cross-section of Godot work from the Godot Foundation to W4 Games (the company started by Godot veterans to provide enterprise-focused services). One thing that stuck with me is how their biggest problems relate to scale—with the drastic increase in Godot users over the last few years, there is far more work to do than volunteers to do it, making prioritization critical to moving Godot forward.
Two other speakers were to be part of the AMA, but, due to current tensions with U.S. immigration, they were unable to attend. Sadly, this perfectly valid concern was brought up more than once during conversations, and it saddens me that my country made this an issue.
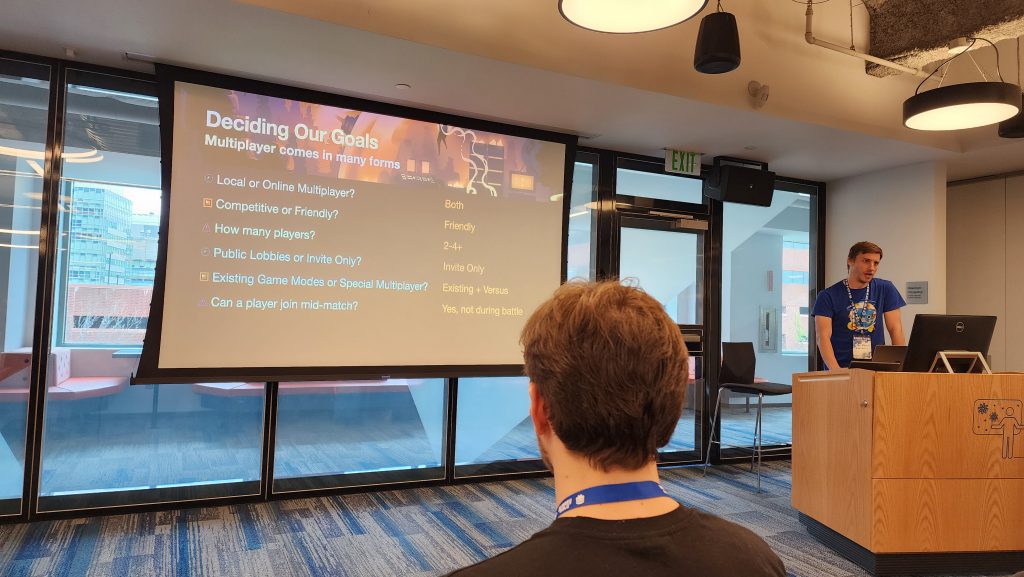
Keeper to Keepers: Adding Multiplayer to Dome Keeper Dome Keeper is one of Godot’s more well-known success stories (and one of my favorite games), and Chris Ridenour of KAR Games talked about how his company took that single-player game and worked to convert it to work with multiplayer. I’ve never designed or built a multiplayer game, so this overview was a great talk for getting my feet wet and having that info in mind for the future.
The YouTube Crash Course for Game Devs StayAtHomeDev is well-known for bringing exposure to Godot projects through his YouTube channel, and this talk was both a primer for how one can get going with a YouTube channel and a call of encouragement for us to create, whether our games or YouTube videos or otherwise. As the previous talk’s speaker was unable to make it, StayAtHomeDev also answered some questions beforehand about various topics. I’ve always had a YouTube channel in the back of my mind, and this talk was a nudge towards potentially acting on those thoughts.
I chatted with StayAtHomeDev multiple times during the conference. He’s an awesome guy, and we even share a common background in web development!
Enjoyable Game Architecture with Godot & C# Mark Wilson gave a talk around flexible architecture and how the Chickensoft ecosystem leverages clean architecture principles to make enjoyable tools and paradigms working with Godot and C#. I don’t work with C# (yet), but I’ve known Chickensoft’s founder for years, so I’ve been part of their community. After the talk, we got a group photo of the Chickensoft folks who made it to GodotCon!
Lightning Talks The final talk of the day was seven microtalks across a variety of topics. They all gave me interesting things to think about, from how to produce faster with a game jam mentality to improving time management to using custom resources to manage global state. It was a great set of closing talks.
After the Con, I left to hang out with an old friend living in the Boston area, and then flew back to Minnesota on Thursday.
A slide from the Keeper to Keepers talk.
Aftermath
Throughout GodotCon, I found myself inspired to be with so many people who use Godot. I’m usually in a minority in that regard when attending gamedev gatherings, so it was awesome to talk Godot and other topics with fellow Godot devs. Likewise, it was awesome to see a wide variety of Godot projects and see what others have done within the game engine I love working with.
I talked with a lot of people, both at GodotCon itself and at surrounding events (I even offered a couple people a ride home one day, and got some great discussion out of it). Everyone was kind, friendly, and passionate about their projects and their love for Godot. I’ve heard so many awesome stories and backgrounds, hopes and dreams, ideas and ideals, corridor chats and bar banter. It felt amazing to be a part of.
In addition to meeting new people, I had a fun few encounters with people I knew from elsewhere:
Adam, a guitarist for the band Steel Samurai, which just performed at VGM Con, where I was showing Dice Tower. (I caught the second half of that concert, it was great!)
David Snopek, a W4 employee and Godot maintainer whom I met at MDEV last year.
Daniel Johnsen, who showed off a Godot game (Golfella!) alongside Dice Tower at 2D Con in 2023.
One of the members of the Nice Games Club community, a gamedev podcast local to my home metropolis.
Finally, throughout GodotCon, I talked to people about Dice Tower and showed them videos of the game’s gameplay. The response to Dice Tower was universally positive, giving me great encouragement.
All in all, I thoroughly enjoyed GodotCon and the city of Boston. I’d love to do it again next year!
The talks will be posted to Godot’s YouTube channel in the near future; be sure to check those out!
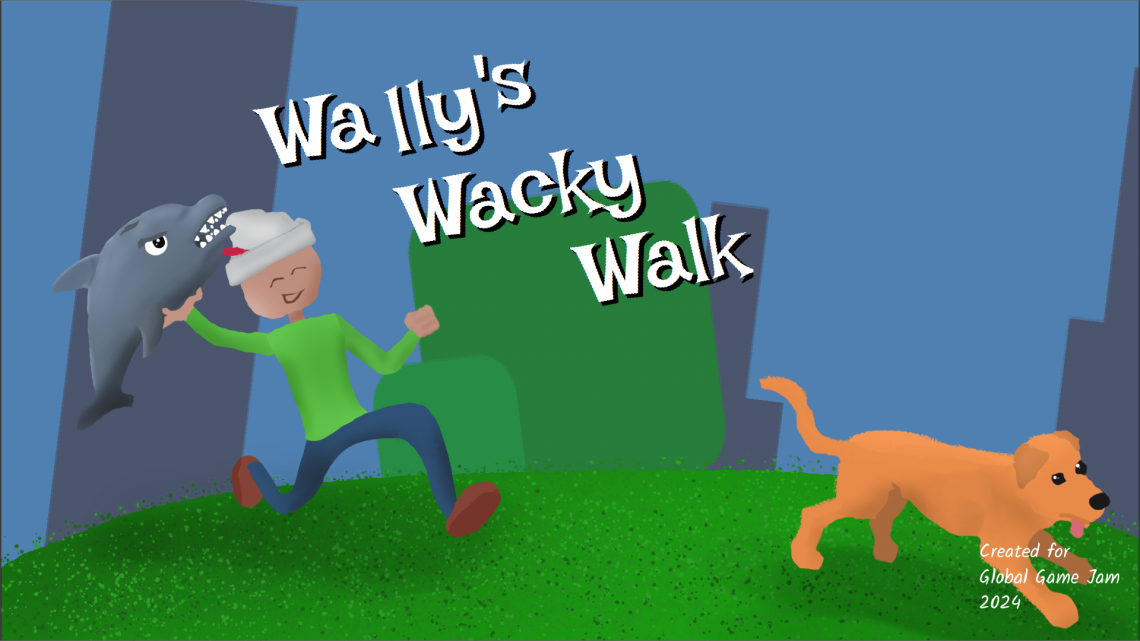
I recently presented a postmortem for the game I worked on for Global Game Jam 2024, Wally’s Wacky Walk. You can watch it here (along with other presentations from the IGDA Twin Cities community), and you can download the game here!
This year, I participated in Global Game Jam. In preparation for it, I decided to make a game in 16 hours, or one week’s worth of my game development time. What I wanted to focus on, in particular, was scoping the game accurately; in other words, I wanted the game’s scope to only encompass what I thought would be feasible within a week.
16 hours is the amount of time I’ve estimated spending doing game development during a typical week.
How did I do? Read on to find out!
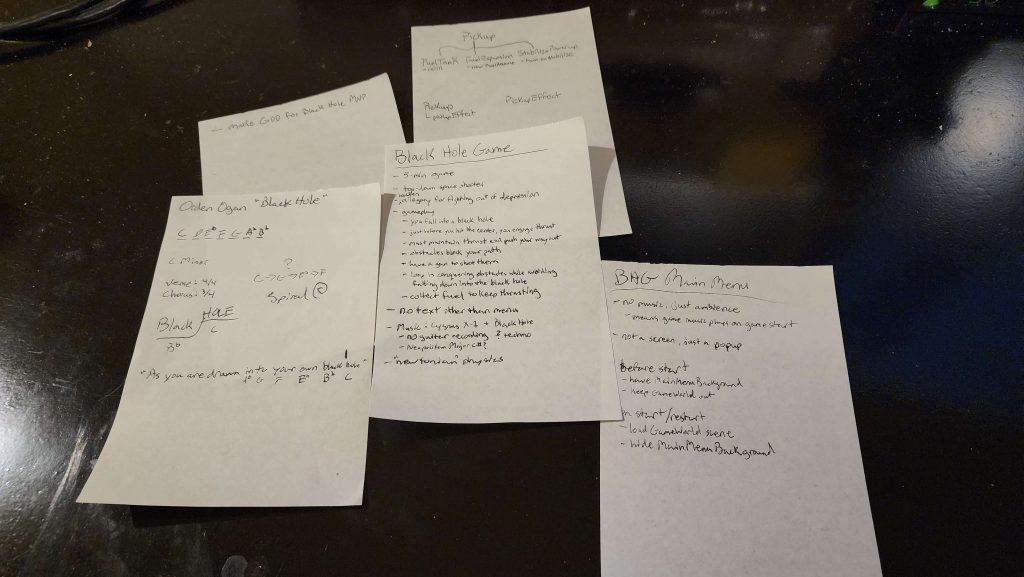
The various notes I scribbled roughing out game ideas.
Planning Phase
Day 1 (Saturday)
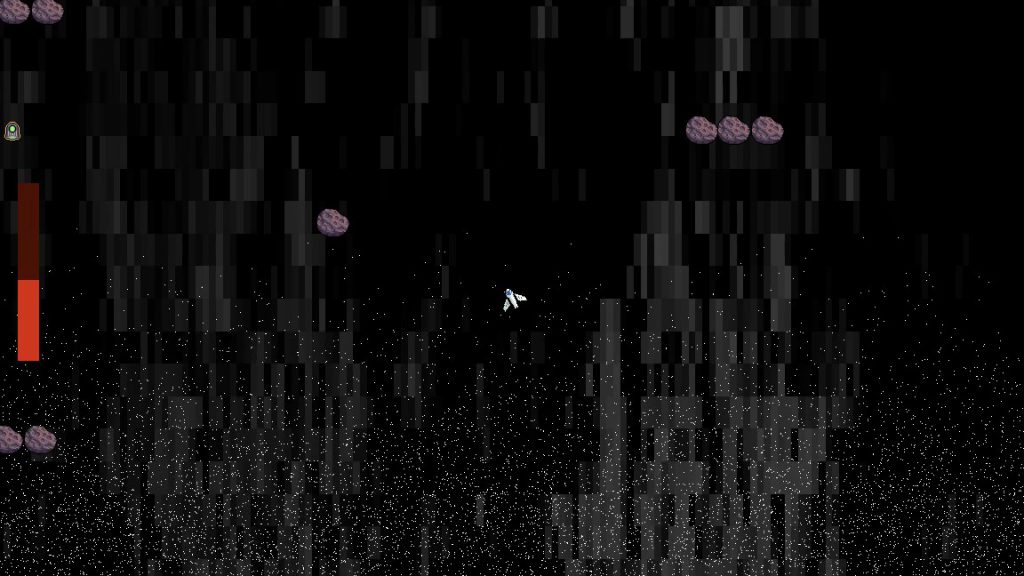
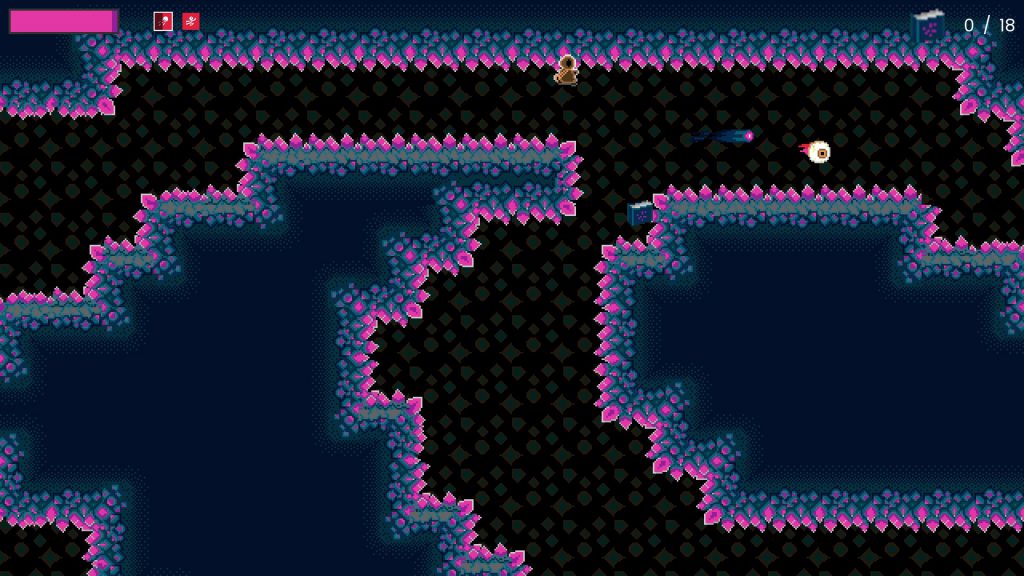
I spent a couple of hours on Saturday roughing out the game idea. I wanted to make a top-down space shooter, and I wanted the player to fight against a black hole’s pull and escape its gravity well. This theme was meant to be both literal and figurative, with game elements hinting an allegory of a fight against depression. To save myself the trouble of coming up with a good name right away, I used the working title Black Hole Game.
There would be two kinds of movement: rotational, where the player’s ship rotates and moves forward; and slide, which emulates classic top-down space shooter movement, such as Space Invaders or Galaga. There would also be shooting combat, with multiple guns for the player to collect, obstacles to shoot down, and enemies to dogfight and defeat.
A direct influence was a game called Laser Age, but I doubt that one is familiar to most people; I played it a lot when I was a kid.
This was a solo project, so I decided that there would be no custom art made for the game; everything had to be found in pre-existing art packs. I spent some time searching, and eventually purchased a few packs from an artist in a style that I liked (the Void packs from FoozleCC on Itch.io). For sound effects, I wouldn’t do any recording myself; either I’d find the effects online or I’d generate them with BFXR.
I chose to compose and mix the music. I had an idea of mashing the themes from two songs together: Rush’s Cygnus X-1 (Book 1: The Voyage) and Orden Ogan’s Black Hole. Both of these songs are themed around black holes, representing the dual literal/figurative theme I sought to represent. Although it would have been simpler to relegate this to external sourcing (as I did the art), I enjoy making music, so wanted to keep this part for myself.
I’d use Godot 4 to make the game. My long-term project, Dice Tower, is being built with Godot 3.5, so I wanted to get more experience using the latest version of Godot, particularly since that’s what I’d be using for Global Game Jam.
Finally, I set a deadline for the entire endeavour: Saturday, January 20th, 2023 at 5:00pm CST. In the spirit of a game jam, I wanted a clear, strict end time to force me to complete the project.
With my ideas set, I spent Sunday and Monday engaged in other activities. Come Tuesday, I was raring to go.
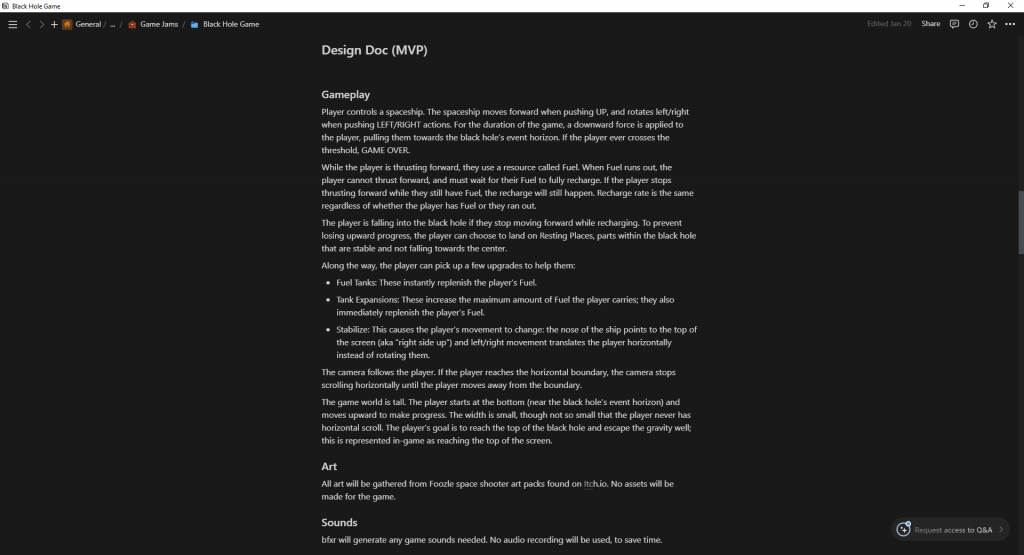
Part of the game design document I created for the game.
Day 2 (Tuesday)
My work period was in the evening. My only task this day was to create a game design document and a timeline for when I was going to work on certain tasks. I gave myself a one-hour time limit for doing all of it; the idea was that limiting how much time I had to plan would keep me from adding scope creep.
I used a modified version of the Pomodoro technique for consuming that hour of time. I’d do fifteen minutes of work, then take five minutes of break time. For the first block of work time, I spilled out as many ideas about Black Hole Game as I could. After the five-minute break, I spent the next fifteen minutes going through six randomly-drawn cards from my Deck of Lenses, writing down answers to how Black Hole Game might be seen through each lens. The final fifteen minute block was spent furiously typing out the actual game design document, or what was actually going to make it into the game. That brought me to 55 minutes of work; the final five minutes were spent taking my game design document and scheduling out which tasks would be worked on when.
I think timeboxing the game design period proved useful. Only a small amount of the many ideas I’d come up with made it into the design doc, and that was solely because I didn’t have enough time to write them all down. Since there were fewer things, it limited the scope of what Black Hole Game was going to be. All that remained was to see whether or not that small amount of scope was achievable.
Some of the ideas that were left on the planning room floor included the guns and shooting-oriented mechanics; the gameplay would solely focus on movement.
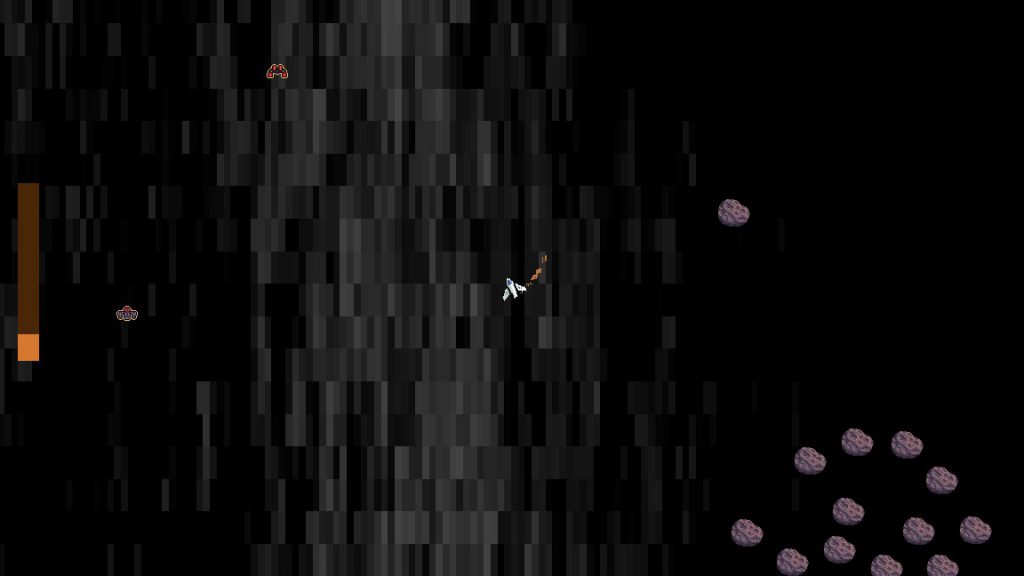
Yes, the background is a noise texture.
Development Phase
Day 3 (Wednesday)
My time period was both morning and evening. Accordingly, I focused on roughing out the core of the game: movement mechanics and endgame triggers. My goal for the end of the day was to have a playable minimum viable product.
After creating the Godot project, I started implementing the player spaceship. I added the rotation-based movement first, spending a bit of time trudging through trigonometry (and the CharacterBody documentation) to figure out a simple implementation. Once this was mostly functioning as desired, I added the alternative sliding movement style, as well as the ability for the game to switch between the two movement styles seamlessly. Finally, I added constant downward velocity, simulating the pull of a black hole.
I added a debug key to let me freely toggle back and forth between the two styles of movement, even though my ultimate goal was to trigger this change through a pickup. I didn’t remember to take it out of the final build, so any player that figures out what the bind is can cheat the game. ;P
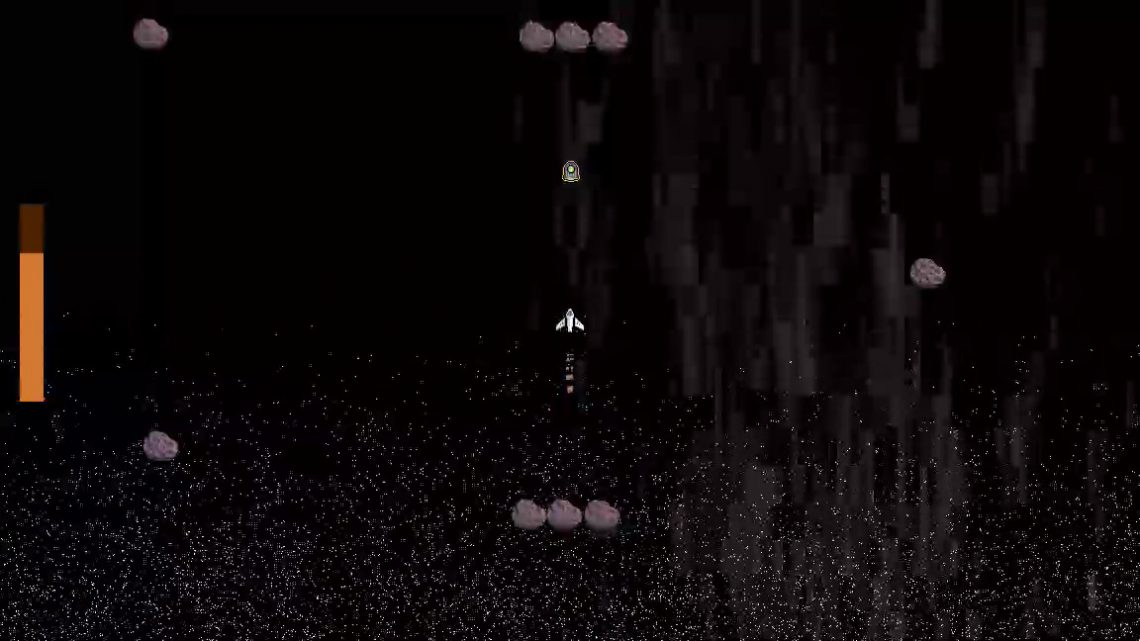
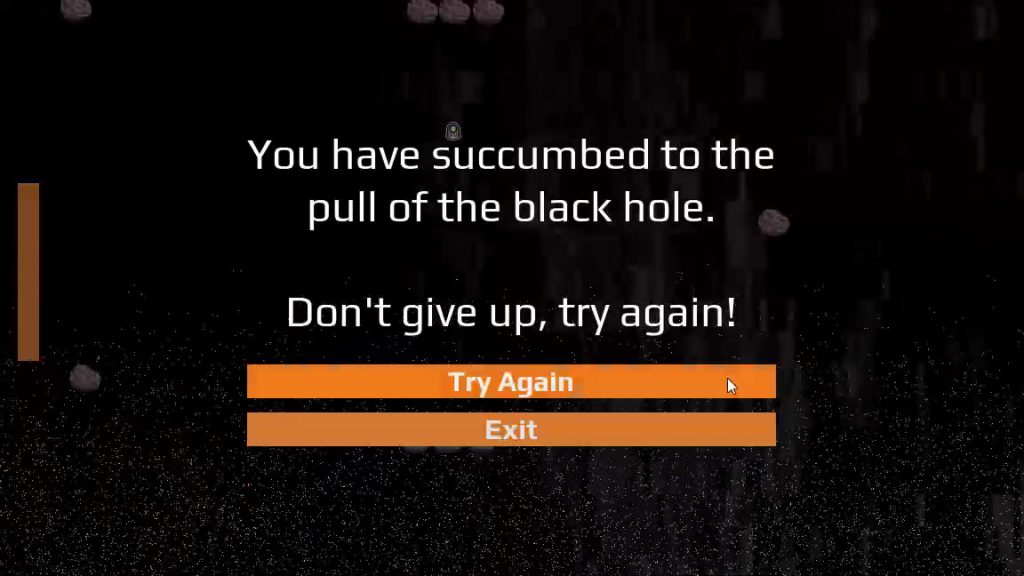
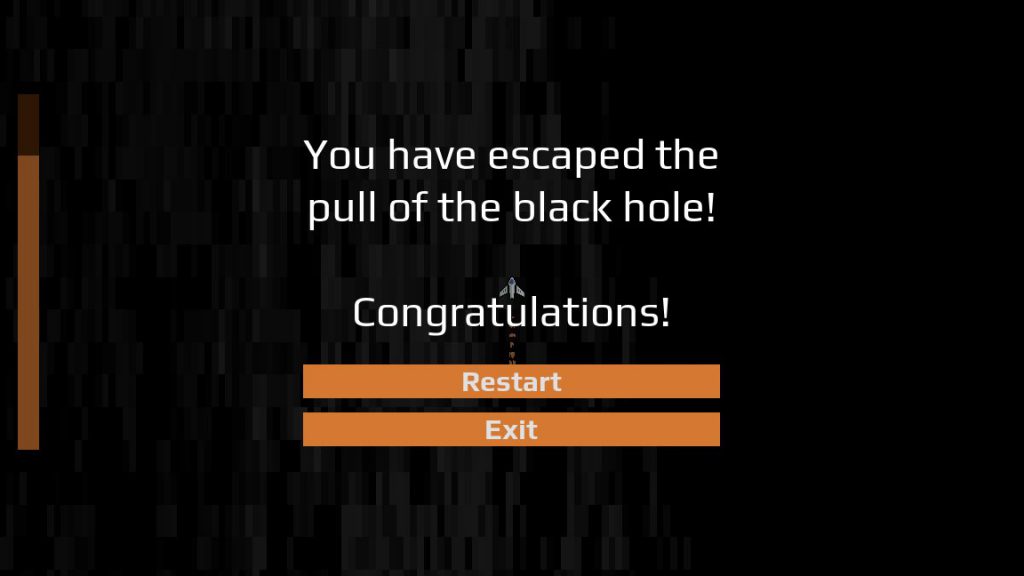
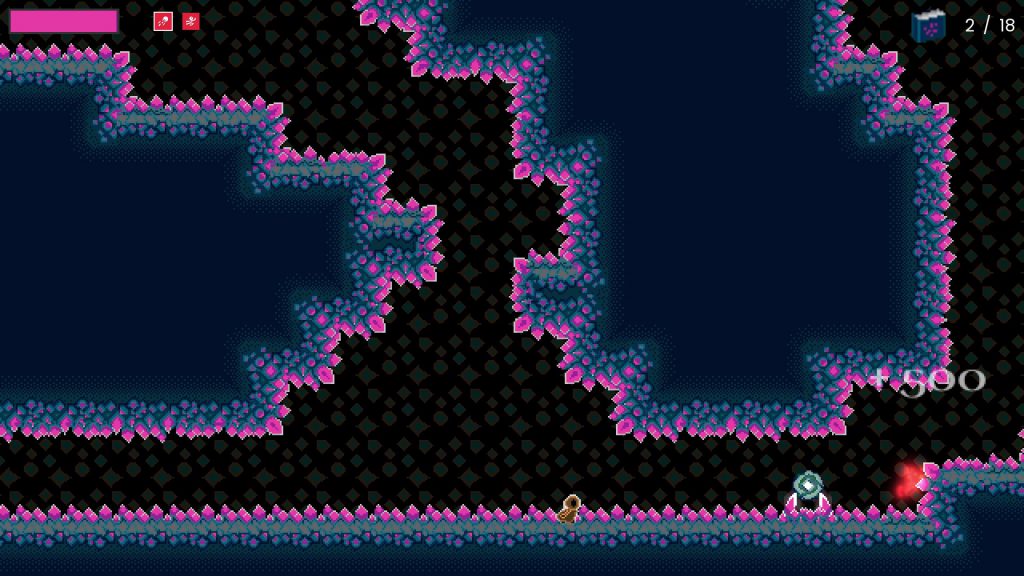
Once the player movement was working, I fleshed out my test game world into a fuller experience. I created some simple asteroid platforms for the player to rest their ship upon. I also made a couple of debug endgame zones: a red one for the black hole bottom, signifying defeat; and a green one to indicate where victory would be given to the player. In both cases, I showed a rudimentary test popup to communicate this endgame state. At this stage, the loss and victory zones were not too far away, for ease of testing.
With a game world in place, I worked on creating the Fuel mechanic. This limited how long the player was able to use their forward thrust, and with it the ability to drive against the black hole’s pull, and would create the game loop of moving from resting place to resting place without running out of fuel along the way. The implementation itself was simple: I made a custom resource that tracked how much fuel was in a given fuel tank, how long it took for the fuel to recharge, and signals to indicate when fuel was depleted or replenished. I then gated the player’s forward movement behind whether they had fuel in the fuel tank; if the player ran out of fuel, they couldn’t thrust forward until the tank recharged to full.
The last thing I tried was an experiment to render a black hole through Godot’s shader system. I tried a few shaders I found online, but none of them worked with initial implementation. Eventually, I decided that this wasn’t worth continued pursuit, and I axed it from my todo list.
By the end of the day, I had my MVP working: the player ship moved as designed, they had a fuel resource to manage, and places where they would trigger defeat or victory upon touching. I was feeling good about my chances meeting the planned scope.
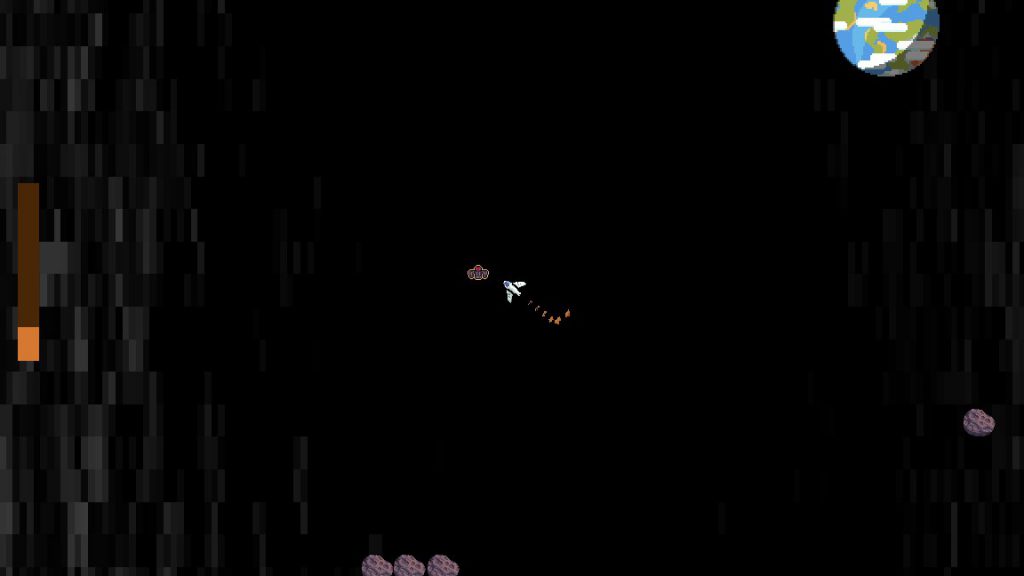
The rocket flame is a basic Godot particle effect.
Day 4 (Thursday)
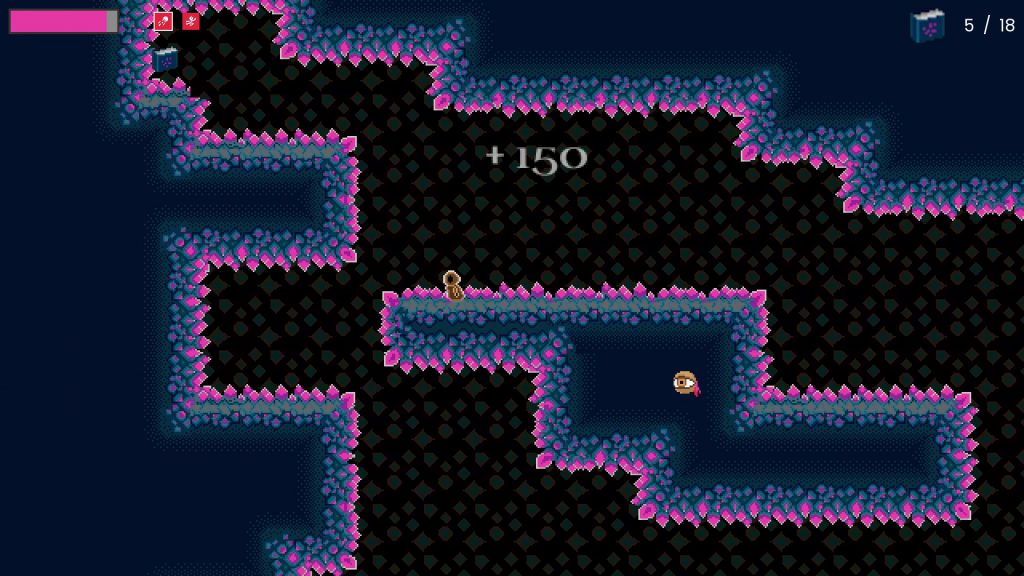
Today, I only had a couple of hours in the morning to do game development work. Knowing this ahead of time, the only work I scheduled for that day was implementing a UI display for the fuel gauge and a Pickup system with three implementations: Fuel Tanks (instant refuel), Tank Expansions (refuel and expand the player’s tank capacity) and Stabilize (temporarily activate the Slide movement style). The day went as planned, and I implemented all of those thing by the end of my game development time. Once again, my confidence in the game scope increased.
The “black hole” is a giant Godot particle effect.
Day 5 (Friday)
Once again, I only had a morning’s couple hours to work. Originally, my plan was to implement sound effects, but I changed my schedule to work on music, instead; I figured the timeboxing would be more useful for roughing out a composition than figuring out sound effects and how to implement them.
This time, I encountered difficulty. I had specific ideas for how I wanted to make the music, and I spent an hour messing around with various virtual instruments to try and get better sounds. Ultimately, most of that time was wasted, as I reverted to using the sounds I’d had in the first place.
Because of that wasted time, I rushed my way through a composition, and at the end of my gamedev work period I still didn’t have a fully composed piece of music, let alone the victory and defeat variants and the actual in-game implementation.
At this point, I became worried about whether I could still meet my planned scope. Were it not for my strict limit on when I would be allowed to work, I probably would have forced myself to finish the music on Friday night, against my work-life balance needs; instead, I forced myself to stick to the plan, and resolved to finish things as soon as I could on Saturday.
I kept the UI minimal, but took the trouble to find custom fonts on Google Font; not using the engine default font looks more polished.
The Final Push
Day 6 (Saturday)
This was the final day for developing Black Hole Battle (the final title of Black Hole Game). I had ten hours, from 7am to 5pm, to finish development. By my self-imposed standards, this included publishing the game and making it available for people to play.
First, I had to catch myself up from where I’d gone off-plan. I spent about an hour finishing the music composition; ultimately, I was very pleased with it, and it decently accomplished my composition goal of merging Rush and Orden Ogan. I also threw together some short themes to play during defeat and victory.
With the music composed, I started work on implementing the music into the game. I thought I’d save some time by stealing some code from Dice Tower’s sound management system and converting it to work in Godot 4; the reality was that this system was built on top of a number of internal systems which I also had to port over to make the entire system work. Altogether, that was another two hours spent. Once the foundational systems were in place, it didn’t take too long to wire up the logic for when each piece of music should play.
Next, I jumped into creating and integrating sound effects. With time being compressed, I opted for using BFXR to create almost all of the needed sound effects (the lone exception being an ambient background noise, which I wound up stealing from Dice Tower). I worked my way down the list of planned effects, crossing out any which I felt I could do without. By early afternoon, all the necessary sound effects were created and implemented.
At this point, I needed to add the bare minimum requirements for UI, menus and game restart logic. I spent 20 minutes finding and adding two fonts: one for stylistic display, like headings, and one for button and paragraph text. Next, I created a Theme resource and added just enough customization to reduce the cost of duplication (like consistently styled buttons). With that theme, I created and styled my main menu, pause menu, and endgame menu popups. Once the menus were made, I added logic for when they would appear. Finally, I created proper game start and restart logic and integrated that with my menus. Once these things were finished, I had a fully functional and minimally polished game. To confirm I had a functional build, I did a test export of the game and proved that it still worked.
Fortunately, I only had one screen resolution to worry about; my experience supporting multiple resolutions in Dice Tower cautioned me against making the effort to do more than that.
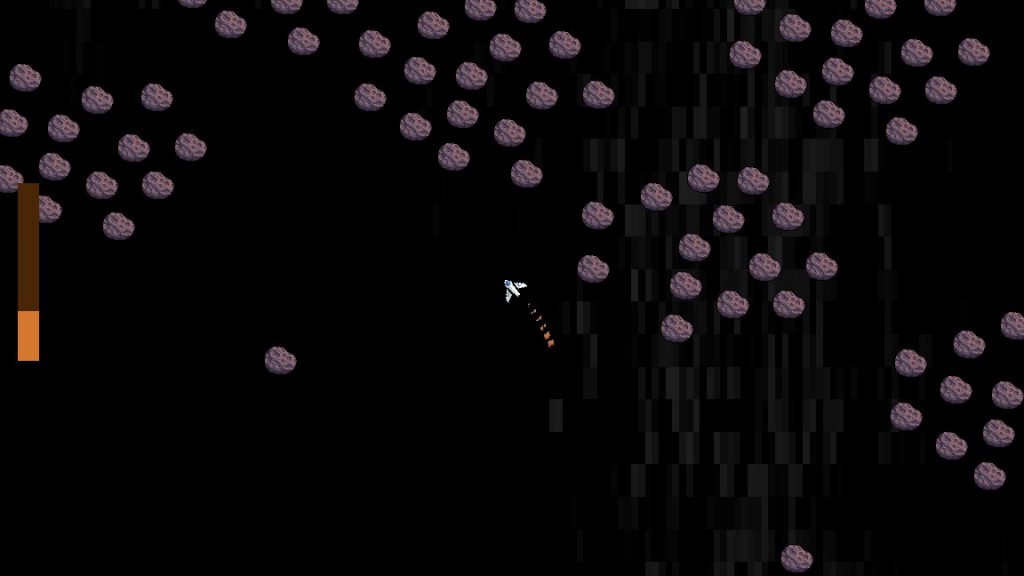
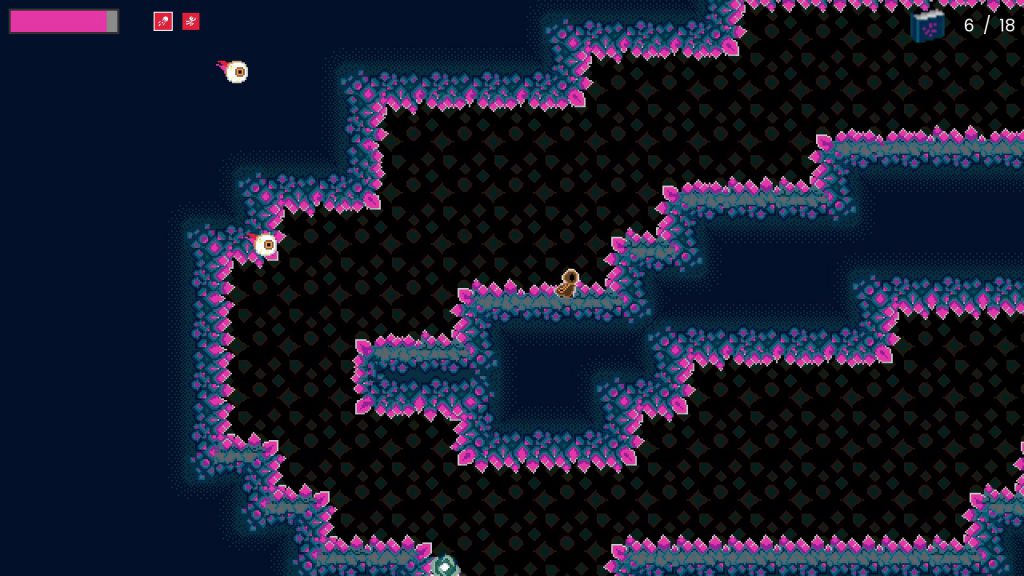
By this time, I had about an hour left to add whatever content and polish I could muster. I threw together some simple game objects (based around the asteroids and planet from the purchased art packs) and tossed them into an expanded game world, along with generous placement of player pickups. I also adjusted the player movement mechanics slightly, to make them feel more responsive. Finally, I hid the debug graphics for the endgame zones, and, for the black hole bottom, I added a particle effect to indicate some kind of churn and swirl; hardly a realistic representation of what a black hole would actually look like, but it felt cool and only took a minute to spin up.
With minutes to spare, I created the final export and uploaded Black Hole Battle to a hosting service. The project was finished, and precisely at 5pm! I shared the project with a few friends, then went upstairs to have supper with my family.
I created a single asteroid scene, then created other scenes that let me reuse that one asteroid scene in groups. For these big clusters, I added a script that let the game randomly pick an amount of asteroids to show, adding easy variety.
Takeaways
The primary goal for Black Hole Battle was to practice scoping for a specific amount of time. Given this, I was successful: I accomplished all of the features I’d set out in the game design document.
Did I complete every single task? No, but that was never the goal; it’s impossible to complete a project exactly as drawn up, and there must be room alotted for adjustments. What I was expecting of myself was to implement all the planned game features and to release them in a polished state; in this effort, I succeeded.
Was the game itself perfect? No; the audio balance between SFX and Music was off, I didn’t really nail the planned thematic duality of black holes and crippling depression, and the small amount of gameplay means it doesn’t take long to fully explore what the game offers. My focus wasn’t on making Black Hole Game the best game it could be, but on making it good enough to be releasable. The game isn’t perfect, but it’s “good enough” to feel like a complete game.
At no point did I force myself to work longer than the hours I’d planned. I resisted the urge to crunch when I felt like I was falling behind, and I still found a way to deliver a completed project. This was a rare success, as previous projects have either ran horrifically over scope or had significant cuts to features and quality to release them on time. Hopefully, I can use this as a standard to plan other projects by.
Conclusion
I wanted to prepare for Global Game Jam by making a one-week, precisely-scoped project. With Black Hole Battle, I successfully achieved this goal, and it left me feeling confident going into Global Game Jam.
How did the jam itself turn out? You’ll find out soon, when the IGDA Twin Cities Global Game Jam postmortem meeting is uploaded to YouTube! That said, I consider the work I did on Black Hole Battle an important factor in how my time at Global Game Jam went.
Here is the final result for Black Hole Battle, for those who wish to try it out. I have no plans to make further changes for it, but feel free to leave feedback so I can apply it to future projects.
Tonight, I gave a presentation for my local IGDA chapter (Twin Cities) called Stop Waiting for Godot: Introducing You to the Godot Game Engine. This is a high-level overview of what Godot is and what you can do with it, intended to give you a taste of what working with Godot is like. You can watch the recording here, on IGDATC’s YouTube channel!
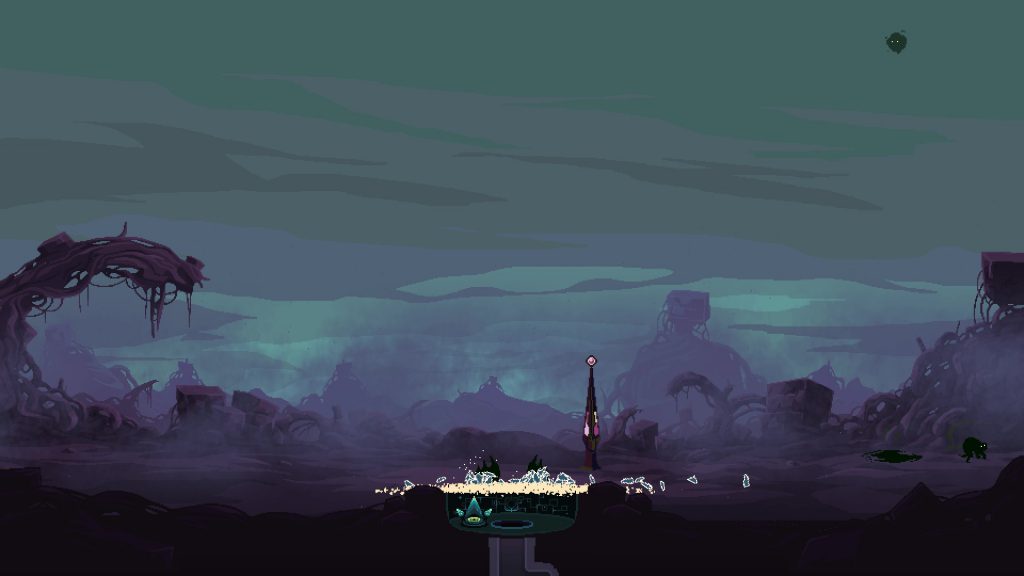
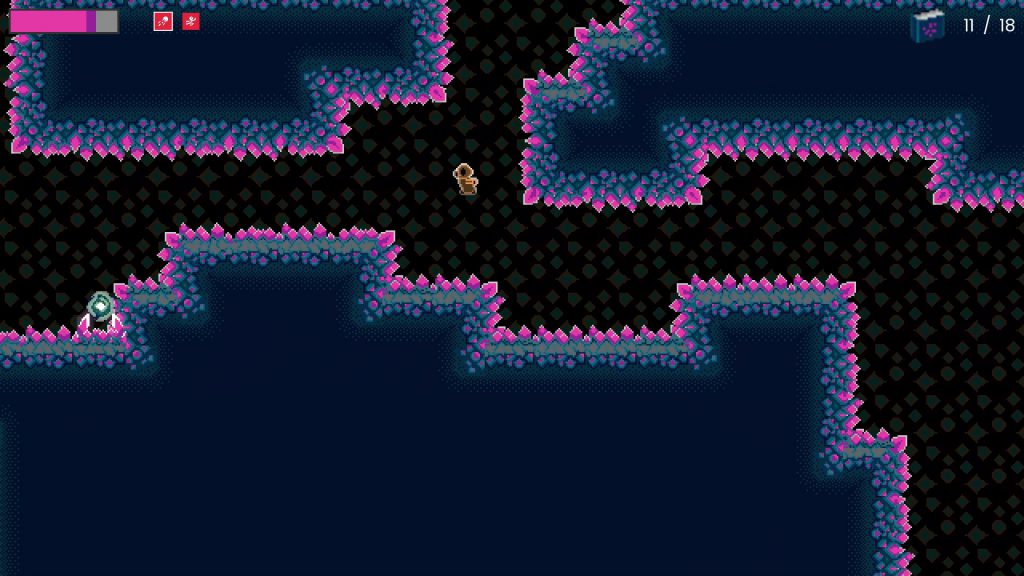
I discovered the game Dome Keeper in October of 2022. It’s a Godot game, and it had a cool premise—tower defense mixed with resource mining in a sci-fi atmosphere—so I bought it. Since then, I’ve played Dome Keeper on a near-daily basis, and I haven’t gotten tired of it yet.
Why do I like it so much? I decided to analyze the gameplay and try to figure that out. If I can understand why I like playing a particular game, that will help me figure out how to better design my own games.
I decided to focus on two categories: the gameplay of Dome Keeper itself, and the “environment” surrounding how and when I play Dome Keeper. Both impact my overall feeling for the game and why it’s so much fun for me to play.
I totally didn’t get distracted playing Dome Keeper while writing the blog post, I was doing field research!
The Gameplay
There are three parts to Dome Keeper’s gameplay: mine digging, resource management, and monster fighting. Additionally, there are a number of “rush moments” where these three systems come together to create awesome moments.
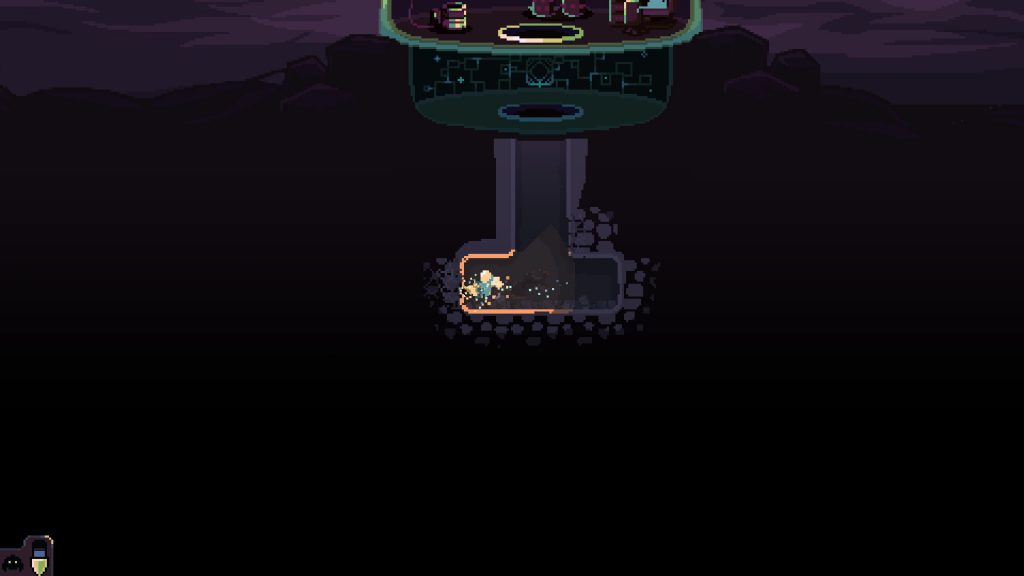
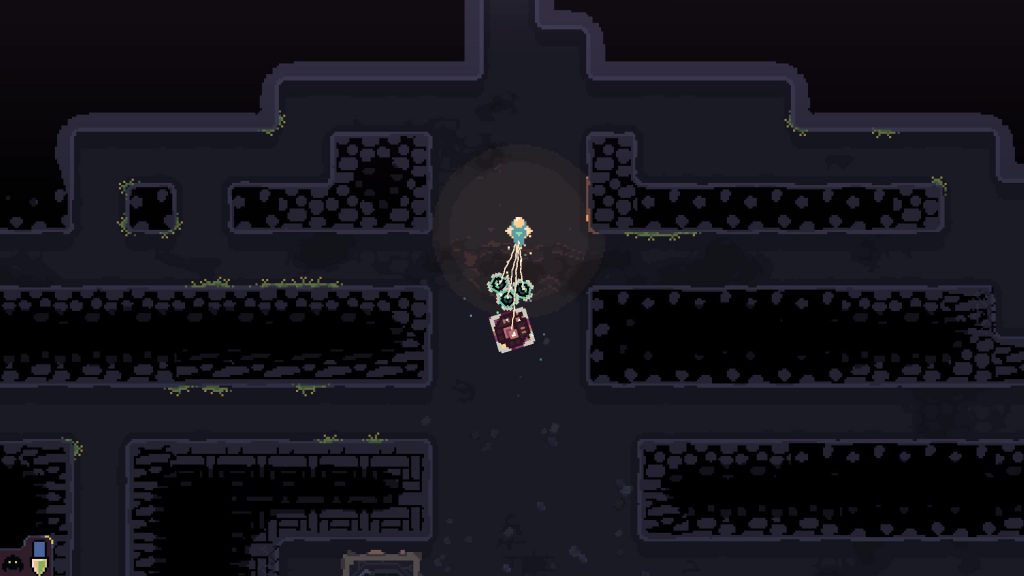
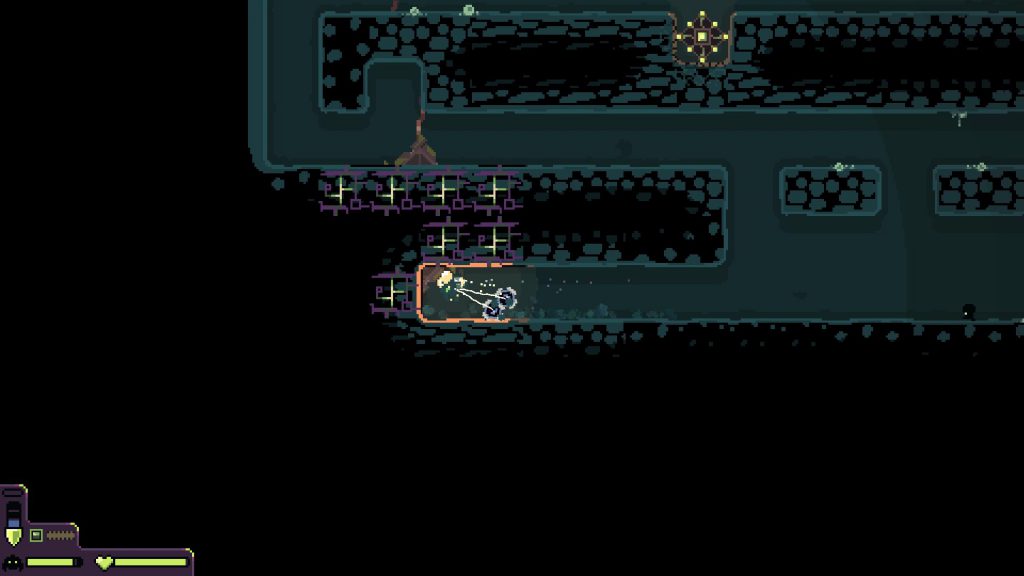
All runs start with carving out your initial tunnel.
Mine Digging
Digging a mine is simple: move down below the dome and start drilling into the nearest block (if you’re the Engineer character, anyway). This feels like digging mines in Minecraft (another activity I’ve done a lot). Why do I like it? I think it has to do with being able to structure a plan for what an “ideal” mine shaft looks like and then imprint that pattern onto the pixelated rock tiles.
I’ll be ignoring the Assessor character for this post because I almost solely play as Engineer; it just fits my preferred style of play better.
I’m not content with just digging tunnels, though; I need a goal in doing so. That objective is finding new resources: iron, water, and cobalt. These resources all contribute to improving my capabilities (more on that in a bit), so they have endogenous value within the game. Because of that value, they’re worth finding, so it gives me a small burst of dopamine when I find them. The way I dig my tunnels allows me to ensure I don’t miss finding anything.
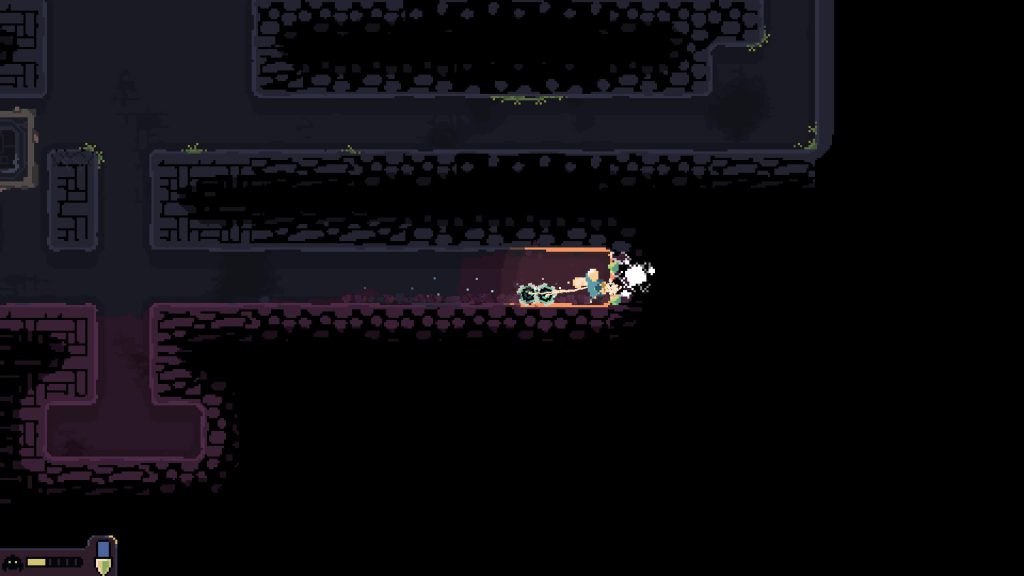
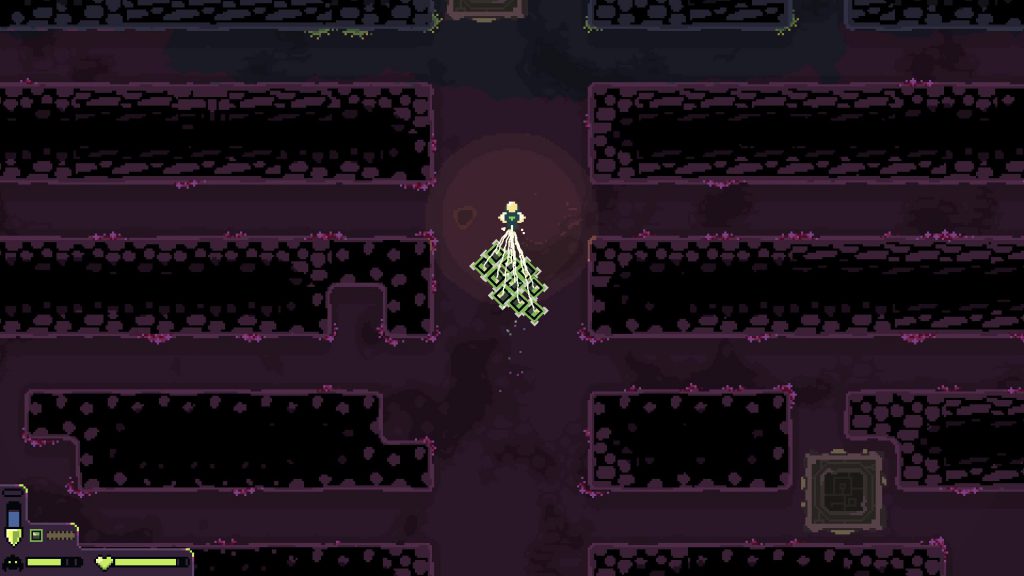
I don’t know why digging optimal patterns to find resources is so soothing to me…but it is.
Finding iron, water, and cobalt is only part of the mining story; I also have to carry those resources back through the mine shafts to my dome, where they are processed for use. At the beginning, the game limits how many resource units I can carry, resulting in a cap to how quickly I can mine. Over time, I can upgrade this carry limit, so the efficiency improves. That visible sense of progress feels good as I play, and it further feeds into the value resources have.
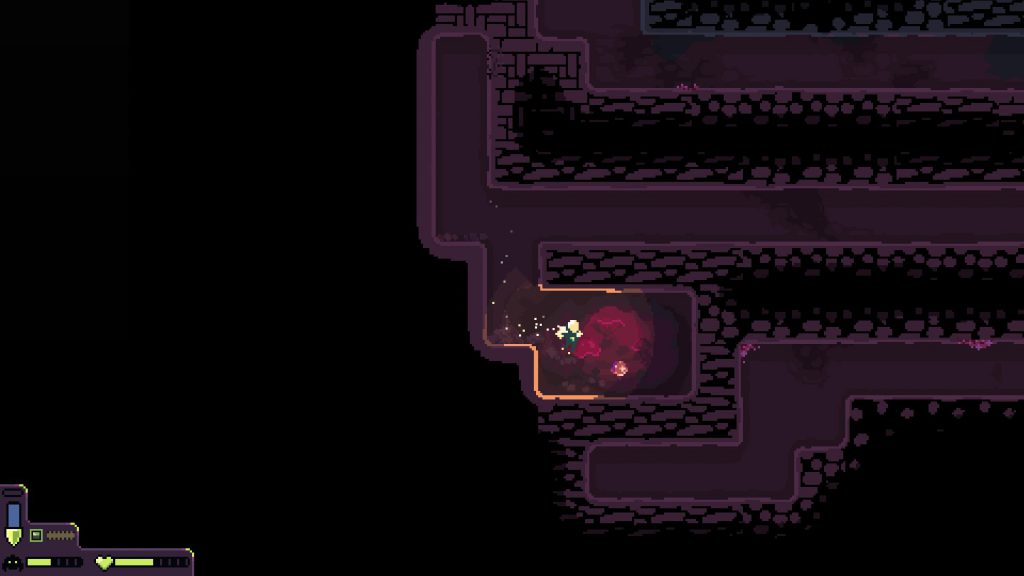
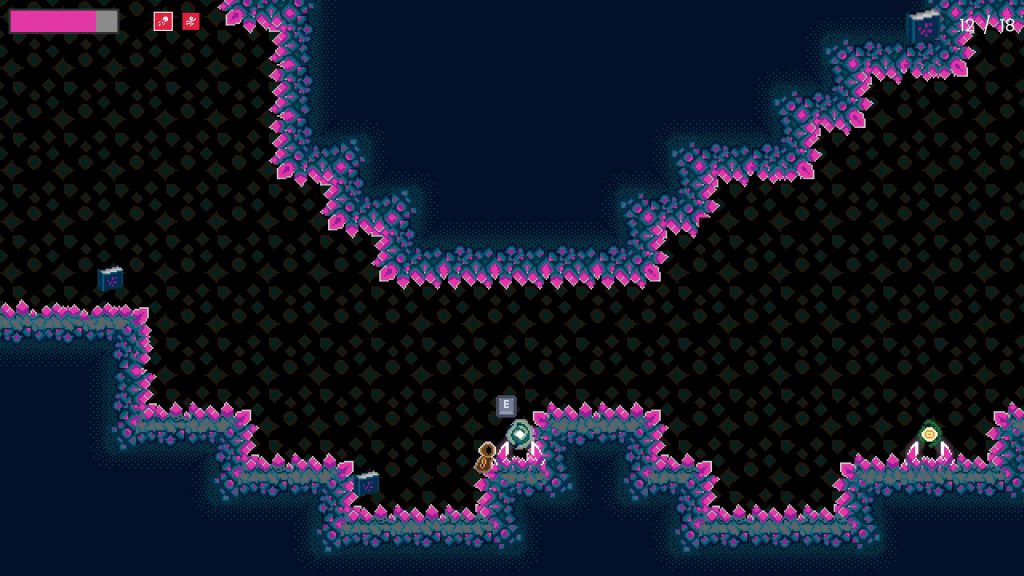
There’s other things which can be found underground, too. The other main discoverable items are gadgets, which you have to dig out and carry back to your dome. Once there, they provide some beneficial functionality, including the ability to teleport between your base and a movable portal (Teleporter), a gravity lift which pulls resources in it up to the dome (Lift), and high-powered explosives you can drop to destroy lots of rocks at once (Blast). There are also other minor things to discover under the rocks which aren’t directly part of the dome, like a small creature that ferries one resource at a time, a seed which you can plant on a resource to create a “tree” growing that resource, and a device that, when activated with two iron cubes, gives you X-ray vision to see through two layers of rock. These things add a touch of surprise when you come across them in your digging, and the variety which can be found keeps things interesting.
I’m not sure what this called, but picking it up gives you a massive speed boost. That’s fun to randomly find!
Finding resources and helpful items is only one facet of Dome Keeper’s gameplay. Once you bring those things back to your base, you need to do something with them.
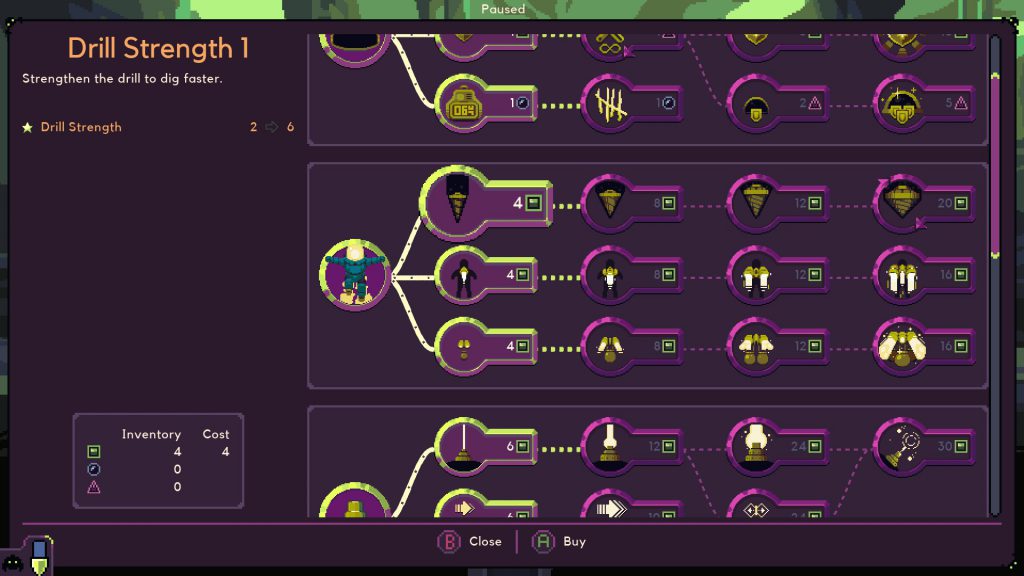
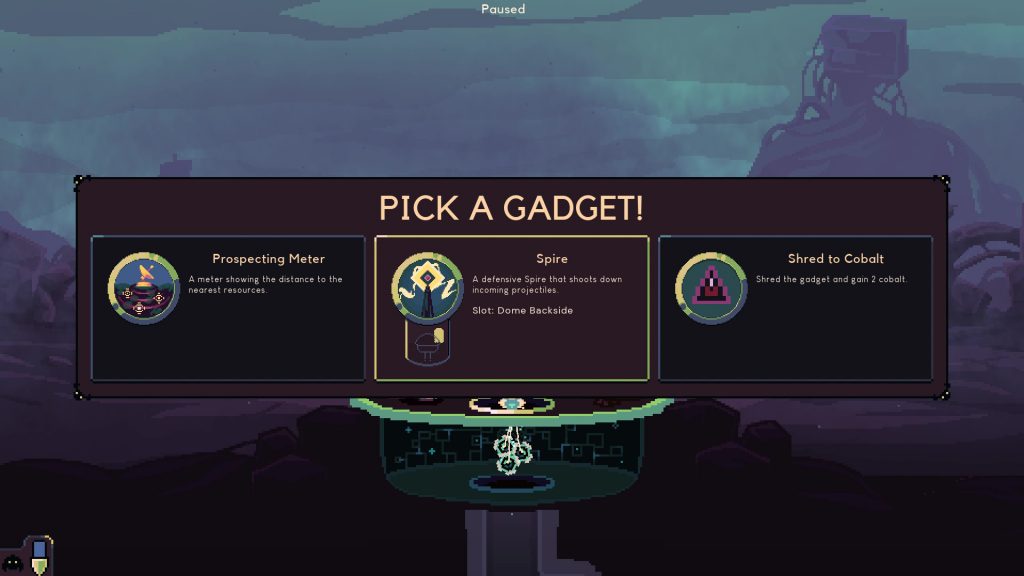
Once your resources have been brought back for processing, you get to choose where to spend them. There are multiple things you can upgrade, and making the right choices about which upgrades to get when is important.
Resource Management
You are underpowered when you start a new run of Dome Keeper; it takes quite a few hits for your drill to break apart the rock, and even longer when that rock contains a resource. The first thing I always do is to mine enough iron to increase my drill’s power so I can dig faster. Immediately this provides visible feedback in the form of faster digging, and passive feedback in that I can get future upgrades sooner. This kind of tangible feedback feels great, and it keeps building up with each upgrade you purchase.
The upgrade UI is nice and clean, so it’s obvious what you’re getting and what it leads to in the progression tree.
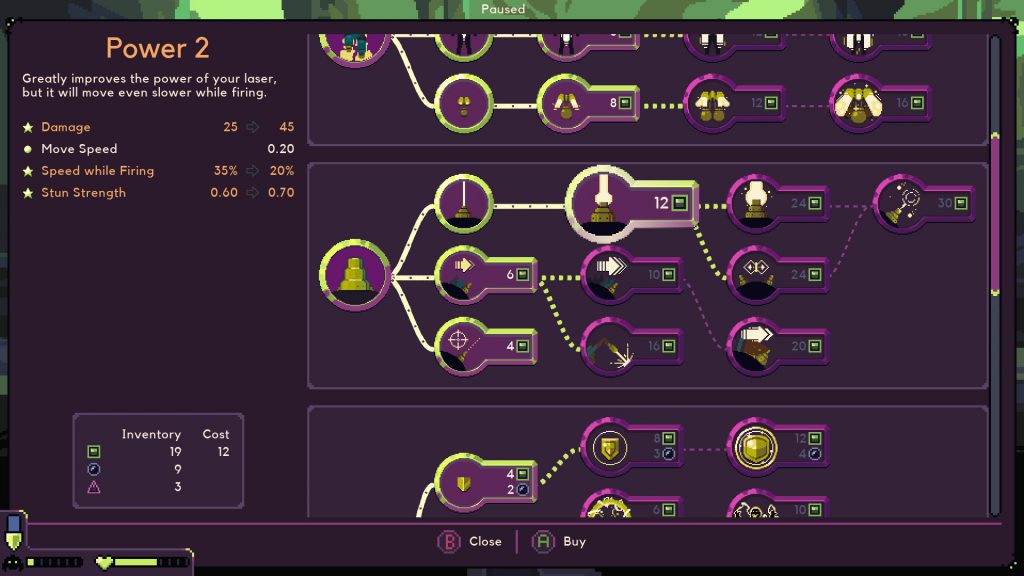
I didn’t have to choose upgrading the drill first, though; I could also have chosen to upgrade my mining speed, or the power of the laser weapon on my dome, or even the ability to see how much time I have before monsters come within firing range of the dome. There’s a plethora of choices to make, and strategizing to buy upgrades at the right time in order to maximize my chances of survival is enthralling. Even choices which feel worthless (like buying an indicator that tells me how many waves I’ve survived) feed into the thrill of strategic decision making; by having some options that are obviously worthless, it gives me the thrill of knowing I’m making a correct choice by avoiding them.
The dome and the keeper aren’t the only things to upgrade, either. The gadgets you find buried under the dome also have their own small upgrade tree, which makes them even more fun to use. Some of the upgrades improve efficiency, like adding additional orbs to the Lift to bring more resources back faster. Others change gameplay entirely, like the Teleporter gaining the ability to teleport resources and providing an alternate means of getting resources back to your base. As I play, I also develop partiality towards certain gadgets based on how I like to play (teleporter and lift are go-to gadgets) while others have less value (like the probe and the Drillbert robot). If I bring back a gadget and it turns out to be something I don’t want, I get to choose to shred it for cobalt, which helps prevent me from feeling like I brought back something worthless.
Spending resources on upgrades is important for improving my ability to mine more effectively. Just as important, however, is improving the ability to defend my dome.
Turns out we weren’t alone, after all.
Monster Fighting
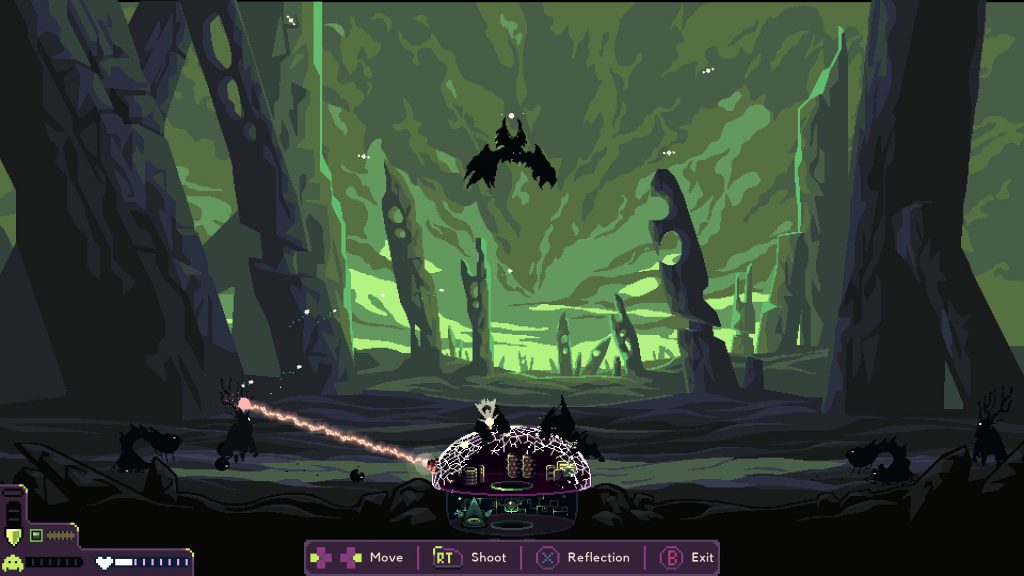
The final element of Dome Keeper’s gameplay trifecta is base defense. Every so often, monsters will approach from across the surface of the planet you’ve landed on and attempt to destroy your dome. Losing your dome means losing the game, so you have to prevent this from happening at all costs. Fortunately, this part of gameplay feels fun, and the combat introduces further opportunities for strategic thinking.
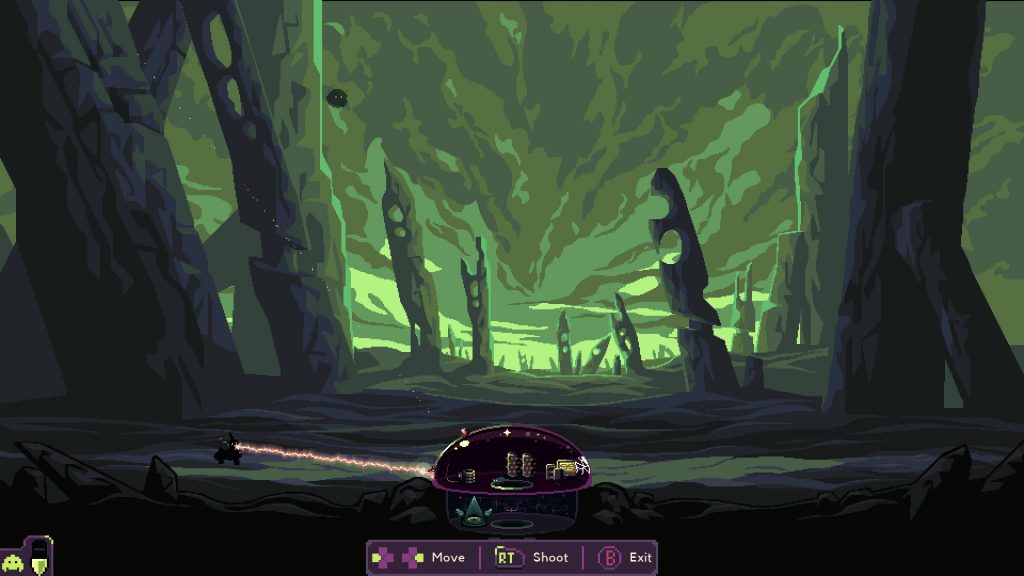
Firing a laser feels so darn fun! It’s a straightforward beam of light that melts the health of any monster it hits for as long as you keep it trained on said monster. The effects feel nice and juicy, from the wavy effects of the beam to the small particles that shoot from along the beam trail, from the satisfying shoom sound of the laser to the small controller rumble that happens while I’m opening fire.
Over time, bigger and bigger monsters approach, in greater numbers, so you must upgrade in order to survive. The laser can be made more powerful, and the dome can be improved with greater health and resistance to damage. These upgrades cost the same resources that you use to build up your mining efficacy, so there is a constant tug and pull of when to upgrade your mining to get resource faster and when to upgrade your defense so you can continue to survive.
Time to upgrade my laser. That means it’ll be awhile before I can afford upgrading other things, but I need to start killing monsters faster to reduce time to kill, and with it base damage.
There’s even strategic gameplay in the moment to moment of battle. You can’t move your laser instantaneously, so where you move it to impacts how much damage you take. If you move it to the side with fewer monsters, then that’s more damage coming your way before you can shift the laser back to the other side. If you take enough damage, you need to pop out of laser mode to make repairs (done simply with a payment of cobalt), so you need to make sure you stay on top of how much health you have.
A recent update to Dome Keeper added an upgrade that automatically fixes your dome when it runs out of health, if you have the resources to afford it. It’s something I always get because of how convenient it is, but having it definitely removes a lot of that tension which previously came from managing health in battle.
Overall, fighting the monsters feels good, and figuring out the optimal times to upgrade and the best battlefield tactics for minimizing damage feels continuously interesting. The best moments of Dome Keeper, however, come from when these three tenets of gameplay interact with one another to create thrilling results.
I like to keep my laser in the center of the dome prior to starting the battle, so I can pivot quicker to whichever side spews monsters first.
Rush Moments
I’ve already explored some of the ways Dome Keeper’s systems come together to create good gameplay, but there are some more subtle thrills to be had.
While you’re mining underground, you have to keep a constant eye on the monster proximity countdown. Come back too early, and you’ve wasted precious time you could’ve spent doing more digging; come back too late, and you’re going to take some hits and get behind in your defense. If you get things exactly right and dash back into the base just as an attack wave starts, it creates an incredible rush.
Even in failure to calculate things correctly, it still results in powerful feelings, from the panicked adrenaline burst as you scramble back to the tune of the proximity alarm’s beeping to the relief you feel as you exterminate the last monster in a wave with a sliver of health remaining, able to fight another day. Importantly, you aren’t left with the taste of defeat from these moments; you feel as though some bad decision you made was your near downfall, and formulate solutions to prevent yourself from falling into the same bad situation again.
Whoops, didn’t play that one right. I’ll do better on the next one.
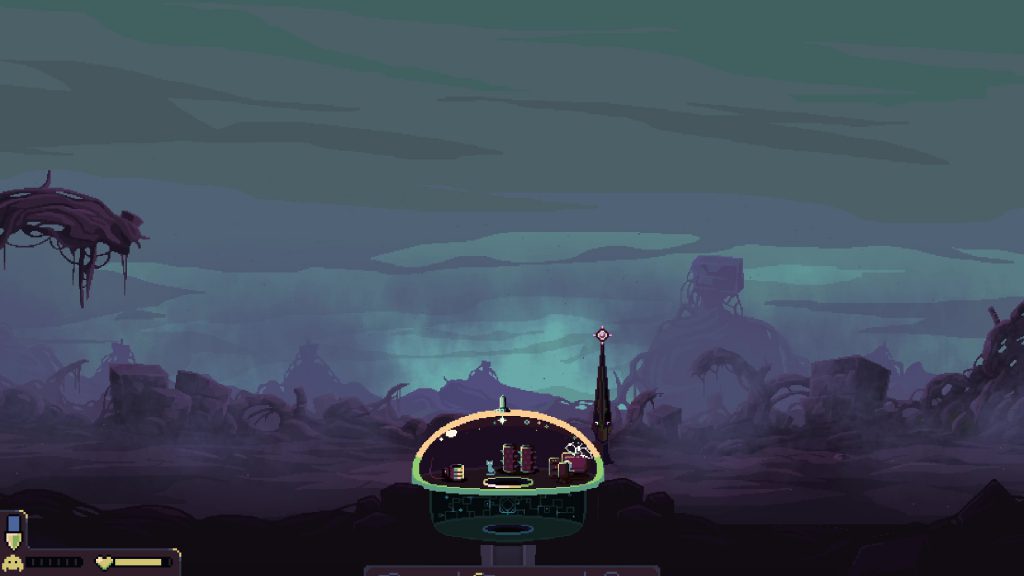
Finally, reaching an endgame moment provides its own thrill. Whether it’s the relic from Relic Hunt mode, to making the decision that you have enough score to trigger the sendoff in Prestige mode, reaching the end goal feels powerful in that the end is in sight, if only you can hold out and play well just a few moments longer. It can even turn into a bit of mastery, where you know you can win right now, but choose to try and play as long as you can, betting on being able to squeak out a win just before becoming overwhelmed.
My Environment
The gameplay itself is enjoyable, but just as important for me is how well it fits my lifestyle. I don’t get much time to play games, I don’t enjoy spending lots of time learning how to play them, and short and sweet games usually don’t feel cool enough for me to enjoy playing them. Dome Keeper manages to hit a sweet spot for all three of those metrics, and I’ll explain how.
Hmm…find resources more easily, or improve my base defense? Or, perhaps, take the cobalt to repair my base? Choices, choices.
Time Spent
I don’t have much spare time. In addition to spending 40 hours a week doing my day job, I spend at least 16 hours a week on developing my own games, and at least half of the remaining time in various family activities. I simply don’t have time anymore for epic games that cost me dozens of hours of gameplay, like I did as a teenager and in my early twenties.
The gameplay of Dome Keeper is such that I can easily fit a meaningful gameplay session in roughly 20 minutes. It doesn’t feel like I’m hard pressed to end the session, either; a full cycle takes roughly 2-3 minutes, so it’s not hard to find a natural stopping point.
I do confess to sometimes finding it hard to stop because of that “just one more thing” mentality, though. Gotta find out what that gadget is before I quit my session, right?
Completing a full round of Dome Keeper takes, at most, a couple of hours. That’s enough time for me to finish a run at least once each week. Game completion gives me a great sense of resolution, even if said run ends in defeat. Comparatively, games with a massive story and lots of content can easily take me months to reach a completion point, and playing the same game that long without resolution leaves me feeling frustrated. Thus, Dome Keeper’s short run time is something I enjoy a lot.
As someone who has a life to live and games to develop, it’s easier for me to enjoy games that have short core sessions and modest run times; in those regards, Dome Keeper’s timing fits my sweet spot almost perfectly.
Don’t mind me, I’m just hauling some iron.
Simplicity
Similarly to how I have less time to play games, I have less time to understand the complexity of a game’s loop. If something takes a lot of time for me to learn, I have a lot less fun playing it; at the same time, if the gameplay is too simple, then it’s boring. Once again, Dome Keeper manages to hit a perfect balance for my tastes.
Having only a small number of resources to manage helps keep the complexity down. The fewer compounding interactions I have to keep track of, the easier it is for me to understand those resource interactions. I think the number three, in particular, is just right. Having only two resources would make for not much challenge at all, and having more than three, while not impossibly complex, would add more information for me to comprehend, and make the game slightly more difficult to get into.
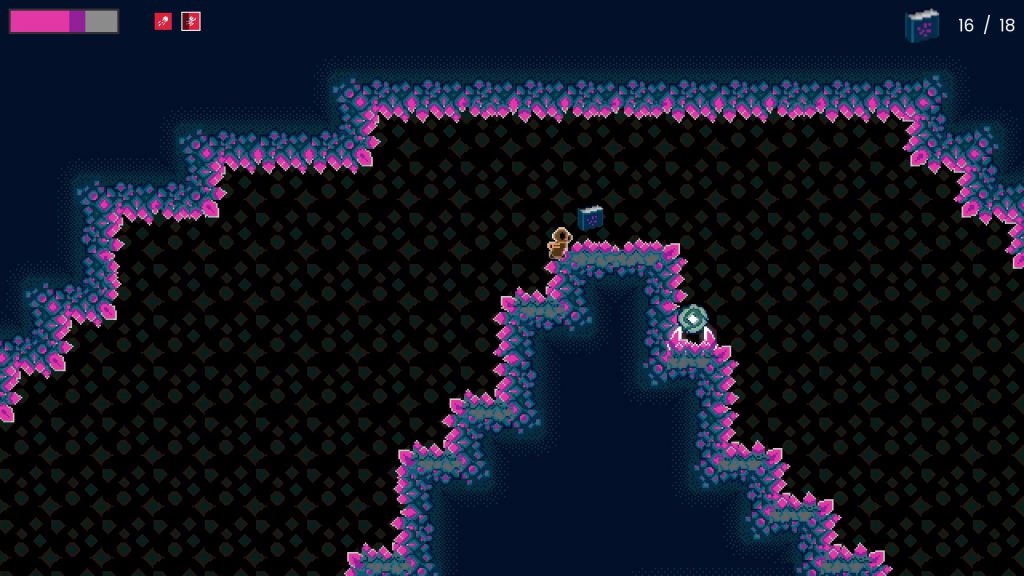
Relic found! Time to dig it out and bring it back to the base…
Speaking of complex interactions, Dome Keeper has a lot of them. It may not be obvious at first, though, because those complexities arise from the combination of simple interactions. Buying a drill upgrade? Easy to understand the value. Buying a more powerful laser? Also easy to understand. But what if you only have the resources to buy one upgrade or the other? Less powerful drill means it’ll take longer to get more resources for upgrading, but less powerful laser means you might not have enough firepower to prevent the next wave from doing a lot of damage. Those two simple interactions (upgrading the drill and the laser) combine to form a complex strategic decision, one that changes from run to run depending on the situation I’m in. I love simple ideas that combine to form deep strategies, and Dome Keeper is full of such interactions.
Playing the game almost feels like routine to me at this point. That may sound like a weird thing to speak of in a positive light, but it makes sense for someone in my position. A routine is something I can measure myself against easily to see how well I’m doing. Following the patterns I’ve established are good feels rewarding when I carry them out with maximal efficiency. Finally, that comfy feeling of following a routine is a pleasant break from the stressful challenges I face in my day job, game development efforts, and family life.
Dome Keeper may seem like a simple game to play, with not much time spent doing it. For me, that’s a good combination, and everything feels just complex enough that I don’t get bored of playing it the way that I do.
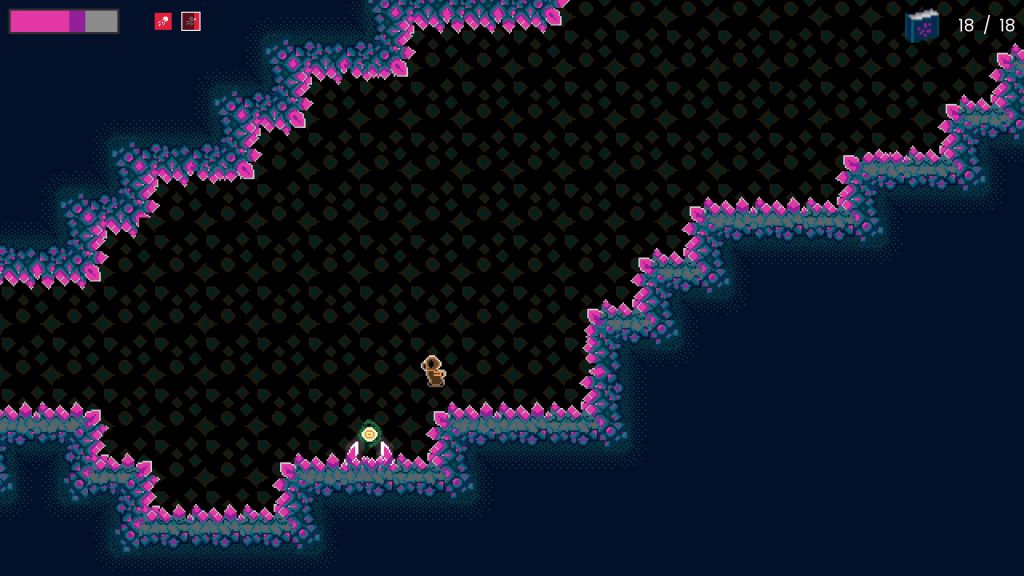
One sec, trying to survive the final fight.
Fun Atmosphere
Finally, the style Dome Keeper is presented in appeals to me. The pixel art is crisp, and easy to read, so it doesn’t take me much effort to read the information I need; it also conveys a good sci-fi atmosphere without needing too much detail. The sound design is great, from the tings of the drill to the crumbling of the rocks to the screams of the monsters as they die. And the music is chill enough to fit well in the background and not pull me out of my mine-digging reverie.
Conclusion
I like Dome Keeper a lot. In studying the game, I’ve realized that its gameplay is a great fit for my interests, and the way it fits into my busy lifestyle makes it easy for me to make small amounts of time to play it.
As a game designer, still working on crafting an enjoyable game, these insights are valuable to keep in mind. I don’t want to design another Dome Keeper, but understanding why I enjoy that game so much aids my own efforts to create games that, hopefully, are just as enjoyable.
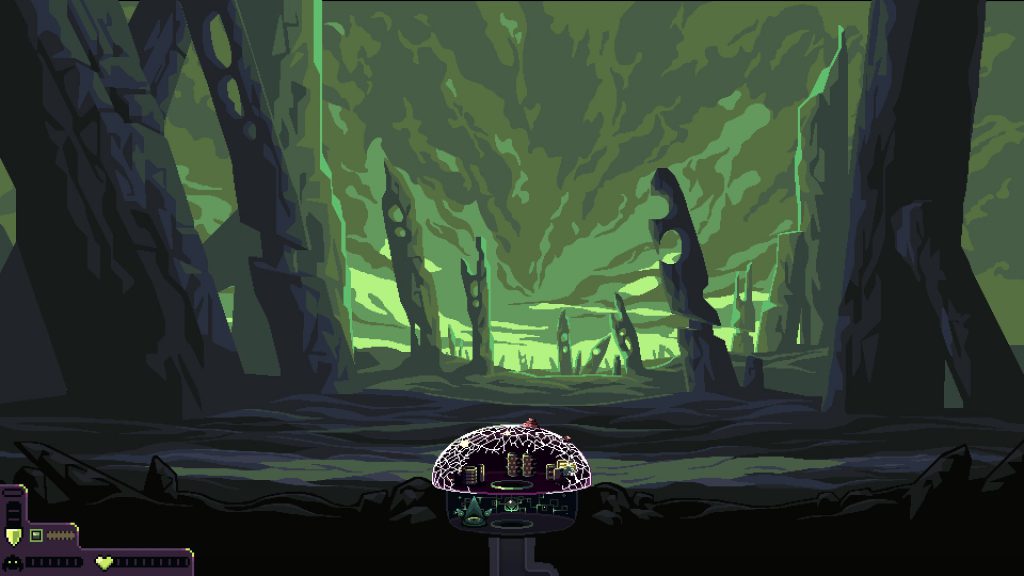
The aftermath of the final battle. I survive, victorious once again.
Rebecca and I have spent the last half year working on the same game: Dice Tower (the full release). We hit a milestone of getting the game ready enough to show at a local playtest livestream, and I really wanted to take a break from Dice Tower development. The two of us decided to participate in another game jam; it would let us try making something different, and possibly something that would be worth continuing after Dice Tower was finished.
Participating in more game jams was something we’d intended to do after GMTK Game Jam last year, but we spent so much time focused on Dice Tower that we never made time for it.
After some research into game jams happening at the time, we chose to enter Godot Wild Jam 54. It’s a game jam where only Godot engine-made games were allowed, so we’d get a chance to see other games made in that engine. It was a smaller size game jam than others we’d entered in the past, so the odds that people would play our game (and leave feedback) was higher. Finally, the length of the jam was nine days, and we thought that would allow us to better fit jam work in alongside our normal day job and family responsibilities without taking too much time off.
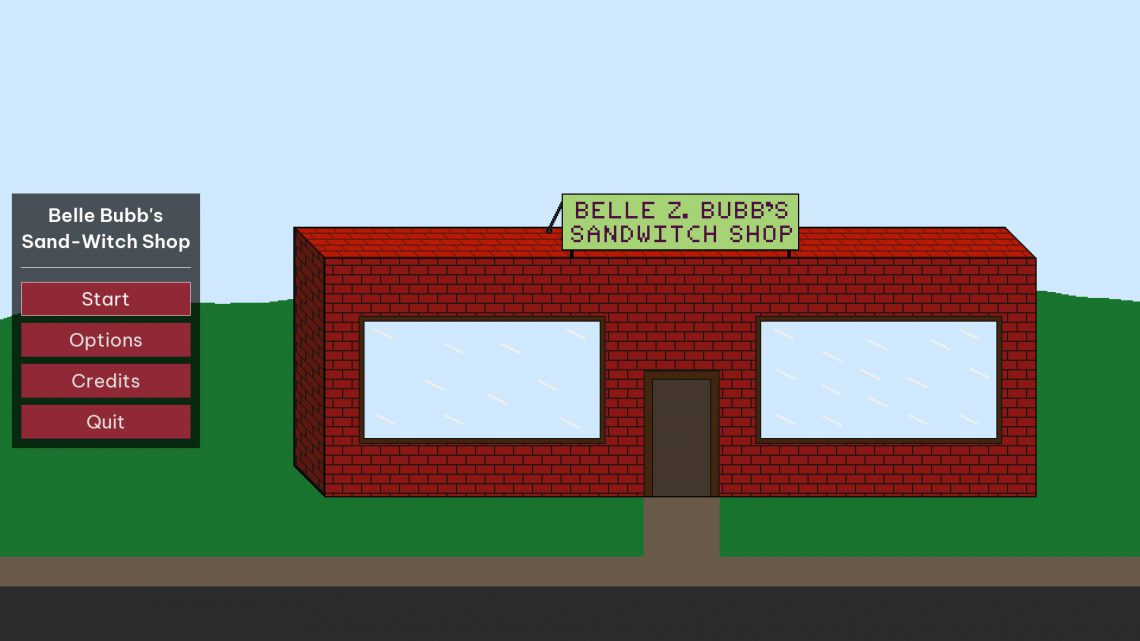
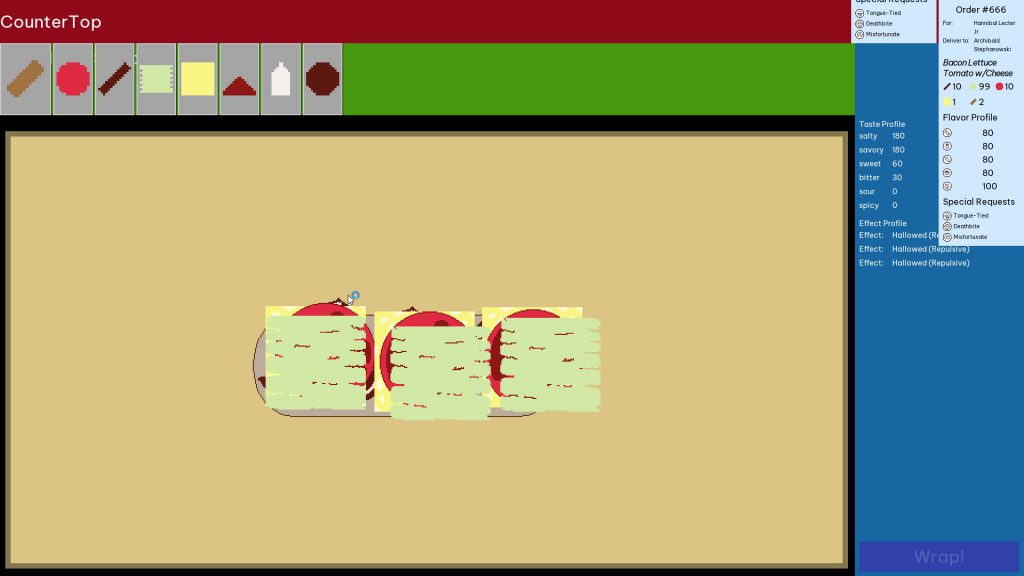
The game we created was Belle Bubb’s Sand-Witch Shop, and it was about working in a sandwich shop making “cursed sandwiches” (fitting the jam’s theme of “curses”) through 2D drag-and-drop gameplay. Sadly, we were unable to finish the game due to a convergence of multiple major issues; that said, those issues provided great insight into how to get better at making games, so I don’t think our efforts were wasted.
I’ll identify what those issues were, explain why they were problematic, and explain how I’m going to learn from them to become a better game developer.
Even though our game was incomplete, we still uploaded what we had to the jam anyway, so we could get feedback.
Issue: Isolated Tests
The gameplay for Belle Bubb’s Sand-Witch Shop involved doing new kinds of things that I was less familiar with, like drag and drop mechanics, evaluating what constituted a “sandwich”, and having ingredients that could interact with one another both during sandwich assembly and during sandwich consumption (aka “eating”). I chose to try and build each system in isolation and test that each worked well enough before moving on to others.
Creating all the systems in isolation meant there was no gameplay loop for the majority of the game’s development, so there couldn’t be any testing around whether the game was actually fun. Sure, dragging ingredients around and having them interact with one another was cool, but without evaluating them it was just an aimless sandbox experience. Testing the systems independently also meant I couldn’t see how well they’d interface with one another. This had catastrophic consequences when I encountered fatal issues with those systems once they were brought together.
Lesson Learned: No More Isolated Tests
I like making isolated tests because it’s simpler for me to wrap my head around them; I also don’t have to immediately worry about making them work as part of a whole. However, this is twice now that waiting to integrate systems until later in the project has resulted in slower progress. The jam version of Dice Tower was able to recover from this; Belle Bubb’s Sand-Witch Shop was not. Therefore, for games I’m working on the future, I need to build all the systems together at once. That should help me identify integration problems much sooner, and come up with better fixes for them.
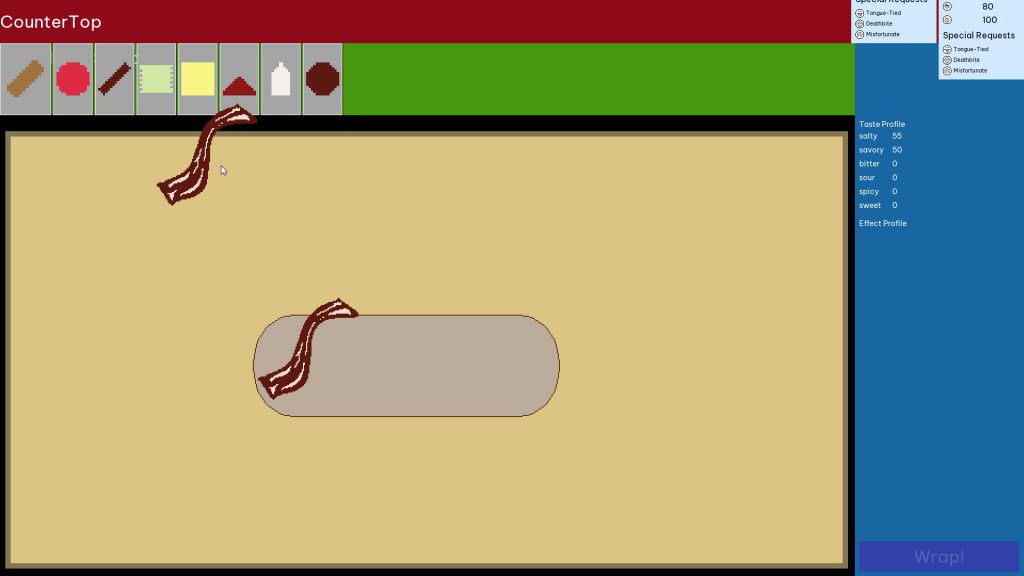
Gameplay was to drag ingredients from their containers onto the sandwich being assembled on the countertop. The taste profile on the right would update as each ingredient was added to the sandwich.
Issue: Badly-Designed Resource System
The foundation of evaluating the sandwich structure was a system that made heavy use of Godot’s customizable Resource nodes to store data in complex ways. This was somewhat similar to resource-based work that I’d created for Dice Tower, so I thought it wouldn’t be too much work to do the same kind of thing here. The architecture I came up with involved having the Ingredient resource store references to its UI model, and then the UI model also referencing its own Ingredient resource.
This dual-reference approach led to horrible issues with resource uniqueness. I was treating each Ingredient resource as a unique entity, but Godot treats resources as shared entities; anything holding a reference to a resource refers to the same instance of that resource. Since each ingredient, in design, could have its own unique set of curses and effects, I had to do a lot of duplication when creating new Ingredients and assigning them to models. This created all kinds of bugs where the stored data on a model or resource didn’t match what the game systems expected, and the massive amount of nesting took hours for me to debug.
All that stemmed from one complex resource system. I built multiple such architectures, and then had them all reference each other… The bugs stemming from that hell were the reason we wound up not being able to fully complete the game.
Lesson Learned: Don’t Abuse Resources
Working with Godot’s resources allows for creating powerful customizable systems, but it is incredibly easy to abuse that power to the point of making things insanely difficult to troubleshoot. I need to not use resources so much for the data solutions. At the very least, I need to minimize how much nested resource storage I’m doing, and make sure the architectures I’m coming up with aren’t fatally flawed before building on top of them.
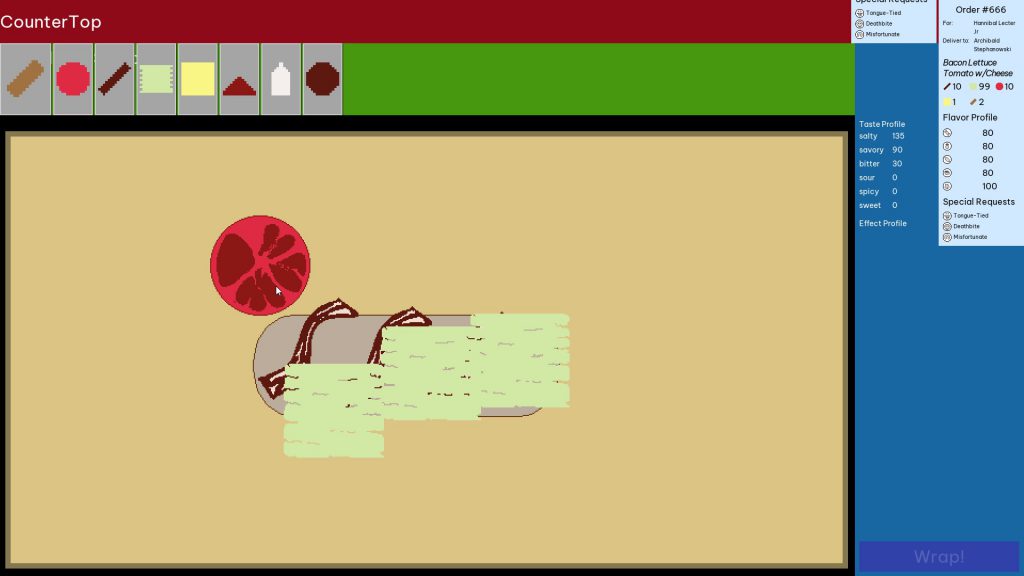
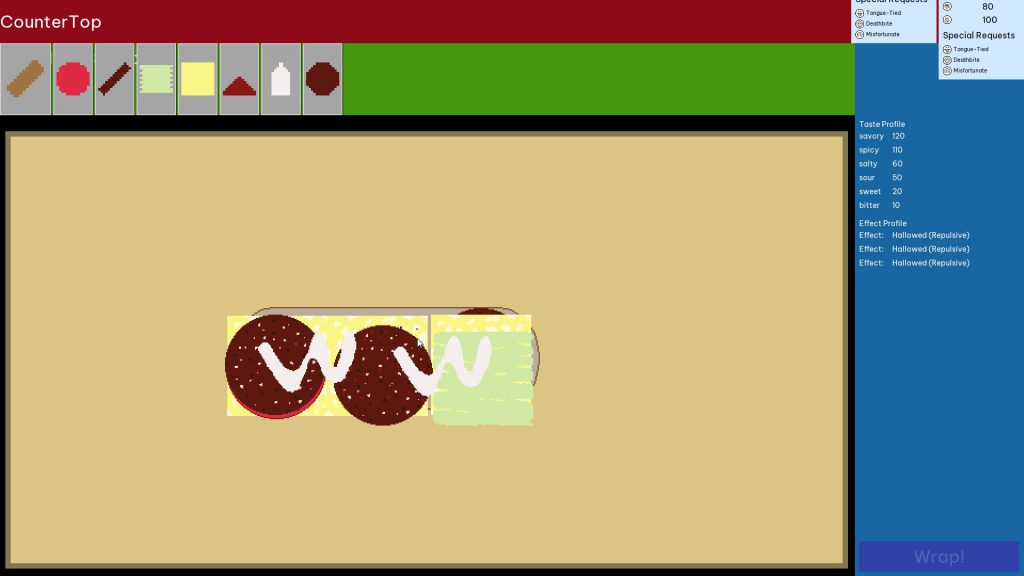
Bringing in a cursed ingredient had an effect on ingredients around it. For instance, the tomatoes were cursed to repel lettuce.
Issue: Too Much Undetected Complexity
I had no idea how complex the game we were trying to make actually was. To illustrate, these are the features which we managed to get into the game. At the time of planning, I thought they were simple:
Sandwiches have ingredients
Ingredients have curses
Curses have effects
Ingredients can also have effects
The same effects can be assigned to both curses and ingredients
Ingredients have individual tastes
Sandwich ingredients are combined together to form a recipe
They also come together to form the actual sandwich
Both of these have a “taste profile” that is the amalgamation of all ingredient tastes
They also have an “effects profile” that is the amalgamation of all curse and ingredient effects
Recipe and food need to be compared to each other to determine if they are “close enough”
All of the above needs to be represented in-game and in UI
That wasn’t even the full scope of what we had originally planned to put into the game. Other ideas include:
Randomizing which ingredients have what curses
Getting paid for making sandwiches
Using earned money to choose what ingredients to buy
Having a story about how you sold your soul to keep your sandwich shop alive
Post-sandwich order review that included descriptions of what effects your curses had
That was a lot of complexity. It didn’t feel that way at the beginning because I didn’t think things through. The further we got into making the game, the more I realized the amount of effort needed to make all these systems and interactions work was insane.
And, because I waited so long to bring systems together, I didn’t experience this revelation until it became too late to pivot to something simpler.
Lesson Learned: Work Through Systems Implications in Advance
I need to have much better insight ahead of time where potential complexities will arise. The best way I can think about doing that is diagramming them somewhere, on paper or in a whitescreen board app, so I can visualize what systems need to interact with one another. If there’s too much complexity, then it’s a clear sign that I need to scale things back. I’ve been worried in the past that this will make the process take longer, but the consequence of not trying to do so is having things take longer anyway and not realize it until it’s too late.
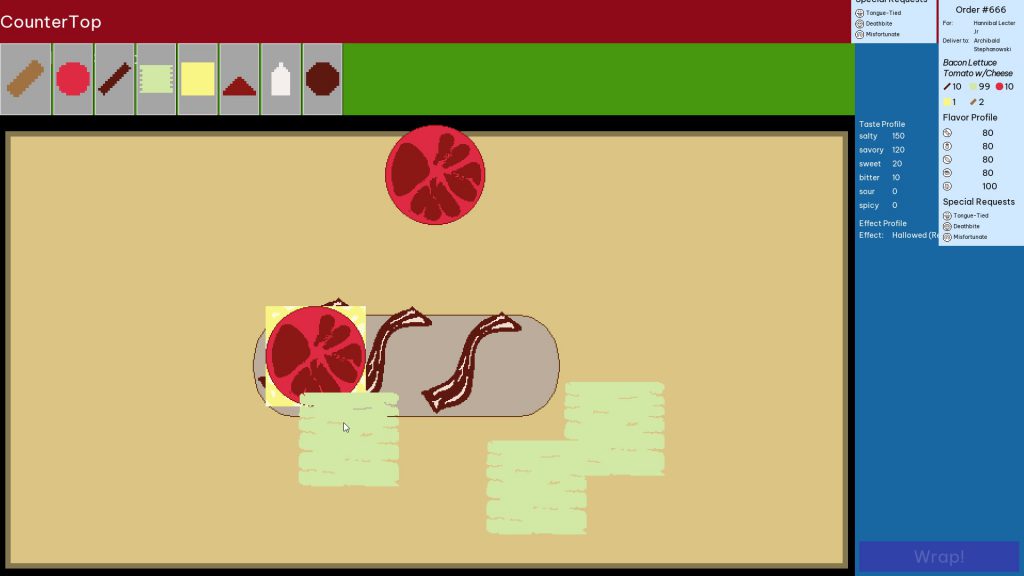
Other ingredients had effects that could cancel out curses. The cheese, in this instance, cancelled out any Repulsive curse on any other ingredient.
Issue: There Was No Planned Endgame
We came up with an idea for interesting gameplay, but had no concept of what the goal of the game was going to be. I kept putting a pin in it to “come back to” after the other systems were developed. Since none of the other systems were ever fully completed, we never got a chance to figure out what happens at the end.
Lacking this conceptualization of the player’s goal contributed to the underestimation of how much work was needed. There was no way to test the player could play through a core gameplay loop because we didn’t know what said loop was beyond “make a sandwich”. Without that guiding star, it was too easy to fall into a pattern of perfecting the systems with no plan for whether those systems would work well together to create a satisfying resolution.
Lesson Learned: Define the Goal at the Outset
Knowing what the player’s in-game goal is from the beginning not only gives a development target to shoot for in terms of minimum viability, but it also makes it clear what systems really need to be kept to make a fun gameplay experience. That doesn’t mean the goal has to be immutable; in fact, the goal will likely need to be simplified further as development roadblocks cut into available development time. If the goal is known in advance, though, then figuring out how to juggle all the necessary concerns should become much simpler.
To build a sandwich, you would have to account for the curses each ingredient had. You would then have to be careful to make sure the taste profile of those combined ingredients fit close enough to the profile of the sandwich recipe.
Issue: I Was Overworked
As mentioned previously, we’d spent a long time before this working on Dice Tower. In that entire time, I hadn’t really taken a break, and this caught up with me during the jam.
I’m no stranger to pushing through burnout—I don’t think I’ve ever fully recovered from burning myself out nearly a decade ago—but I underestimated how much easier it is to work through burnout when on a consistent, slow grind. When I needed to work fast and come up with good ideas quickly, my brain refused to cooperate. That’s one of the reasons I didn’t have a good grasp on how complex the ideas were: I couldn’t think far enough ahead to evaluate the consequences of those ideas, so I instead ignored that part of the process to work on the next thing necessary. The consequence of working through major burnout was significantly slowed progress, much too slow for a game jam. Subsequently, since I fell behind pace, I didn’t give myself time to rest during the jam, which only further exacerbated the mental problems I was dealing with. It was a nasty negative feedback loop.
Lesson Learned: Take a Break!
I’m bad at taking time off to actually take time off. I also know that it’s easier for me to push through tiredness and make progress if I do it consistently. But there’s a limit to how much grind I can endure, and I need to respect that. At the very least, I should take some time off from game development and other project work prior to starting a new game jam, to give myself time to recharge properly. That should hopefully make it easier for me to work and plan properly, and thus also make it easier to not feel like I’m falling behind, resulting in pacing my work schedule appropriately.
There were lots of possibilities to work with, both for ingredients and for effects.
Conclusion
I entered a game jam with the intent of working on a different project which might become future inspiration. Instead, I endured an experience that revealed multiple flaws with how I approach game development. Though the experience was painful, the lessons I learned from it are valuable, and that makes me glad for having gone through it.
Lest this postmortem post make it seem like the entire project was a disaster, let me highlight some of the things that did go right:
People liked messing around with making the sandwiches, so there is an idea there which might be worth future exploration.
While the resource system was buggy, it did allow for relatively easy creation of ingredients, curses, and effects.
Of all the things that got cut, at least sound and music weren’t among them this time!
Our focus is going back to Dice Tower, but we definitely intend to enter game jams more frequently in the future. Even when the projects don’t succeed in being good games, they succeed in being great teachers.
This July, Rebecca and I took part in Game Maker’s Toolkit Game Jam 2022 (an annual game jam hosted by the creator of YouTube channel Game Maker’s Toolkit, Mark Brown), making a game called Dice Tower in only fifty hours. It was our first game jam in a long time, having spent the last three years focusing (and failing) on making our “first big release”. Those fifty hours proved to be an intense, fulfilling experience, and I want to examine how things went. I’ll start with the goals that Rebecca and I made, continue into what happened during the jam, and conclude with whether I felt our goals were met and what we’ll do in the future.
Our Goals
First and foremost, Rebecca and I wanted to actually release the game! Our last jam effort, Rabbit Trails, never saw the light of day because we didn’t get the build submitted in time, and we were determined to avoid making that mistake again.
To that end, we explicitly wanted to scope our game small enough that it had a realistic chance of being completed by jam’s end. Further supporting that goal, we also decided that we would avoid trying to come up with something “clever”; we would be fine with coming up with feasible and fun ideas, even if they might be ideas that other people were likely to come up with. Finally, we determined that we would specifically make a 2D side-scrolling platformer, because that was the genre we were most familiar with; we didn’t want to waste time figuring out how to do a genre that we lacked experience in making.
Based on what had happened in previous jams, we had a few other goals we wanted to meet. Given that our previous games felt bland, we wanted to make sure whatever we made felt more polished and juicy, thereby increasing how good it felt to play. Previous jams had left us feeling burnt out and exhausted, and, while that is a traditional hallmark of game jams, we strongly wanted to avoid feeling that way at this jam’s end, so we made plans to limit how many hours we’d work per day so that we’d have time to relax and get our normal amount of sleep.
Separate from the in-jam goals, we had one ulterior objective: we wanted to see if the idea we came up with was good enough to develop further into a small release. The game we’d been working on, code-named “Squirrel Project”, was still very much in the early prototyping stage; we’d built and tried a lot of things, but made little progress in actually putting together a full game experience. Both of us felt concerned with how much time we were taking in making a “small game”, so we were interested in seeing if doing game jams might give us smaller concepts that would be easier to develop and release quickly. This jam would serve as a proof of concept for this theory.
Day One (Friday, 7/15/22)
The day of the jam arrived. Our son was off spending the weekend with relatives, we’d prepared our meal plan for the next couple of days, and I’d taken time off from my day job. We sat around my laptop, awaiting Mark Brown’s announcement of the theme. At noon, the video was released, and we saw the theme emblazoned on the screen:
Initial Planning
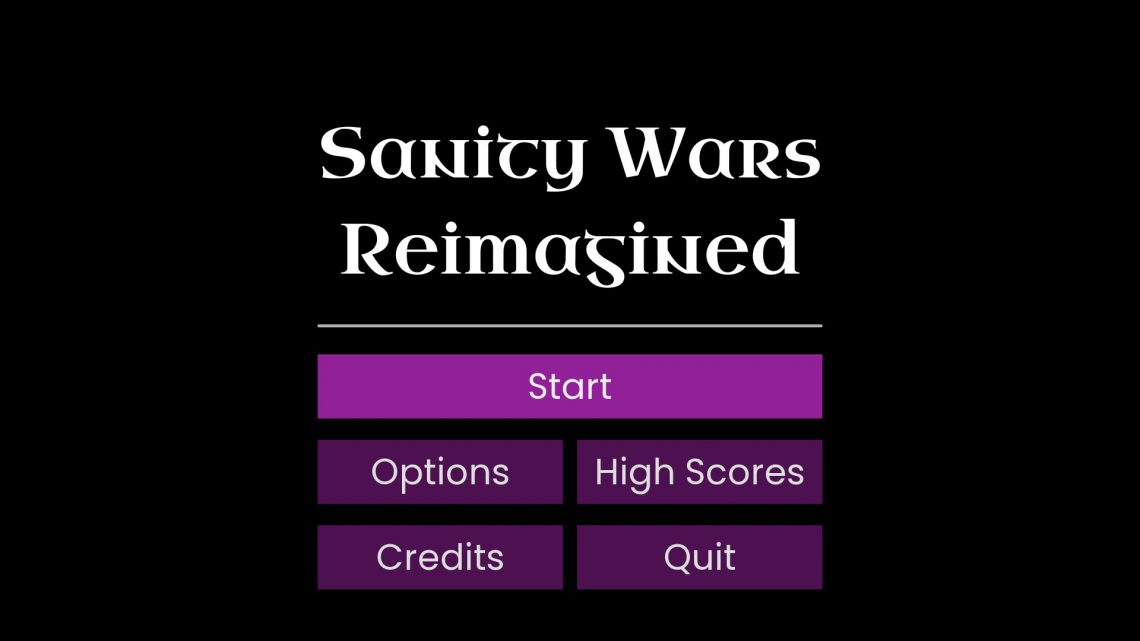
I hated the theme at first impression. One of my takeaways from working on Sanity Wars Reimagined (our first-ever full release) was that working with randomness in game design was hard, and now we had a game theme which strongly implied designing a game focusing around randomness. In my mind, it would be harder to design a game around dice that wasn’t random in some way. Concerned now with whether we would have enough time to make a good game, I started brainstorming ideas with Rebecca.
We spent that first hour working out an idea; the first idea we hit upon wound up dominating the rest of our brainstorming session, to the point that we didn’t seriously entertain anything else. The game would be a rogue-lite platformer, where you moved to various stations and rolled dice to determine which ability you got to use for the next section of gameplay. Throughout the level would be enemies that you could defeat to collect more dice, which would then give you a better chance to roll higher at the ability checkpoints, thereby increasing your odds of getting the “good” abilities.
I intentionally wanted to minimize the randomness of our game so that players felt they had some level of control over the outcomes of dice rolls, and I liked the idea of using dice quantity to achieve this outcome. The more dice you add to a roll, the more likely you are to get certain number totals. This is known as a probability distribution.
At the end of that hour, we formally determined that this was the idea we wanted to work with. Rebecca started crunching out pixel art, and I got to work making a prototype for our envisioned mechanics.
That Old, Familiar Foe
The next few hours of my life were spent working on the various elements that would serve as a foundation for our mechanics. I threw together some simple dice code, along with dice containers that could roll all the dice they were given. I also pilfered my player character and enemy AI code from Squirrel Project, to jumpstart development in those areas.
But something happened as I started trying to work out how I was going to make the player’s abilities work: my brain began to freeze up. This was a frighteningly familiar sensation: I’d felt this way near the end of developing the original Sanity Wars (for Ludum Dare 43). Dark thoughts started clouding my mind:
There’s not enough time to make this game.
You’re going to fail to finish it, just like your last game jam.
Is what you’re feeling proof that you’re not really good enough to be a game developer?
Slowly, I forced myself to work through this debilitating state of mind. After several more hours, I came up with a janky prototype for firing projectiles, and a broken prototype for imparting status effects on the player (like a shield). It occurred to me that if I was having this much trouble making something as simple (cough cough) as player abilities, then how was I going to have time to fix my glitchy enemy AI, and develop the core mechanic of rolling dice to gain one of multiple abilities, and make enough content to make this game feel adequate, let alone good. Oh, and then there was still bugfixing, sound and music creation, playtesting…
It finally hit me: This idea wasn’t going to work. There was simply too much complexity that was not yet done, and I was struggling with the foundational aspects that needed to be built just to try out our idea. There was no way I would be able to finish this vision of our game on time.
My mind in shambles and my body exhausted, I shared my feelings and concerns with Rebecca, and she agreed that we needed to pivot to a new idea. We tried to come up with something, but we were both too tired to think clearly. Therefore, we decided to be done for the evening, get some supper, and head to bed.
Note the lack of planned relaxation time.
As I lay in bed, I fretted about whether we could actually come up with a new idea. That first idea was by far the best of what few ideas we’d been able to come up with during our brainstorming session; how were we going to suddenly come up with an idea that was good enough and simpler? With these worries exhausting my mind, I fell asleep.
This is the first thing I made, a simple test with a dice container and N number of dice. It felt oddly satisfying to keep pressing the “Roll Dice” button.
Day Two (Saturday, 7/16/22)
The next morning, at 6am, I woke up, took a shower, and played a video game briefly. This was my normal morning routine during the workday, and I was determined to keep to it. At 7am, I grabbed a cup of coffee and sprawled out on the couch, pad of paper and pen resting upon an adjacent TV tray, prepared to try and come up with a new idea.
Rebecca joined me at 7:30am, after she did her own waking routines.
The New Idea
I wrote down the elements we already had: Rebecca’s character art and tileset from her previous day’s work, some dice and dice containers, and a player entity that was decently functional as a platformer character. If our new idea could incorporate those elements, then at least not all of yesterday’s work would go to waste.
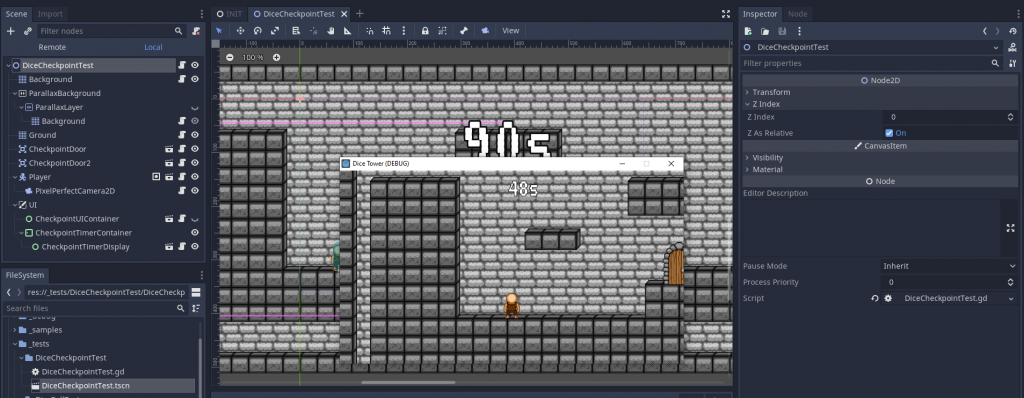
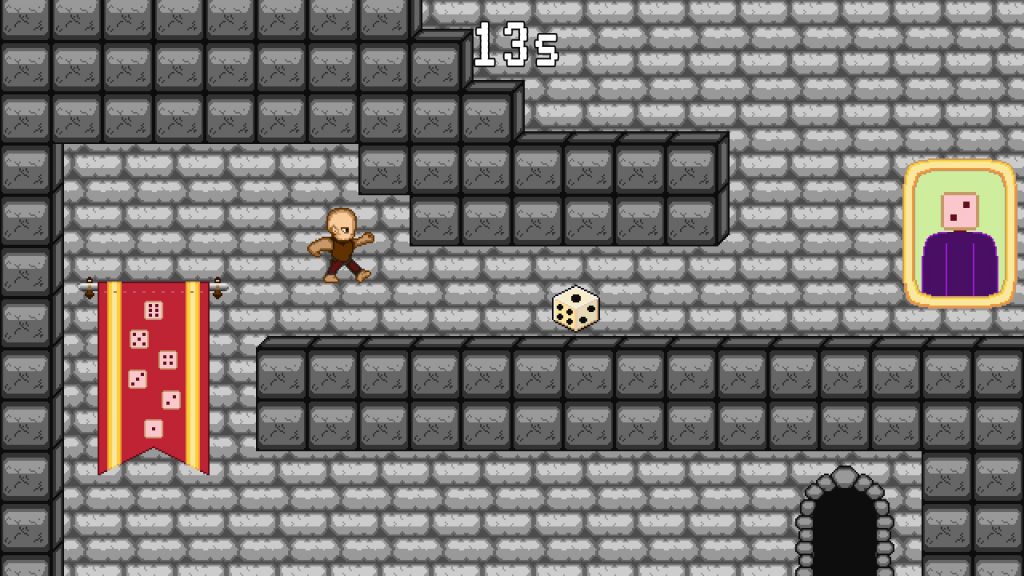
After thinking about it for a long while, I hit upon an idea: what if you rolled dice to determine how much time you had to complete a level? As you moved through each level, you could collect dice and spend them at the end-of-level checkpoints to increase your odds of getting more time to complete the next level. If that were combined with a scoring system involving finding treasure collectibles that were also scattered throughout each level, then there’d be potentially interesting gameplay around gambling how many dice you’d need to collect to guarantee that you had enough time in each level to collect enough treasure to get a high score.
I pitched the idea to Rebecca, and after some discussion about that and a few other ideas, we decided this was the simplest idea, and therefore had the best chance of being completed before the deadline. Fortunately, this idea also did successfully incorporate most of the elements that we’d worked on yesterday, so we didn’t have to waste time recreating assets. On the other hand, this idea needed to work; there was likely not going to be any time to come up with another plan if we spent time on this one and it failed.
Our idea and stakes in mind, Rebecca and I once more commenced our work.
Slogging Through the Day
I created various test scenes in Godot. Slowly, I began to amass the individual systems and entities that I’d eventually put together to form the gameplay. Throughout the day, I felt very sluggish and lethargic mentally; this was likely a side effect of the burnout I’d put myself through yesterday. I kept reminding myself that some amount of progress was better than none at all, but it still didn’t feel great.
By the start of that evening, I had a bunch of systems, but nothing that fully integrated them. Taking a break, I went outside for a walk and some breaths of fresh air. As I trod the trails in our neighborhood, I worked out the game’s next steps. I reasoned that if I continued to put each system and entity together in isolation and test them, I stood a realistic chance of running out of time to put everything together into a cohesive game. Therefore, I decided to forgo this approach, and simply put everything together now, and build the remaining systems as I went along. This flew in the face of how I traditionally prefer to program things, but I resolved to set aside my clean code concerns and focus simply on getting the game working.
This might look like a game level, but it was really just a single test scene that I was throwing my creations into. There was no logic connecting any of these things together to form a gameplay loop.
The Late Evening Dash
Not long after I returned from my walk, it became 7pm. This was the twelve-hour mark, and in our pre-jam plans I’d determined that I wouldn’t work more than twelve hours on Saturday. Yet I still didn’t have much that was actually put together. I was now faced with a conundrum: should I commit to stopping work now, and risk not having enough time tomorrow to finish the minimum viable product?
Ultimately, I decided that I would try to get an MVP done tonight, or at least keep working until I felt ready to stop. Three hours later, while that MVP was still incomplete, I had put together the vast majority of what was needed to make the game playable: a level loading system, the dice-rolling checkpoints, dice collection (though said dice weren’t yet connected to the checkpoints), the level timer and having it set from rolling the checkpoint dice, rudimentary menu UI, and player death. At this point, I felt that continuing to work would just cut into my sleeping time, and I was still determined to get a proper amount of sleep. At the least, those few hours had produced enough progress that I felt confident that I could finish things up tomorrow morning.
I quickly prepared for bed, and after watching some YouTube to wind down I fell asleep.
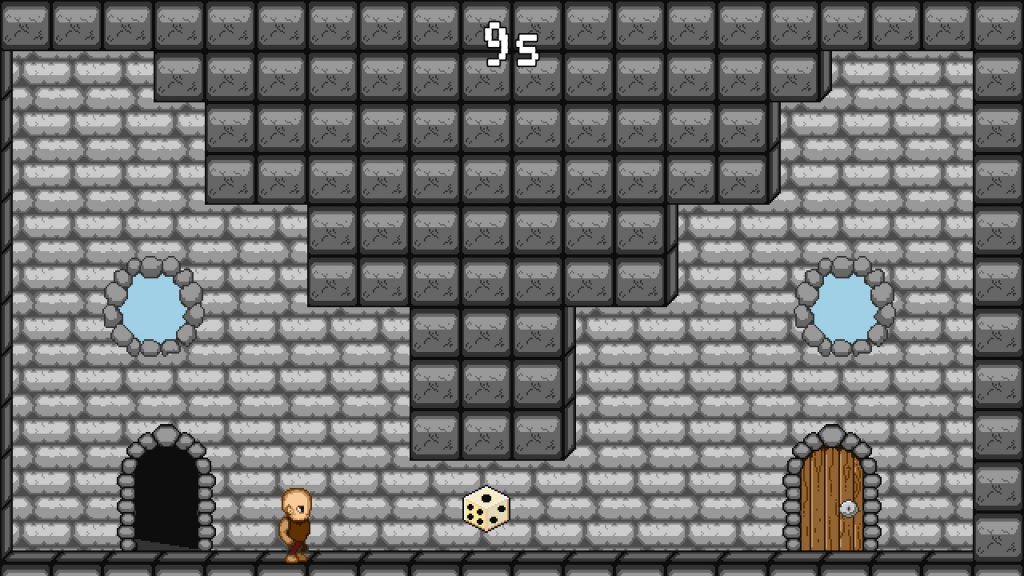
One of three tutorial levels I’d created that night. This one is to teach the player that they can pick up dice; when they advance to the next checkpoint, they’ll see that newly-collected die in their dice pool, and hopefully make the connection between the two actions without having to explicitly spell it out.
Day Three (Sunday, 7/17/22)
That morning, I woke up at 6am, as usual, but this time I skipped all of my morning routine save the shower. By 6:30am, I was at my computer and raring to go.
Blazing Speed and Fury
The first thing I did was export the game as it currently was. I’d been burned enough times by last-minute exports that I was determined to make sure that didn’t bite me in the butt this time. Fortunately, this time there were no export-specific crashes or bugs, so I resumed work on the game proper.
For the next several hours, my mind singularly focused on getting this game done. I finally made the checkpoints accept the dice you collected, thus completing the core loop of rolling dice to determine the time you had to make it through the level. I added game restart logic, added transition logic for when the player was moving between levels, added endgame conditions and win/loss logic, and fix various bugs encountered along the way. I also realized that I wouldn’t have time to implement a scoring system, so I unceremoniously cut it from the MVP features.
Cutting the scoring system also meant cutting the third tutorial level, which would have taught the player about the treasure collectible. Additionally, it would’ve served as a prelude to the intended tension of collecting treasure to increase your score and collecting enough dice to have more time in the next level.
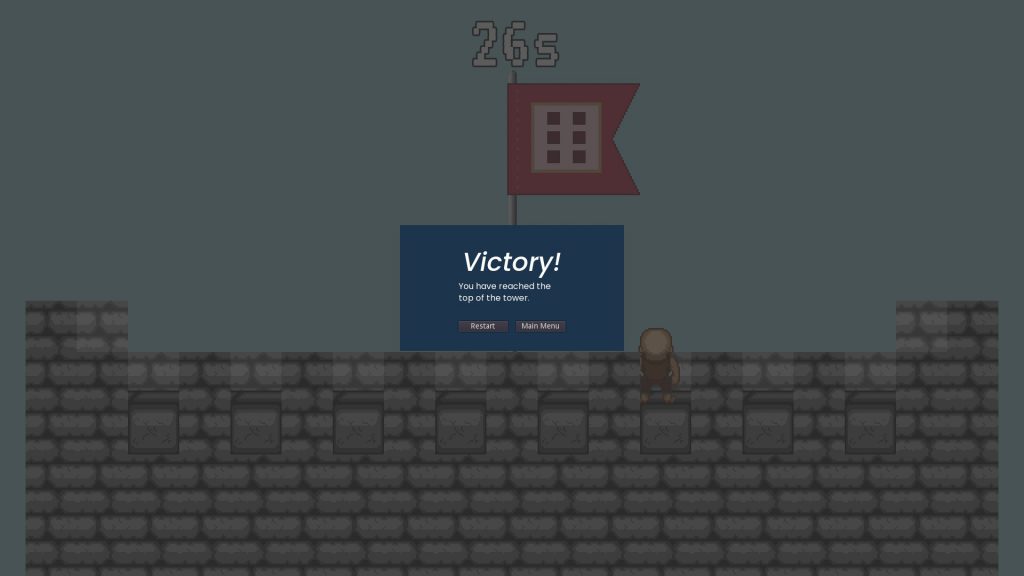
Around noon, I finally had the game fully working. I could boot the application, start a new game from the main menu, play through all the designated levels, and successfully reach the victory level to win the game (or run out of time and lose). If nothing else, we at least had a playable game!
Final Push
The game jam started at noon on Friday, and as it was now noon on Sunday that meant 48 hours had passed. Thankfully, the jam had a two-hour grace period for uploading and submitting games to Itch.io. That meant I had less than two hours to jam as much content and polish into the game as I could before release!
I blazed my way through creating six levels, spending less than an hour to do so. Of course, that meant I had little time to balance the levels properly, beyond ensuring they could be completed in an average amount of time. One thing I did spend time on was adding the various pieces of decorative art Rebecca made to each level. It might seem frivolous to add decorations, but I think having a nicely-decorated level goes a long way towards breaking up level monotony and sameness, and honestly it didn’t take that long for me to add those things.
After a few trials, I hit upon a solution for balancing the randomness for the dice checkpoints: I’d give the player six free seconds at the start of each level, and a single die at each checkpoint (in addition to the ones collected through gameplay). As I playtested the level, that at least felt long enough that, using probability curves, the average player could have a decent chance of finishing each level.
Intentionally, I chose to not focus at all on adding sound effects and music. My reasoning went thusly: players would probably prefer to have more content to play through than have sound and music with very little content. It made me remorseful, because sound can make an okay game feel great, but there just wasn’t enough time to do a good job of it, so I decided it was better to just cut audio entirely.
Finally, at 1:30pm, I looked at what we had and determined it was good enough. Rebecca had been working on setting up our Itch.io page, and I gave her the final game build export to upload to the store page. We submitted the game just in the nick of time; shortly after our submission was processed, Itch.io crashed under the weight of thousands of last-minute uploads. While this server strain prevented us from adding images for our game page (we got them in later), at least we already had the game uploaded and submitted, so we weren’t in danger of missing the deadline.
Rebecca and I looked at each other. We’d done it! We’d successfully made a game and submitted it! We spent the rest of the afternoon out and about on a date, taking advantage of our last bits of free time before returning to parenthood the next day.
Feedback
Over the next week, our game was played and rated by people. We received multiple comments about how people enjoyed the core idea, which was encouraging.
A couple of our friends from the IGDA Twin Cities community took it upon themselves to speedrun our game. This surprised me, because I thought the inherently random nature of our game would be a discouragement from speedrunning. They told me they enjoyed it a lot, however, and over the course of that week they posted videos of ridiculously speedy runs and provided good feedback.
By happenstance, the Twin Cities Playtest session for July was that same week, so Rebecca and I submitted Dice Tower to be played as part of that stream. Mark LaCroix, Lane Davis, and Patrick Yang all enjoyed the game’s core concept, and gave us tremendous feedback on where they felt improvements could be made, as well as different directions we could go to further expand and elaborate on the core mechanic. It was a great session, and we are greatly indebted to them for their awesome feedback.
After the play-and-review week had passed, Mark Brown made his video announcing the winners of the jam, and we got to see our final results online (we did not make it into the video, which only featured the top one-hundred games).
For a game jam with over six thousand entries, we did surprisingly well, placing in the top 50% in overall score. Our creativity score was in the top third, which pleased me greatly; it felt like further validation that our core concept was good enough to build on.
Reflection
I want to circle back to those goals Rebecca and I set before the jam, and see how we did in meeting them. There were a couple of other takeaways I had as well, which I’ll present after looking at the goals.
Did We Meet Our Goals?
First and foremost, we wanted to release a game, and we did! That was huge for us, given our last effort died in development. In particular, to release this game after the mental fracturing I endured on Friday night, and having to pivot to a new idea, shows that, perhaps, we’re decent game developers, after all.
Did we scope our game properly? At the beginning, no, definitely not. Fortunately, we recognized this (albeit after spending a day on it), and decided to change to a more feasible idea. Even though we had to cut scope from the new idea as well, the core was small enough that we were able to make it in the time allotted. It gives us a new baseline for how much work we can fit in a given amount of time, which should serve us well in future endeavors.
It’s a similar story for our theme interpretation. Our first idea seemed simple, but turned out to be complex under the hood, as it’s a lot of work to not only add lots of different player abilities, but game entities (such as enemies) to use those abilities on. In hindsight, I laugh at how we thought that kind of game was feasible in 48 hours, with not nearly enough foundation in place beforehand. That said, once again, we pivoted from the complex to the simple, and the new theme interpretation was simple enough to be doable.
Ironically, I thought this would be a common enough idea that plenty of other people would do it, but I actually never encountered a mechanic similar to this during my plays of other jam games, and multiple people commented on the novelty of the idea. Perhaps our focus on coming up with a good idea instead of a unique one managed to get us the best of both worlds!
We stuck to our guns and made a 2D side-scrolling platformer, even though at times I felt like that made it more difficult to find a good theme interpretation. Because we knew how to work in that genre, it made our mid-development pivot possible; I don’t think we could have been successful in doing that if we’d tried to make something unfamiliar to us. Additionally, I think using a genre where dice are less commonly used led to coming up with something more unique than we might’ve if we’d done an RPG or top-down game (two genres I thought would be easier fits for the theme).
One area we did miss on was making this a polished release. The missing audio was sorely felt. That said, I really like the art that Rebecca came up with, especially the decorations, and I don’t regret the decision to cut sound in favor of making levels and placing her doodads. Honestly, despite the missing audio, the fact that this game was fun and playable made this jam release feel more polished than our previous jam efforts.
That dice banner and the dice family portraits were particularly fun to place throughout the levels.
A big success we had was in self-care management. Even though we didn’t stick to the maximum hours per day we set before the jam, we took care to make sure we got enough sleep each night. The end result is that this is the first jam we’ve done that both of us didn’t feel utterly spent at the end of it. That allowed us to enjoy a lovely afternoon and evening together as a couple, and we didn’t feel totally shot for days thereafter. I think that also helped us have the energy needed to push us through to the finish line.
One final goal remains to be evaluated: was our game good enough to base a future release upon? The answer is “yes”. Based on the enthusiastic feedback we received, plus our own thoughts about where the concept could go, we’ve decided to put Squirrel Project aside and focus on making a full, but small, release out of Dice Tower. With some more features and polish, and maybe a dollop of background story to tie things together, we think Dice Tower could make a good starting point for our first paid release.
Additionally, we plan to take part in future game jams, and further explore the concept of making quick games to find small ideas with good potential.
Other Takeaways
There were some additional things we learned from the jam. These emerged as byproducts of the things we tried during the jam.
Our initial thoughts were that we’d spend our brainstorming session coming up with multiple ideas, and then make small prototypes for each of them and decide which of them was the one we wanted to make. It didn’t turn out that way; both our first and second attempts settled early on a single idea, to the point where we didn’t really have many other ideas that we seriously considered. I think that perhaps that’s just how Rebecca and I work; it’s easier for us to jump into an idea and try it rather than piece a bunch of ideas together and flesh all of them out on paper. Perhaps in our next jam, then, we’ll deliberately settle on an idea right away and just go for it, making explicit allowance for pivoting if it starts feeling like too big an idea to work with.
Personally, I also learned that I need to let go of trying to test every little thing in isolation. That may be a good approach for building long-lived, stable systems, but for something as volatile as game prototyping it just slows the process down too much, with no game to show for it. By putting things together as early as possible, it makes things feel more real because it is the real game! I’ll keep this in mind for future projects, to just make a go of it right off the bat, and save my efforts to make things nice and tidy for when the ideas are codified and made official.
Conclusion
Ultimately, I’m glad Rebecca and I decided to participate in GMTK Game Jam 2022. It feels exhilarating to not only finish a game in that short amount of time, but to defeat some of my internal demons from previous jams in the process. We feel more confident in our ability to develop and release games, and we’re excited to tackle making the full release of Dice Tower.
It’ll be interesting to compare this postmortem with the postmortem for whatever that game becomes!
In the meantime, though, feel free to try out our jam release of Dice Tower and let us know what you think!
Over the last three days, PixelLunatic and I worked on a game for Game Maker’s Tool Kit Game Jam 2022. Our entry is Dice Tower, and you can play it here!
Keep in mind that this is a game jam game, so this is far from perfect (for example, there is no audio), but we think the end result would up being pretty fun to play! We might decide to develop this further in the future, though we haven’t officially committed to doing so yet.
After seven months of development, Rebecca (PixelLunatic) and I have released Sanity Wars Reimagined! Along the way, we learned a lot, lessons we hope to apply to future games we develop. In this article, I want to dig a little bit into what we learned, from what we were initially trying to do to where we wound up, and the various lessons learned and mistakes made along the way.
This project started with a discussion Rebecca and I had about where things were from a long-term standpoint. For the past few years, we’d attempted, and abandoned, various prototypes, and it seemed like we were still far off from actually releasing a product. At the time, I had just come off of a month-long project exploring the creation of game AI; my intent was to start another project aimed at making improvements to the dialogue system. During our discussion, however, Rebecca pointed out that, while our ultimate goal was to make games and sell them, we had a bad habit of not committing to anything long enough to get it released. What’s more, she was concerned that this pattern of starting and abandoning projects wasn’t good for our morale.
She was right to be concerned about this; I’d felt that making an actual release was still a point far off in the distance, and this was making it easier for me to accept the idea of working on non-release projects, to “gain experience”. How would we ever learn how to improve, though, if we never got our projects to a releasable, playable state? Only two of our game jam games and one of our prototypes had ever been given to other people to play, so we had very little feedback on where we needed to improve. I realized that we couldn’t keep waiting to release something until “we got better”; we needed to make something and release it, however bad it may be.
We decided that we would start with a small project, so that it would take less time to get it to a releasable state. To that end, we determined that the project should be a remake of our first jam game, Sanity Wars. By remaking a game that was already released, we thought, we could focus on actually building the parts needed to make the game work; since I’d made those things work previously, we would hopefully avoid the pitfall of trying to create mechanics that were beyond our current skill to implement, or would take too much time to build. Why Sanity Wars? Out of all the previous jam games we’d made, it seemed like the most successful one, so we thought we could just add some polish, redo the art (since Rebecca did not do the original’s art), and it would be fine.
With that, our next project was set: Sanity Wars Reimagined. We would stay faithful to the mechanics of the original, aiming only to remake them in Godot, as this would be quicker than trying to iterate and make new mechanics. I would also take the opportunity to try and make systems that would be reusable in future games; ideally, we would treat Sanity Wars Reimagined as a foundation that we would directly expand upon for the next game. Since the original Sanity Wars was done in three full days, I thought this project wouldn’t take long to complete. Accounting for our busy adult schedules, I estimated the work would take two weeks to complete; at most, a month.
It didn’t take two weeks. It didn’t take a month. It took seven months before we finally released Sanity Wars Reimagined on Itch.io. Along the way, we made significant modifications to the core mechanics, removing multiple parts that were considered essential to the original Sanity Wars; even with those changes, the end result was still not that fun (in our minds). There were many times during the development period where it felt like it was going to drag on and on, with no end in sight. All that said, I still think Sanity Wars Reimagined was a successful release.
Why do I think that? To answer that question, I want to examine what technologies we developed during the project, what mistakes we made, and what we plan to do to improve things for our next project.
Technologies Developed
A lot of what I made from a code standpoint was able to be imported back into my boilerplate Godot project, which will then be available from the start when I clone the Genesis boilerplate to make any future game project. In doing so, I’ve hopefully decreased the amount of development time needed for those projects.
Genesis is name of a tool I created in NodeJS that lets me keep a centralized Godot boilerplate template and create new projects from that boilerplate using simple commands in a command line interface. To give a non-technical summary, it allows me to quickly create and update new Godot projects that include common code that I want to reuse from project to project.
Here are some of the things that I’ll be able to make use of as a result of the work done for Sanity Wars Reimagined:
Resolution Management
There is a lot to consider when supporting multiple resolutions for a game, especially one that uses a pixel art aesthetic. I was already aware of this before committing to figuring out a solution for Sanity Wars Reimagined, but I underestimated just how much more there was to learn. The good news is that I created a solution that not only works for Sanity Wars Reimagined, but is generalized enough that I can use it as the starting point for future games.
I’ll talk in brief about some of the struggles I had to contend with and what I did to solve them.
For starters, when working with pixel art, scaling is a non-trivial issue. Because you are literally placing pixels in precise positions to render your art aesthetic, your scaling must always keep the same aspect ratio as your initial render; on top of that, it must specifically be increased in whole integer factors. This means you can only support a limited number of window sizes without messing up the pixel art. That plays a huge factor in determining what your base size is going to be; since most monitors use a 1920px by 1080px resolution size, your base needs to be a whole integer scale of 1920×1080, or else the game view is not going to actually fill the whole screen when it is maximized to fill the screen (aka fullscreen).
The way fullscreen modes are typically handled for pixel art games, when they attempt to handle it at all, is to set the game view to one of those specific ratios, and letterbox the surrounding area that doesn’t fit cleanly into that ratio. That is the approach I chose for my fullscreen management as well.
Godot does give you the means to scale your game window such that it renders the pixel art cleanly, and you can also write logic to limit supported resolution sizes to only those that scale in whole integers from the base resolution. However, there is a catch with the native way Godot handles this: any UI text that isn’t pixel-perfect becomes blurry, which isn’t a great look to have. I could have switched to only using pixel-perfect fonts, but that wasn’t the look I wanted the game UI to have. After spending a lot of time experimenting with ways to handle this in Godot’s settings, I determined that I would have to create a custom solution to achieve the effect that I wanted.
I wound up talking to Noel Berry (of Extremely OK Games) about how Celeste handled this problem, as its crisp UI over gameplay pixel art was similar to what I was hoping to achieve. He told me that they actually made the UI render at 1920×1080 at default, and then scaled the UI up or down depending on what the game’s current resolution was. This inspired me to create a version of that solution for Sanity Wars Reimagined. I created a UI scaling node that accepts a base resolution, and then changes its scale (and subsequently the scale of its child and grandchild nodes) in response to what the game’s current resolution is. It took a lot of effort, but in the end I was able to get this working correctly, with some minor caveats*.
* I’ll be coming back to these caveats later on in the article, when I discuss mistakes that were made.
Overall, I’m very pleased with the solution I developed for resolution management in Sanity Wars Reimagined, and ideally this is something that should just work for future pixel art-based games.
Screen Management
Another system I developed for Sanity Wars Reimagined is a screen management system that supports using shaders for screen transitions. Although my boilerplate code already included a basic screen manager that was responsible for changing what screens were being currently portrayed (MainMenuScreen, GameScreen, etc.), a significant flaw it had was that it didn’t provide support for doing screen transitions. This was going to be a problem for Sanity Wars Reimagined, as the original game had fade transitions between the different screen elements. I thus set out to refactor my screen management to support doing transitions.
In the original Sanity Wars, the way I accomplished the fade was through manipulating the drawn image in the browser’s canvas element (as the original game was built using HTML/JavaScript, the technologies I was most familiar with at the time). It was hardcoded to the custom engine I’d built, however, and there wasn’t a direct way to achieve the same effect in Godot. It’s possible I could have made the fade transition, specifically, work by manipulating the screen node’s modulation (visibility), but I didn’t feel comfortable making direct changes to node properties for the sake of screen effects, especially if I wanted to have the ability to do other kinds of transitions in the future, such as screen slides or flips; anything more complex than that would be outright impossible through mere node property manipulation.
My focus turned towards experimenting with a different approach, one based on using Godot’s Viewport node to get the actual render textures, and then manipulating the raw pixels by applying shaders to the render images of the outgoing screen and the incoming screen. Viewports were something I hadn’t had much experience with, however, so I wasn’t certain if the idea I had would actually work. To prove the concept, I spent a weekend creating a prototype specifically to test manipulating viewport and their render textures. The approach did, in fact, work as I envisioned (after a lot of research, trial, and error), so I proceeded to refactor the screen management system in Sanity Wars Reimagined to use this new approach.
When referring to screens here, I’m not talking about physical monitor screens; it’s a term I use to refer to a whole collection of elements comprising a section of the game experience. For instance, the Main Menu Screen is what you see on booting up the game, and Game Screen is where the gameplay takes place.
Overall, the refactor was an immense success. The fade effect worked precisely the way it did for the original Sanity Wars, and the system is flexible enough that I feel it should be easy enough to design new screen transition effects (in fact, I did create one as part of making the LoadingScreen, transitioning to an in-between screen that handled providing feedback to the user while the incoming GameScreen prepared the gameplay). Should I want to create different visual effects for future transitions, it should be as simple as writing a shader to handle it. (Not that shaders are simple, but it is far easier to do complex visual effects with shaders than with node property manipulation!)
Automated Export Script
After realizing that I needed to export game builds frequently (more on that later), I quickly found that it was tedious to have to work through Godot’s export interface every time I wanted to make a build. On top of that, Godot doesn’t have native build versioning (at least, not that I’ve found), so I have to manually name each exported build, and keep track of what the version number is. Needless to say, I wondered if there was a way I could automate this process, possibly through augmenting the Genesis scripting tools to include a simple command to export a project.
I took a few days to work through this, and in the end I managed to create functionality in my Genesis scripting tool that did what I wanted. With a simple command, godot-genesis export-project "Sanity Wars Reimagined" "Name Of Export Template", Genesis would handle grabbing a Godot executable and running a shell command to make Godot export the project using the provided export template, and then create a ZIP archive of the resulting export. The name of the export was the project name, followed by a build number using the semantics I chose (major.minor.patch.build). By providing a -b flag, I could also specify what kind of build this was (and thus which build number to increment). It works really well, and now that exports are so easy to do I am more willing to make them frequently, which allows me to quickly make sure my development changes work in the release builds.
Other Features and Improvements
There are many other features that were created for Sanity Wars Reimagined; to save time, I’ll simply give brief summaries of these. Some of these were not generalized enough to be ported back into the Genesis boilerplate, but the experience gained from creating them remains valuable nonetheless.
Generators
These nodes handle spawning entities, and I made the system flexible enough that I can pretty much generate any kind of object I want (though, in this case, I only used it to spawn Eyeballs and Tomes).
RectZone
This is a node which let me specify a rectangular area that other nodes (like Generators) could use to make spatial calculations against (aka figure out where to spawn things).
PixelPerfectCamera
This is a Camera node that was customized to support smoothing behavior rounded to pixel-perfect values. This helps reduce the amount of visual jitter that results from when a camera is positioned between whole integer values.
The reason this happens is because pixels can’t be rendered at fractional, non-integer values, so when a pixel art game asset is placed such that the underlying pixels don’t line up to a whole integer, the game engine’s renderer “guesses” what the actual pixel color values should be. This is barely noticeable for high-resolution assets because they consist of a huge number of pixels, but for something as low-resolution as pixel art, this results in visual artifacts that look terrible.
UI Theming
I finally took a dive into trying to understand how Godot’s theme system works, and as a result I was able to create themes for my UI that made it much simpler to create new UI elements that already worked with the visual design of the interface. I plan to build on my experience with UI themes for future projects, and ultimately want to make a base theme for the Genesis boilerplate, so I don’t have to create new themes from scratch.
State Machine Movement
I converted my previous Player character movement code to be based on a state machine instead of part of the node’s script, and this resulted in movement logic that was far simpler to control and modify.
As you can see, there were a lot of features I developed for Sanity Wars Reimagined, independent of gameplay aspects. A large part of what I created was generalized and reusable, so I can put the code in future projects without having to make modifications to remove Sanity Wars-specific functionality.
Complications
No human endeavor is perfect, and that is certainly true for Sanity Wars Reimagined. In fact, I made a lot of mistakes on this project. Fortunately, all of these mistakes are things I can learn from to make future projects better. I’ll highlight some of these issues and mistakes now.
Both Rebecca and I learned a lot from the mistakes we made developing this project, but I’m specifically focusing on my mistakes in this article.
New Systems Introduced New Complexities
The big systems I added, like Resolution Management and Screen Management, added lots of functionality to the game. With that, however, came gameplay issues that arose as the result of the requirements integrating with these systems introduced.
Take ScreenManager, for example. The system included the ability to have screens running visual updates during the transition, so the screen’s render texture didn’t look like it was frozen while fading from one screen to the next. By creating this capability, however, I needed to modify the existing game logic to take into account the idea that it could be running as part of a screen transition; for instance, the player character needed to be visible on the screen during the transition, but with input disabled so the player couldn’t move while the transition was running.
Another issue the ScreenManager refactor created had to do with resetting the game when the player chose to restart. Before, screens were loaded from file when being switched to, and being unloaded when switched from, so restart logic was as simple as using node _ready() methods to set up the game logic. After the refactor, this was no longer true; to avoid the loading penalty (and subsequent screen freeze) of dealing with loading scenes from file, ScreenManager instead kept inactive screens around in memory, adding them to the scene tree when being transitioned to and removing them from the scene tree when being transitioned from. Since _ready() only runs once, the first time a node enters the scene tree, it was no longer usable as a way to reset game logic. I had to fix this by explicitly creating reset functions that could be called in response to a reset signal emitted by the controlling screen, and throughout the remaining development I encountered bugs stemming from this change in game reset logic.
ResolutionManager, while allowing for crisp-looking UI, created its own problems as well. While the UI could be scaled down as much as I wanted, at smaller resolutions elements would render slightly differently from how they looked at 1920×1080. The reason for this was, ironically, similar to the issues with scaling pixel art: by scaling the UI down, any UI element whose size dimensions did not result in whole-number integers would force Godot’s renderer to have to guess what to render for a particular pixel location on the monitor. Subsequently, some of the UI looked bad at smaller resolutions (such as the outlines around the spell selection indicators). I suspect I could have addressed this issue by tweaking the UI design sizes to scale cleanly, but my attempts to change those values resulted in breaking the UI in ways I couldn’t figure out how to fix (largely due to my continued troubles understanding how to create good UI in Godot). In the end, I decided that, with my limited amount of time, trying to fix all the UI issues was less important than fixing the other issues I was working on, and ultimately the task was cut during the finishing stages of development.
I’m guessing most people won’t notice, anyway, since most people likely have the game at fullscreen, anyway.
Complexities arising from implementing new systems happened in other ways throughout the project as well, although the ones stemming from ScreenManager and ResolutionManager caused some of the bigger headaches. Fixing said issues contributed to extending development time.
Designing for Randomization
One of the core mechanics of Sanity Wars (original and Reimagined) is that all the entities in the game spawn at random locations on an unchanging set of maps. At the time I created the mechanic, my thought was that this was a way to achieve some amount of replayability, by having each run create different placements for the tomes, eyeballs, portals, and player.
Playtesters, however, pointed out that the fully random nature of where things spawned resulted in wide swings of gameplay experience. Sometimes, you got spawns that made runs trivially easy to complete; other times, the spawns made runs much more difficult. This had a negative impact on gameplay experience.
The way to solve this is through creating the means of controlling just how random the processes are. For example, I could add specific locations where portals were allowed to spawn, or add logic to ensure tomes didn’t spawn too close to portals. Adding controlled randomness isn’t easy, however, because by definition it means having to add special conditions to the spawning logic beyond simply picking a location within the map.
The biggest impact of controlled randomness wasn’t directly felt with Sanity Wars Reimagined, however; it was felt in our plans to expand directly off of this project for our next game. Given that random generation was a core element of gameplay, that meant adding additional elements would also need to employ controlled randomness, and that would likely result in a lot of work. On top of that, designing maps with randomness in mind is hard. It would likely take months just to prototype ideas, let alone flesh them out into complete mechanics.
This aspect, more than anything else, was a huge influence in our decision to not expand on Sanity Wars Reimagined for the next project, but to concentrate on a more linear experience. (More on that later.)
Clean Code
If you’re a programmer, you might be surprised at seeing “clean code” as a heading under complications. If you’re not a programmer, let me explain, very roughly, what clean code is: a mindset for writing code in such a way that it is easy to understand, has specific responsibilities, and avoids creating the same lines of code in different files; through these principles one’s code should be easier to comprehend and use throughout your codebase.
Under most circumstances, writing clean code is essential for making code not only easier to work with, but faster to develop. So how did writing clean code make Sanity Wars Reimagined more complex?
Simply put, the issue wasn’t strictly with adhering to clean code principles in and of themselves; the issue was when I spent a lot of time and effort coming up with clean code for flawed systems. Clean code doesn’t mean the things you create with it are perfect. In fact, in Sanity Wars Reimagined, some of the things I created wound up being harmful to the resulting gameplay.
A prime example of how this impacted development is the way I implemented movement for the Eyeball entity. I had the thought of creating a steering behavior-based movement system; rather than giving the entity a point to navigate to and allowing it to move straight there, I wanted to have the entity behave more like real things might move (to put it in very simple terms). I then spent a long time creating a locomotion system that used steering behaviors, trying to make it as clean as possible.
In the end, my efforts to integrate steering behavior movement were successful. There was a huge flaw, however; the movement hampered gameplay. Steering behaviors, by design, are intended to give less-predictable behavior to the human eye, which makes it harder to predict how the eyeball is going to move when it isn’t going in a straight line. This style of movement also meant the Eyeballs could easily get in a position where it was difficult for the player to hit them with the straight-line spirit bullet projectile, which was specifically intended for destroying Eyeballs. Since steering behaviors work by applying forces, rather than explicitly providing movement direction, there wasn’t an easy, feasible way for me to tweak the movement to make it easier for the player to engage with Eyeballs.
In addition to making Eyeballs less fun to play against, the steering behaviors also made it hard to make Eyeballs move in very specific ways. When I was trying to create a dive attack for the Eyeball, I literally had to hack in movement behavior that circumvented the steering behaviors to try and get the attack to visually look the way I wanted to; even then, I still had a lot of trouble getting the movement to look how I felt it should.
How did clean code contribute to this, precisely? Well, I’d spent a lot of time creating the locomotor system and making it as clean an implementation as I possibly could, before throwing it into the gameplay arena to be tested out and refined. If there had been time to do so, I likely would have needed to go back and refactor the Eyeball movement to not use steering behaviors; all that work I’d spent making the steering behavior implementation nice and clean would’ve gone to waste.
Don’t get me wrong; writing clean code is very important, and there is definitely a place for it in game development. The time for that, however, is not while figuring out if the gameplay works; there’s no sense in making something clean if you’re going to end up throwing it out shortly thereafter.
Playtesting
I didn’t let other people playtest the game until way too late in development. Not only did that result in not detecting crashes in release builds, it also meant I ran out of time to properly take feedback from the playtests and incorporate it back into the game.
For the first three months of development, I never created a single release build of Sanity Wars Reimagined. I kept plugging away in development builds. The first time I attempted exporting the project was the day, no, the evening I was scheduled to bring the game to a live-streamed playtest session with IGDA Twin Cities. As a result, it wasn’t until two hours before showtime that I found out that my release builds crashed on load. I spent a frantic hour hack-fixing the things causing the crashes, but even with that, the release build still had a major, game-breaking bug in it: the testers couldn’t complete the game because no portals spawned. Without being able to complete the game, the testers couldn’t give me good feedback on how the game felt to them. From that point onward, I made a point of testing exports regularly so that something like that wouldn’t catch me off-guard again.
The next time I brought the game out for playtesting was in the middle of January 2022, three months after the first playtest. At that point, I’d resigned myself to the fact that Sanity Wars Reimagined didn’t feel fun, and was likely going to be released that way; my intent with attending the playtest was to have people play the game and help me make sure I didn’t have any showstopping bugs I’d need to fix before release. What I wasn’t expecting (and, in retrospect, that was silly of me) was that people had a lot to say about the game design and ways it could be made more fun.
To be honest, I think I’d been stuck so long on the idea that I wanted to faithfully recreate the original game’s mechanics that I didn’t even think about making changes to them. After hearing the feedback, however, I decided that it would be more important to make the game as fun as I could before release, rather than sticking to the original mechanics.
That playtest, however, was one and a half weeks before the planned release date, meaning that I had very little time to attempt making changes of any significance. I did what I could, however. Some of the things I changed included:
Removing the sacrifice aspect of using spells. Players could now access spells right away, without having to sacrifice their maximum sanity.
Giving both the spells dedicated hotkeys, to make them easier (and thus more likely) to be used.
Adding a countdown timer, in the form of reducing the player’s maximum sanity every so often, until the amount was reduced to zero, killing the player. This gave players a sense of urgency that they needed to resolve, which was more interesting than simply exploring the maps with no time constraints.
Changing the Eyeball’s attack to something that clearly telegraphed it was attacking the player, which also made them more fun to interact with.
Adding a scoring system, to give the player something more interesting to do than simply collecting tomes and finding the exit portal.
Various small elements to add juice to the game and make it feel more fun.
Although we did wind up extending the release date by a week (because of dealing with being sick on the intended release week), I was surprised with just how much positive change I was able to introduce in essentially two and a half weeks’ worth of time. I had to sacrifice a lot of clean code principles to do it (feeding into my observation about how doing clean code too early was a problem), but the end result was an experience that was far more fun than it was prior to that play test.
I can only imagine how much more fun the game could’ve been if I’d had people involved with playtesting in the early stages of development, when it would’ve been easier to change core mechanics in response to suggestions.
Thanks to the IGDA Twin Cities playtest group, and specifically Mark LaCroix, Dale LaCroix, and Lane Davis, for offering many of the suggested changes that made it into the final game. Thanks also to Mark, Lane, Patrick Grout, and Peter Shimeall for offering their time to playtest these changes prior to the game’s release.
Lack of a Schedule
I mentioned previously that I’d thought the entire Sanity Wars Reimagined project wouldn’t take more than a month, but I hadn’t actually established a firm deadline for when the project needed to be done. I tried to implement an approach where we’d work on the project “until it felt ready”. I knew deadlines were a way that crunch could be introduced, and I wanted to avoid putting ourselves in a situation where we felt we needed to crunch to make a deadline.
The downside, however, was that there wasn’t any target to shoot for. Frequently, while working on mind-numbing, boring sections of code, I had the dread fear that we could wind up spending many more months on this project before it would be finished. This fear grew significantly the longer I spent working on the project, my initial month-long estimate flying by the wayside like mile markers on a highway.
Finally, out of exasperation, I made the decision to set a release date. Originally, the target was the middle of December 2021, but the game wasn’t anywhere near bug-free enough by that point, so we pivoted to the end of January 2022, instead. As that deadline approached, there were still dozens upon dozens of tasks that had yet to be started. Instead of pushing the deadline out again, however, I went through the list to determine what was truly essential for the game’s release, cancelling every task that failed to meet that criteria.
Things that hit the cutting room floor include:
Adding a second enemy to the game, which would’ve been some form of ground unit.
Refactoring the player’s jump to feel better.
Fixing a bug that caused the jump sound to sometimes not play when it should.
Adding keyboard navigation to menus (meaning you had to use the mouse to click on buttons and such).
Create maps specifically for the release (the ones in the final build are the same as the ones made for the second playtest).
It’s not that these things wouldn’t have improved the game experience; it’s just that they weren’t essential to the game experience, or at least not enough to make it worth extending the release date to incorporate them. By this point, my goal was to finish the game and move on to the next project, where, hopefully, I could do a better job and learn from my mistakes.
These are far from the only complexities that we had to deal with during Sanity Wars Reimagined, but they should serve to prove that a lot of issues were encountered, and a lot of mistakes were made. All of these things, however, are learning opportunities, and we’re excited to improve on the next project.
Improvements for Next Time
There’s a lot of things that I want to try for the next project; many of them serve as attempts to address issues that arose during the development of Sanity Wars Reimagined.
Have A Planned Release Date
I don’t want to feel like there’s no end in sight to the next project, so I fully intend to set a release date target. Will we hit that target? Probably not; I’m not a great estimator, and life tends to throw plenty of curveballs that wreak havoc on plans. By setting an end goal, however, I expect that it will force us to more carefully plan what features we want to try and make for the next game.
In tandem with that, I want to try and establish something closer to a traditional game development pipeline (or, at least, what I understand of one), with multiple clearly-defined phases: prototyping, MVP, alpha, beta, and release. This will hopefully result in lots of experimentation up front that settles into a set of core mechanics, upon which we build lots of content that is rigorously tested prior to release.
Prototype Quickly Instead of Cleanly
Admittedly, the idea of not focusing on making my code clean rankles me a bit, as a developer, but it’s clear that development moves faster when I spend less time being picky about how my code is written. Plus, if I’m going to write something, find out it doesn’t work, and throw it away, I want to figure that out as quickly as possible so I can move on to trying the next idea.
Thus, during the prototyping phase of the next project, I’ll try to not put an emphasis on making the code clean. I won’t try to write messy code, of course, but I’m not going to spend hours figuring out the most ideal way to structure something. That can wait until the core mechanics have been settled on, having been playtested to confirm that said mechanics are fun.
Playtest Sooner Rather Than Later
The feedback I received from the final big playtesting session of Sanity Wars Reimagined was crucial in determining how to make the game more fun before release. For the next project, I don’t want to wait that long to find out what’s working, what’s not, and what I could add to make things even more fun.
I don’t think I’ll take it to public playtesting right away, but I’ll for sure reach out to friends and interested parties and ask them to try out prototype and MVP builds. It should hopefully be much easier to make suggested changes during those early stages, versus the week before release. With more frequent feedback, I can also iterate on things more often, and get the mechanics to be fun before locking them down and creating content for them.
Make a Linear Experience
After realizing how much work it would be to try and craft a good random experience, I’ve decided that I’m going to purposely make the next game a linear experience. In other words, each playthrough of the game won’t have randomness factoring into the gameplay experience. This may be a little more “boring”, but I think doing it this way will make it easier for me to not only practice making good game design, but make good code and good content for as well.
Will it be significantly less fun than something that introduces random elements to the design? Maybe, maybe not. We’ll find out after I attempt it!
Those are just a few of the things I intend to try on the next project. I don’t know if all of the ideas will prove useful in the long run, but they at least make sense to me in the moment. That’s good enough, for now. Whatever we get wrong, we can always iterate on!
Conclusion
That’s the story of Sanity Wars Reimagined. We started the project as an attempt to make a quick release to gain experience creating games, and despite taking significantly longer than planned, and the numerous mistakes made along the way, we still wound up releasing the game. Along the way, we developed numerous technologies, and learned lots of lessons, that should prove immensely useful for our next project. Because of that, despite the resulting game not being as fun as I wish it could’ve been, I consider Sanity Wars Reimagined a success.
What’s next for Rebecca and I? It’ll for sure be another platformer, as that will allow us to make good use of the technologies and processes we’ve already developed for making such games. I fully expect there will be new challenges and complications to tackle over the course of this next project, and I can’t wait to create solutions for them, and learn from whatever mistakes we make!