Note: If you implemented this pattern and are now experiencing issues with
get_tree()calls, see my Issues with get_tree() section at the end of the article.
Oftentimes, in code, you need a way to have different parts of the codebase communicate with each other. One way to do this is have those components directly call methods from another component. While that works, it means you directly couple those components together. If you want to reuse one component in another project, you either have to take all the directly-coupled components with it or you have to refactor the direct couplings out of the component you want to reuse, neither of which is desirable from a clean code standpoint.
A way to solve this problem is to use the signal pattern. This is where each component can emit a named signal, and other components can then be connected to that signal. From that point on, whenever that signal is emitted by the component, anything that is listening for that signal can run code in response to that emission. It’s generally a great pattern, allowing for code to indicate when some event, or signal, happens, and for other parts of code to respond to that event accordingly (without code directly relying on calling methods from one another).
There is a third way to have decoupled components communicate to one another: the messenger pattern. At surface level, it’s very similar to the signal pattern: a part of your code dispatches a named message, and any code that is listening for that particular message can respond to it. Those different parts of your code aren’t connected to one another, however; instead, they interact through a Messenger node. Code that wants to listen for a message registers a message listener to the Messenger, and when another part of code dispatches a message with that name, the Messenger loops through all the registered listeners for that message name and invokes their callback functions.
Both the signal pattern and the messenger pattern can be considered subsets of the Observer pattern. The key difference is that the signal pattern has many objects connecting to one (the object emitting the signal), while the messenger pattern has a mediator object through which messages are dispatched and listened for by other objects. Which is better? It depends on what you are trying to accomplish architecturally, and there’s no reason you can’t use both.
Let’s discuss specifics, with relation to what Godot uses. Godot has the signal pattern baked into it at the core. Nodes can define signals through use of the signal keyword. Any node that wants to listen for another node’s signal can connect() to that node’s signal and associate a callback function to it. It looks like this, at a simplified level:
# OrdinaryNode
extends Node
signal some_cool_thing

# DifferentNode
extends Node

func _ready():
  # Assuming both OrdinaryNode and DifferentNode are children of a hypothetical parent node.
  get_parent().get_node('OrdinaryNode').connect('some_cool_thing', self, '_do_something_awesome')

func _do_something_awesome():
  print("This is awesome!")
From then on, whenever OrdinaryNode emits the some_cool_thing signal, the _do_something_awesome() function in DifferentNode will run, printing “This is awesome!”
While this is a good implementation of signals, the nature of how the signal pattern works implies some shortcomings. For instance, all signals must be explicitly defined in code. You can’t have OrdinaryNode, as written above, emit a coffee_break signal because the code didn’t explicitly define that such a signal exists. This is by design, as it means you have to plan what your node can and can’t emit. Sometimes, though, you do want to have a more flexible way to communicate with other nodes, and at that point signals can’t help you. This is one thing the messenger pattern can help with, by not requiring you to explicitly define what messages can or can’t be sent.
Another aspect of the signal pattern is that it requires you to have nodes define a connection to the node emitting the signal if you want those nodes to react to the signal. That means those nodes must, by definition, couple themselves to the node emitting the signal (though the emitter node doesn’t know, or care, about those couplings). This isn’t necessarily bad, but it limits how you can architect your code; you have to make sure nodes that need to listen for a specific signal are able to connect to the node emitting said signal. Conversely, using the messenger pattern, you can have nodes connect only to a single Messenger node, which can be simpler to implement.
Godot does not natively implement such a messenger node, however. If we want to use this messenger pattern, we’ll need to make something ourselves. That’s what this tutorial will be about.
Note: What I’m calling the Messenger Pattern is more commonly known as the Mediator Pattern. I came up with the name Messenger before I learned what it is called, and I’ll continue to use it in this tutorial because I think it communicates more clearly what I’m using it for.
Setting Up
There is a sample project, if you want to refer to the finished product.
If you want to code alongside the tutorial, start by creating a new Godot project, then create a GDScript file named Messenger.gd. We’ll make this as the base file that other implementations of messengers can extend to provide their own functionality.
The original project was created in Godot 3. Here is a branch that is configured for Godot 4. (Thanks to valVk for assisting the Godot 4 conversion!)
Adding and Removing Listeners
The first thing we want to do is provide a way to add and remove message listeners. Let’s begin with adding listeners.
var _message_listeners := {} # Stores nodes that are listening for messages.


# Add object as a listener for the specified message.
func add_listener(message_name: String, object: Object, method_name: String) -> void:
  var listener = { 'object': object, 'object_id': object.get_instance_id(), 'method_name': method_name }

  if _message_listeners.has(message_name) == false:
    _message_listeners[message_name] = {}

  _message_listeners[message_name][object.get_instance_id()] = listener
This is fairly straightforward. We take the name of the message, the object that has the callback function, and the name of the callback. We store all that in a listener dictionary (defined as a class property outside of the function) and store it in _message_listeners in the dictionary stored at the key matching the message name (creating a dictionary for that key if it doesn’t already exist). We key this listener in the message_name dictionary to the object’s instance id, which is guaranteed to be unique.
Since Godot implements signals at the object level (Node inherits from Object), I’ll be typing these as Objects rather than Nodes, which allows for any node inheriting from Object to be used as a listener (including Resources).
Next, the ability to remove a registered listener.
# Remove object from listening for the specified message.
func remove_listener(message_name: String, object: Object) -> void:
  if not _message_listeners.has(message_name):
    return

  if _message_listeners[message_name].has(object.get_instance_id()):
    _message_listeners[message_name].erase(object.get_instance_id())

  if _message_listeners[message_name].empty():
    _message_listeners.erase(message_name)
Again, fairly straightforward. We run existence checks to see if a listener exists at that message_name key, and erase it from the dictionary if so. Additionally, if no more listeners exist for that message_name, we erase the dictionary for listeners of that message name.
Sending Messages
Now that we can add and remove message listeners, it’s time to add the ability to send those messages.
# Sends a message and triggers _callbacks on its listeners.
func dispatch_message(message_name: String, data := {}) -> void:
  var message = { 'name': message_name, 'data': data }

  _process_message_listeners(message)
We take a message_name string and a data dictionary (which defaults to be an empty dictionary), store it to a message variable, and pass that variable into _process_message_listeners.
# Invoke all listener callbacks for specified message.
func _process_message_listeners(message: Dictionary) -> void:
  var message_name = message.name

  # If there aren't any listeners for this message name, we can return early.
  if not _message_listeners.has(message_name):
    return

  # Loop through all listeners of the message and invoke their callback.
  var listeners = _message_listeners[message_name]
  for listener in listeners.values():
    # Invoke the callback.
    listener.object.call(listener.method_name, message.data)
This is where we handle triggering the callbacks for a message listener. If there aren’t any listeners for that message name, we return early to avoid doing further processing. If there are listeners for that message name, then we loop through each one and trigger the stored method callback, passing in the message’s data dictionary.
That’s it, as far as the basic implementation goes. But there are a couple of caveats that need to be dealt with.
Dealing with Nonexistent Listeners
One such case happens when a listener’s object is freed, making the stored reference in the listener dictionary invalid. If you try to operate on it, Godot will crash, so we need to provide a way to scan for dead listeners and remove them from storage.
Let’s start with a function to perform both the check and the purge:
# Removes a listener if it no longer exists, and returns whether the listener was removed.
func _purge_listener(listeners: Dictionary, listener: Dictionary) -> bool:
  var object_exists = !!weakref(listener.node).get_ref() and is_instance_valid(listener.node)

  if !object_exists or listener.node.get_instance_id() != listener.node_id:
    listeners.erase(listener.node_id)
    return true

  return false
Multiple checks are used to see if the object exists (I’ve found in practice that I’ve needed both of these, not just one or the other). We also check to see if the instance id of the stored listener matches the id of the listener object we passed in; honestly, I can’t recall when or why that particular scenario occurs (I sadly forgot to write a comment about it in my code), but I know I’ve encountered it in the past, so I continue to include it as part of my check. If the object doesn’t exist, or the ids don’t match, we conclude the listener’s object no longer exists, and thus remove the listener from storage. Finally, we return a boolean value indicating whether the purge was performed or not.
Now we need to modify our existing code to use this function.
func _process_message_listeners(message: Dictionary) -> void:
  # ...existing logic

  for listener in listeners.values():
    # If the listener has been freed, remove it
    if _purge_listener(listeners, listener):
      # Check if there are any remaining listeners, and erase the message_name from listeners if so.
      if not _message_listeners.has(message_name):
        _message_listeners.erase(message_name)
        return
      else:
        continue

    # ...existing logic
The difference is we call _purge_listener before we try to invoke the callback. If the listener was purged, we perform an additional check to see if there are any other listeners of message_name, and erase the dictionary keyed to message_name if there aren’t; otherwise, we proceed to the next listener in the for loop.
That takes care of dead listeners. There’s one more problem we need to address.
Dispatching Messages Too Early
Right now, if we try to send and listen for messages during the ready process (when Godot’s nodes all run their _ready callbacks), then we’ll likely run into issues where messages are dispatched before the listeners of those messages are registered (because their ready callbacks run later than when the messages are sent). To solve this, we’re going to add a message queue. If a message is being dispatched before the root node of the scene tree is ready, we’ll add the message onto this queue, and once the root node emits its ready signal we’ll process all the messages in the queue.
Let’s start with setting up the message queue, and modifying our dispatch_message function.
var _message_queue := [] # Stores messages that are being deferred until the next physics process tick.
var _messenger_ready := false # Is set to true once the root node is ready, indicating the messenger is ready to process messages.

# Sends a message and triggers _callbacks on its listeners.
func dispatch_message(message_name: String, data := {}) -> void:
  var message = { 'name': message_name, 'data': data }

  if _messenger_ready:
    _process_message_listeners(message)
  else:
    _message_queue.push_back(message)
We’ve added two new class properties, one to house the message queue and the other to mark when the messenger node considers itself ready. dispatch_message has been modified to first check _messenger_ready, and if so it runs the code the same as before. If the messenger node is not ready, then the message is pushed onto the message queue.
Now let’s set up the ability to process the message queue.
func _ready() -> void:
  get_tree().get_root().connect('ready', self, '_on_Root_ready')


# Is called when the root node of the main scene tree emits the ready signal.
func _on_Root_ready() -> void:
  _messenger_ready = true
  _process_message_queue()


# Process all messages in the message queue and reset the queue to an empty array.
func _process_message_queue() -> void:
  for message in _message_queue:
    _process_message_listeners(message)

  _message_queue = []
In Messenger’s own _ready callback, we register a listener to the scene tree root’s ready signal. The callback then sets _messenger_ready to true and calls a function, _process_message_queue(), which loops through each message in the queue and calls _process_message_listeners() on them. At the send, we clear the message queue, since we don’t need (or want) to process these messages again.
Creating a GlobalMessenger
At this point, we have a base Messenger class that can be used anytime we want to implement the messenger pattern in our code. Let’s demonstrate this by creating a global singleton, GlobalMessenger, that we can interact with from anywhere in our codebase.
Start by creating a new file, global_messenger.gd, and have it extend our Messenger class. If Godot claims the Messenger class doesn’t exist, then you’ll need to reload the project to force Godot to update itself and recognize the Messenger class we added in Messenger.gd.
# Creates a global messenger that can be accessed from anywhere in the program.
extends Messenger
The reason I made this file name snake_case is because my personal convention is to name files that are solely used as singletons with this format, to distinguish them from files containing extensible classes. This is my personal preference only, and is not required to make this code work.
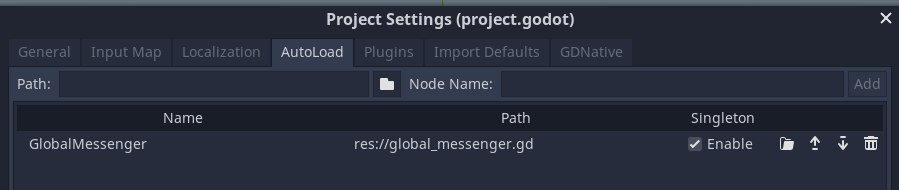
That’s all that needs to be done from a code standpoint. To make this a globally-available singleton, we need to go to Project -> Settings in the editor menu, navigate to the AutoLoad tab, and add global_messenger.gd to the list of autoloaded files.
And…that’s it! We now have a global singleton that we can use from anywhere in our codebase to dispatch messages!
Deferring Messages
Let’s add some additional functionality to our global messenger. For instance, right now, once the messenger is ready, we immediately run listener callbacks upon receipt of the message. What if we wanted to defer message dispatches until the next process tick? It might prove useful to ensure all game data is updated by the time your message callbacks are being run.
We already have a message queue that is used to make sure messages are deferred until the messenger is ready. We can build on that to add functionality to intentionally defer message dispatching until the next physics process tick.
func _ready() -> void:
  set_physics_process(false)


func _physics_process(_delta) -> void:
  ._process_message_queue()
  set_physics_process(false) # We don't need to keep updating once messages are processed.


# Queues a message to be dispatched on the next physics processing tick.
func dispatch_message_deferred(message_name: String, data := {}) -> void:
  _message_queue.push_back({ 'name': message_name, 'data': data })

  set_physics_process(true)
First, we use _ready() to disable physics processing. That’s because, whenever _physics_process() is defined in a script file, Godot automatically enables processing. We only want to process when there are messages in queue, so we just disable physics processing right off the bat.
I use
_physics_processinstead of_processto ensure messages are processed at a consistent rate.physics_processis run a consistent amount of times per second, whereas_processis run as often as possible, and I’ve found that having messages processed as fast as possible can result in unexpected complexity when sent from code that is expecting a consistent frame rate.
Next, in the _physics_process() callback, we call _process_message_queue(), then disable physics processing again (basically, only running the update step a single time).
Finally, we create a new function, dispatch_message_deferred, making it obvious that calling this will be different from a regular message dispatch. We add the message straight onto the message queue. Afterwards, we set the physics processing step to be true. This way, the next time _physics_process() callbacks are run in the code, the global messenger’s _physics_process() callback will be run, too. And since it is a global singleton, it will be run before other nodes in the root scene.
That’s it!
Testing our Implementation
Now that we have a Messenger node, and a GlobalMessenger implementation of it, let’s set up a test scene in our project to test their functionality and make sure they work as intended.
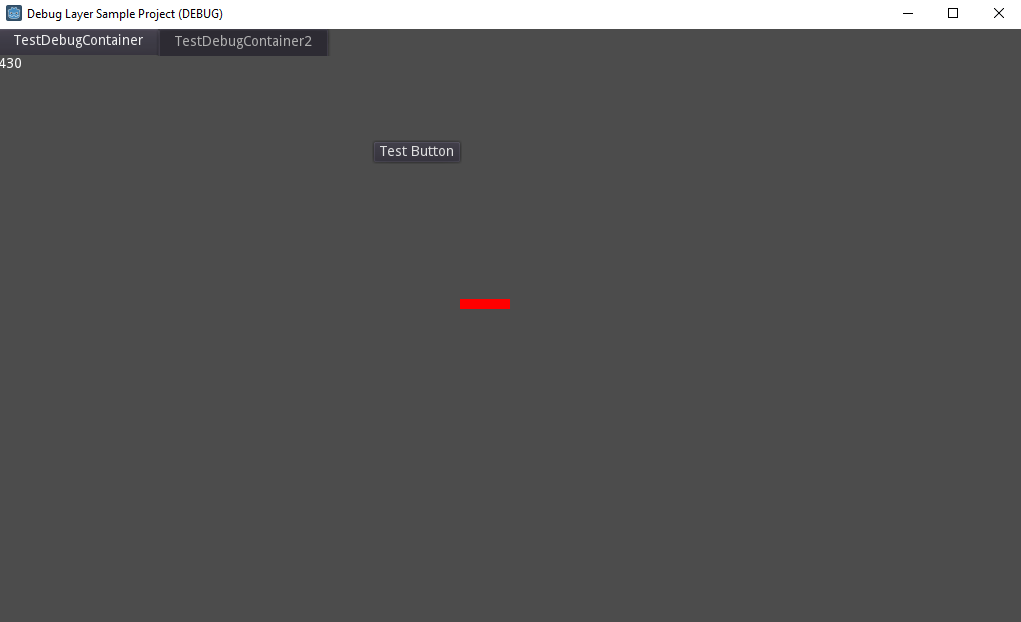
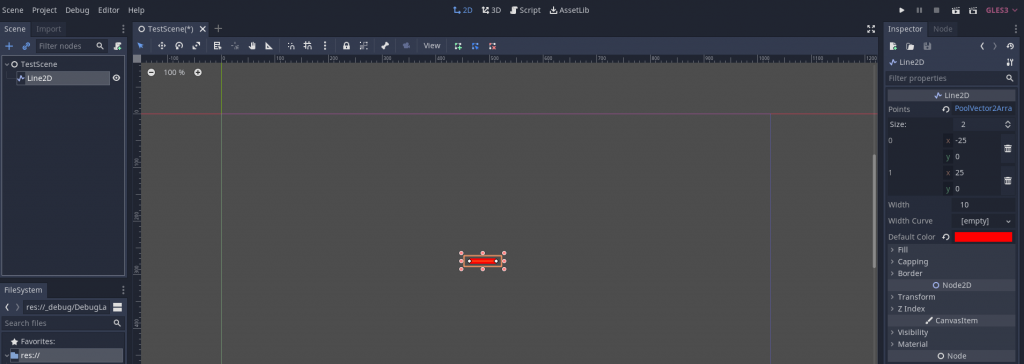
Create a new scene, TestScene, then structure it thusly:
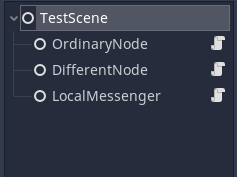
LocalMessenger is a node which is extended from Messenger; we will use this to test that a locally-built implementation of our messenger node works.
The other two nodes, OrdinaryNode and DifferentNode, should contain the following code:
# OrdinaryNode
extends Node


onready var localMessenger = $"../LocalMessenger"


func _ready() -> void:
  GlobalMessenger.dispatch_message('test_1', { 'fish': 'shark' })
  localMessenger.add_listener('test_local', self, '_on_Test_local')


func _on_Test_local(data) -> void:
  print('Do you like looking at the ', data.animal, '?')

# DifferentNode
extends Node


onready var localMessenger = $"../LocalMessenger"


func _ready() -> void:
  GlobalMessenger.add_listener('test_1', self, '_on_Test_1')
  localMessenger.dispatch_message('test_local', { 'animal': 'rabbit' })


func _on_Test_1(_data) -> void:
  print('Test 1 received')
At this point, if you run the scene, you should see the two messages printed to console. If you do, then everything was set up correctly!

Issues with get_tree()
Recently (in May 2023), I encountered a strange bug where a message callback that invoked get_tree() was not returning the scene tree, despite the node housing the callback function being in the scene tree. After some investigation, I realized that I was calling the add_listener() function from the node’s _ready() callback; when I switched to adding the listener in _enter_tree() and removing it in _exit_tree() the get_tree() call worked as expected.
I admittedly am not entirely sure why this works, but my theory is that adding the listener during _ready() is either storing the reference to the function call when the tree is not yet defined or subsequent tree exits and enters is causing the reference to be lost. In any case, I wanted to add this addendum in case anyone else chose to implement this pattern and ran into the same problem.
If you happen to know more info about why this might have happened, please let me know!
Conclusion
We now have a base Messenger node, as well as a GlobalMessenger singleton that extends it and adds defer functionality to it. When should it be used? Personally, I use the messenger pattern in cases where I want to enable node communication, but for whatever reason it doesn’t benefit me to define the specific signals ahead of time, which is when the messenger’s dynamism comes into play.
Of course, that dynamism leads to the risk of making messy code. One advantage to explicitly forcing signals to be defined is that it forces you to think about how you are architecting your code, by making you think clearly about how your signals are going to be used. Since Messenger lets any node send whatever message it wants, it falls on you to make sure that power isn’t abused to send messages when the situation doesn’t call for it. For instance, if you have one node which you want other nearby nodes to listen for a specific event from, you don’t need the dynamic nature of Messenger; signals work perfectly fine, and are a cleaner way to get the job done.
As with all things, in life and code, consider carefully how you do things, and use whatever tools and patterns best fit your needs.