This is Part 3 of a 3-part series. Check out all the parts here!
Part 1: Here!
Part 2: Here!
Part 3: This post.
As a child, I loved to play Donkey Kong Country 2: Diddy’s Kong Quest; as an adult in my early thirties, I still love playing it. One of the reasons, among many, why is the game’s character movement feels almost perfect. Never do I feel as though I can’t adequately control Diddy or Dixie Kong as I navigate them through many levels of perilous adventure. As a game designer, I found myself wondering: what is it, exactly, that makes me love DKC2’s movement so much?
To answer that question, I’ll take a close look at the action verbs DKC2 employs related to the player characters. It’s not just a matter of analyzing the actions and movements in and of themselves, however; the level and enemy design of DKC2 are intentionally crafted to augment those basic and special actions. As is undoubtedly true for many games, it is the whole package together which creates that feel I love so much.
In the first part of this blog series, we looked at the many abilities and forms of movement the Kongs can do; in the second part, we examined the design of the levels those actions are performed in, and how it compliments them. Now, we’ll look at the final segment of the movement equation: the foes the Kongs must fight throughout the levels. We’ll review the types of enemies that get included in the game, relative to how you are expected to deal with them; next, we’ll examine a few foes that implement some special mechanics on top of their base type; finally, we’ll look at a few levels to see how enemies are placed to take advantage of the Kongs’ movement, their movement, and the level’s design to create compelling, challenging gameplay experiences.
Kantankerous Kharacteristics
When asked about what kinds of enemies are present in Donkey Kong Country 2, one might say “there’s some ground enemies, flying enemies, swimming enemies, some bosses”. That isn’t wrong at all, but I want to approach this from a different perspective; I want to examine enemies by how they are designed to be defeated. This approaches helps us focus on what moves you need to employ to defeat a baddie, which makes it well-suited for this design dive.
Basic Baddies
Many of the baddies are designed to be beaten with one or more of the regular moves in the Kongs’ arsenal. Some specifically protect themselves against particular kinds of moves, forcing you to be more strategic about how you approach them. Let’s break those types down.
Stomp Enemies
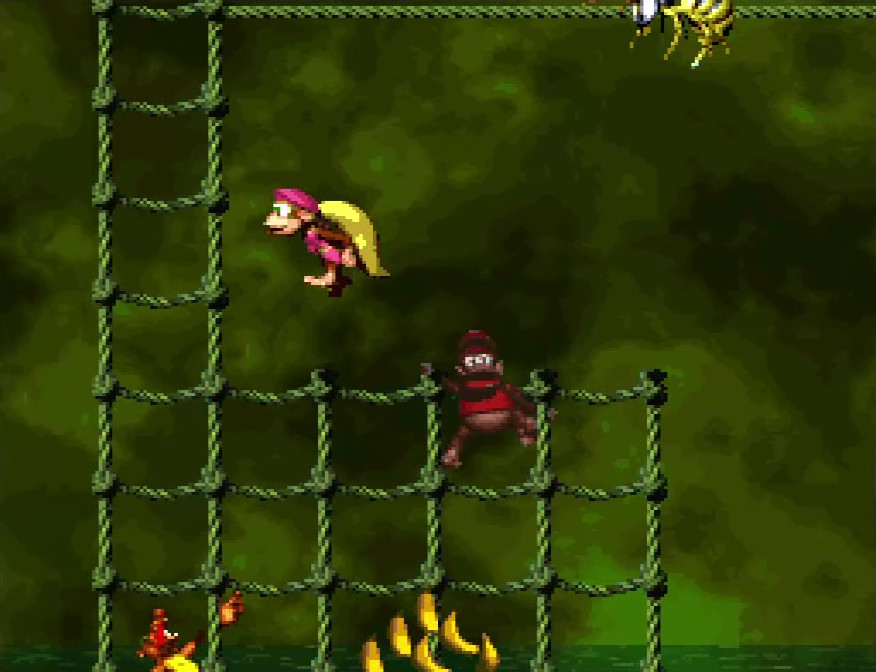
As is true in many platforming games, there are many baddies which can be defeated by jumping on their heads and knocking them off the stage; I’ll call this “stomping”. It’s usually pretty obvious which foes can be stomped; they lack any sort of visible protection to their heads which might discourage you from jumping upon them. That doesn’t mean all stompable enemies are the same; there’s plenty of variety to enemy widths, which affects how easy it is to land within their hurtbox. For example, Sneeks and Flitters have quite wide hurtboxes (and they are visually long-looking characters to communicate this), making them relatively easy to land on; other foes, like the Klomp, stand upright and present a smaller hurtbox, and thus are more of a challenge to land on precisely.
I use the term “hurtbox” to mean the collision area where contact results in hurting the entity possessing it.
Stompable enemies are sometimes placed in such a way that you can chain jumping on multiple of them in a row. As discussed before, this is used in some places as the required means of progressing through the level, but it’s also included in less critical areas as a fun thing to do. Jumping as you land on top of an enemy provides a boost to your jump height, which adds to the thrill of the action. Since jumping on enemies is a core part of the game, adding elements like this to increase the fun factor goes a long way to making the game feel good to play.
Spin Enemies
The spin move is also usable as an attack, careening into enemies to knock them away. Unlike falling on a baddie from above, using a spin requires knowing how much time you spend in the spin animation before breaking out into a run, as otherwise you’ll instead run into the enemy (and thus take damage and lose the Kong you control). This makes the spin attack more challenging to pull off, but subsequently it feels a little more satisfying to use than a simple jump attack.
When you successfully spin into a baddie, it actually resets the spin to the initial frame of the spin move; since the camera stops moving forward as part of this, it adds some weight to how the spin attack feels, contributing to the fun of using it. To compliment this, some parts of the game place multiple enemies close enough to each other that you can easily spin through the entire group, which is tremendously entertaining!
This is actually something I don’t think is done as well in Donkey Kong Country: Tropical Freeze. There’s been a lot of times in that game where I’ve tried to pull off a spin attack through a group of enemies that seem close enough to spin fully through, only for my spin to come up short in the middle of the combo through no perceived fault of my own. It makes it such that I trust the use of that attack less than the jump. That’s a shame, since I think DKC games are at their best when the player is able to use both forms of attack equally well.
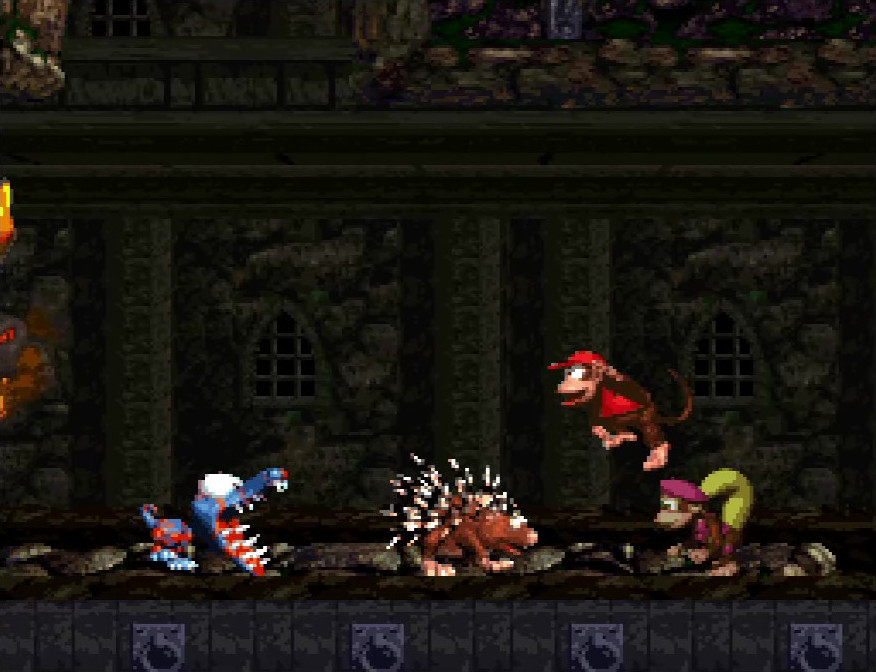
Many of the ground baddies which can be stomped on can also be spun into; some, however, specifically prescribe whether or not the spin attack should be used. The Spiny is designed to resemble a porcupine, bristling with sharp quills all over its body except for the exposed head area; spinning into this foe from the front is thus strongly encouraged. The Klampon, an alligator-esque foe with big, nasty teeth, communicates the opposite; spinning into those jaws means your death, so you must instead stomp them. This adds a level of depth beyond simply defeating these baddies; you need to understand what they are vulnerable to and specifically use the move which targets that vulnerability.
Protected Enemies
There are a few foes which are explicitly immune to the spin and stomp attacks the Kongs possess, meaning you can only defeat them with a projectile or an animal buddy’s attack. As mentioned in previous parts, that means when you are given access to a projectile or a buddy, you’ll need to keep them around long enough to deal with any protected enemies in your path.
What if you don’t have a projectile or an animal buddy? Then these protected baddies become obstacles which you must avoid. There are plenty of places in the game where this is what you are expected to do. For example, many climbing sections are littered with Zingers, forcing you to climb quickly or make well-timed jumps to avoid their patrols. On the ground, protected foes are often placed in ways that force you to perform a clever move (like a spin jump) to get through (or, alternatively, to access some form of reward that you’d otherwise have to pass on).
Enemies which are protected from spins and stomps are given a visual design that communicates this. The hornet-like Zinger is covered in sharp, triangular stingers, making it quite clear that death awaits those who try to spin or jump into it. Klubba is big and muscular, and the Kongs simply don’t have enough mass to do any damage to him; instead, when you try to jump on or spin into him, you bounce off him, and he turns red, making the next time you touch him cause damage. Kutlass sports a pair of oversized cutlass swords, and carries them in such a way that it makes it clear that he can cut you down from any angle you choose to try and attack. Identifying which enemies are protected from spins and stomps is an important part of gameplay, and forces clever use of your moves to either avoid them or keep projectiles and animal buddies alive long enough to get to those baddies and defeat them.
Komplex Kharacters
We’ve examined the basic archetypes of enemies by how they are intended to be defeated. There are a few special cases which differ enough from the basic types, which we’ll look into now.
Ranged Enemies
Most of the baddies in DKC2 use their brawn to try and hurt you, but a few fellows got the clever idea of shooting projectiles at you, instead. That forces you to keep your eyes peeled for when such baddies appear in the level, and react quickly to the projectiles they shoot at you to avoid them. Sometimes, these ranged foes are positioned such that they shoot projectiles through an area of the level you must pass through to make progress, requiring you to time your moves to the pattern of the projectiles so you pass while the baddie is reloading. Thanks to how responsive your basic movement is, dodging the projectiles, while a challenge, is rarely a frustration.
Even within the ranged archetype, there is variety to be found in what projectiles they shoot. The Kannon baddie (not to be confused with the samely-named Kannon that shoots you into bonus areas) sometimes shoots simple wooden barrels, which you can bounce on top of if you aim your jumps correctly; this is used in some levels as a required means of progression, bouncing across from barrel to barrel over a gap until you get to the other side. Other times, they fire iron cannonballs which hurt you irregardless of how they touch you, and you must simply avoid them. The Krook, meanwhile, fires its metal hook hands when you pass within line of sight; the twist is that those hooks function like boomerangs, returning to the Krook after reaching maximum distance, forcing you to not only keep an eye for the initial shot, but be prepared to avoid the projectile as it traverses its return trajectory. Finally, the Kloak hovers around and is capable of throwing many kinds of projectiles, from barrels and chests to Spinies and Zingers; sometimes, if you wait long enough and dodge the projectiles, a Kloak will throw out some form of goodie, like a banana coin or a chest with a 1-up balloon, so it’s not always in your best interests to kill them right away.
Swimming Enemies
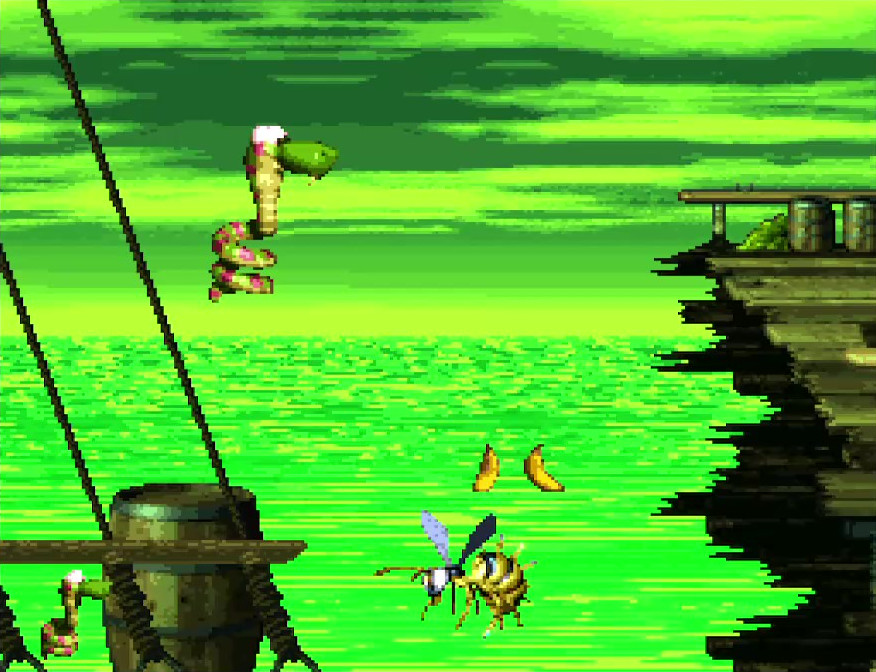
While swimming, the Kongs cannot jump, spin, or throw; this makes all the foes underwater a protected enemy, because touching them means death. Thus, underwater sections tend to evoke avoidance gameplay, where you swim carefully through rooms of patrolling baddies. Not every foe is content with simply patrolling, however; the Lockjaw, an orange piranha, will charge towards you if it catches you within its line of sight, while the Shuri, a spinning starfish, will wait for you to enter an area, then attempt to launch themselves in your general direction. The Puftup, a bloated pufferfish, will sometimes explode when you get within range, launching its sharp spikes in predetermined directions and forcing you to dodge to avoid them.
Both the Shuri and the Puftup also have variants which simply patrol an area, so you have to identify which variant you’re facing when they appear on-screen!
A lot of times, in swimming levels, Enguarde the swordfish is hidden somewhere, and using him makes the underwater sections far easier. Instead of having to avoid every enemy you see, you can instead line up Enguarde’s sword bill to stab them and take them out. As mentioned before, it’s a reward for players who explore levels carefully and check the nooks and crannies for hidden passages.

Bosses
Boss fights are the apex stage of every world, the final challenge that you must overcome to progress to the next world area. All bosses are immune to stomps and spins, being vulnerable only to projectile attacks. Often, the projectiles you need aren’t immediately available to you, requiring you to wait for them to appear. These big baddies aren’t content with sitting around and letting you get those projectiles freely, however; they have many forms of attack in their arsenal to use on you. These attacks are patterned, so you can learn how a boss is going to attack you and develop strategies for dodging them. Even when you acquire the projectile, however, you still have to aim correctly to get the projectile to hit the baddie, or you’ll have wasted your shot and made the boss fight take longer, increasing the odds that you’ll make a mistake and take a hit.
The stages you fight each boss on ask for the use of different abilities as part of the pattern avoidance. Krow, the foe of the first world, flies around the stage and tries to drop eggs on you, some of which can later be picked up and thrown back at him. Kudgel, the gatekeeper of World 3, jumps around the stage and tries to land on top of you; when he hits the ground, anything standing on it is paralyzed, so you not only have to run around to avoid getting landed on, you also have to jump in the air to get off the ground to avoid being unable to respond to his next jump. To fight King Zing, the defender of the fourth world, you transform into Squawks and must not only dodge the king’s flight path, you must hit a specific part of his body (the tail stinger) with your egg projectiles in order to cause damage. Even though the underlying pattern of dodge-the-boss-until-you-can-use-your-projectile is the same for all boss stages, the different takes on that pattern keep the gameplay fresh and interesting, while requiring you to make good use of your movement to win.
This was a notable issue with bosses in the original Donkey Kong Country, where nearly every boss had to be fought in the exact same way, by simply jumping on them.
Special Shenanigans
There’s more to a good foe than simply meandering around a level. A few simple stooges like that are useful for establishing a baseline to gameplay, but often, as game designers, we want to make enemies that take expected archetypes and add an unique twist for the player to deal with.
Donkey Kong Country 2 does this with many of its foes; even though the baddies can be classified into a small set types of how they can be beaten, most still get one or more unique traits that make it more interesting to deal with them beyond a simple spin or stomp. We’ll examine a small subset of DKC2’s roster of baddies, observing the mechanics which make them function and how they engage with the moves given to the player.
Neek
We’ll start with the humble Neek. A small, bandana-bearing vulture, Neek hovers at a predetermined area in the level and waits for you to get near. Once you enter his threat radius, he lets out a screeching cry and dives down a planned flightpath, starting with an arced curve and flattening out into a straight line. You need to quickly predict where that flight path is going, and whether you’re in it. If you are, you’ll need to duck or jump to get out of the way. If you want to remove the Neek, you can jump up and stomp on its head as it flies by.
As far as special mechanics go, this one is relatively simple. Even so, it adds an element of intrigue to how you plan to deal with him. Until you enter the threat radius, he doesn’t move, so you can’t wait him out; on the other hand, since it won’t attack right away, you have time to prepare for your reaction. While all Neeks perform some form of dive and flatten out maneuver, the angles involved can vary with each Neek, so you have to figure out quickly what kind of pattern it’s going to adopt. Thus, even though the dive isn’t that complex a behavior, the Neek’s simple mechanic is still enough to provide interesting, fun gameplay.
Click-Clack
A small, yet oversized, dung beetle, the Click-Clack has a small hitbox to accompany its tiny frame. This makes it so that you have to be more precise with your jumps in order to land on them. Additionally, when you jump on one, it flips onto its back instead of becoming defeated; you’ll also get knocked back a little bit. If you ignore that Click-Clack, it’ll revive and move around faster than before; only a second jump will dispatch it for good. On the other hand, while it’s flipped over, you can pick it up and throw it as though it were a projectile (although throwing it down to the ground will cause it to revive). Finally, if you spin into it, you defeat it instantly.
There’s all sorts of interesting gameplay that arises from the Click-Clack’s mechanics. The knockback force you experience when you jump on a Click-Clack can make the stomp a little risky; that force could push you into another enemy, or into a pit. Spinning into it, where you have room to do so, is certainly the safest way to dispatch them. On the other hand, it can be used as a projectile; if you’re about to face a horde of enemies, particularly ones that are protected from your other attacks, it’s well worth your while to stomp on a Click-Clack for the purpose of carrying it around as ammunition (or a shield, since holding projectiles protect you from damaging attacks to your front). You can’t sit around and wait while it’s on its back, however; you have to decide whether you’re going to kill it or carry it, or it’s just going to get up again, and since it now moves faster it’ll will be more deadly to deal with.
If you look at the Click-Clack in terms of how it is beaten, it’s a spinnable, stompable foe. The small hitbox and unique mechanics around what happens when you stomp on it make it a much more interesting, versatile foe to fight than it might otherwise be.
Klobber
The Klobber is a Kremling that hides in normal-looking barrels. When you get close enough to it, the Klobber will pop up and try to run into you, knocking you around if it succeeds in doing so. The fact that baddies in barrels exist means you have to be cautious whenever you see a barrel; is it only a barrel, or is a Klobber hiding within? Oftentimes, Klobbers are placed around other enemies or hazards, making it easy for you to get shoved into a source of damage.
How do you stop the Klobber? You have to leap into the air and stomp on its head; spin attacks do nothing against it. Once it’s been stomped, it hides inside its barrel for awhile before popping back out to charge after you anew. The only way to prevent it from returning is to pick it up and throw it into something and break, or offscreen into the bottomless void. You don’t need to throw it right away, though; you can carry the Klobber’s barrel around, and it functions exactly like a regular barrel. Like the Click-Clack, that makes the Klobber a source of projectiles, making it worthwhile to deal with one.
There’s more than one kind of Klobber, too. Different-colored Klobbers have different effects when they hit you. The green Klobber just knocks you around; the yellow Klobber steals bananas from you, which disappear if you wait too long to recollect them; the black Klobber takes away life balloons, which float away if you leave them alone. The red Klobber hides in TNT barrels—with the special name Kaboom—and blows up if it runs into you. These increasingly deadly side effects heighten the stakes of engaging with them; be careless, and you could lose valuable life-giving resources (or, in the case of Kaboom, your life).
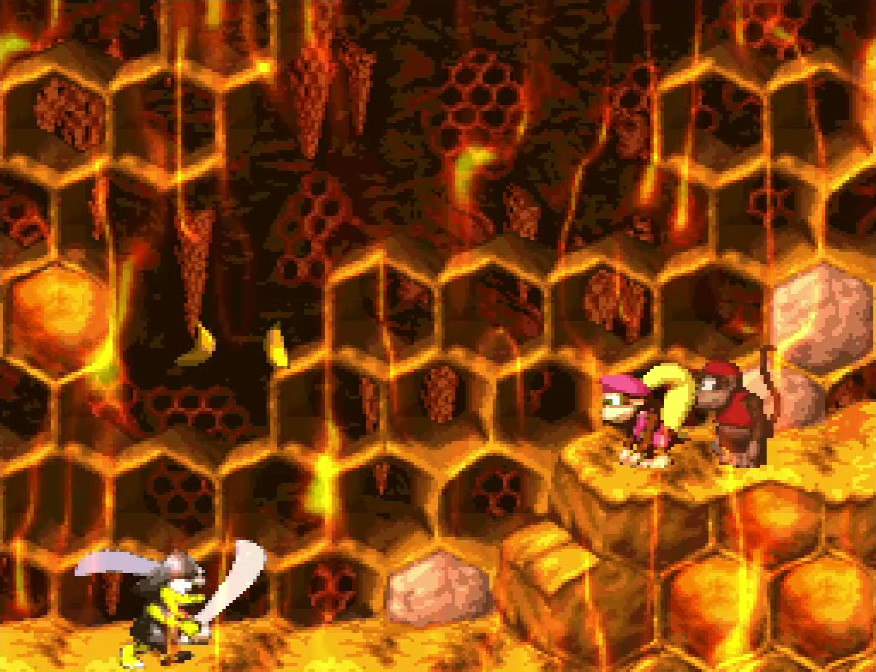
Kutlass
Finally, we’ll bring up Kutlass. We’ve briefly mentioned it already; it’s the double-cutlass-wielding Kremling. Those oversized swords, as mentioned before, make it clear that jumping on the Kutlass is a suicidal maneuver. What about spinning into it from behind? It’s too smart; as soon as you get close, it’ll turn to face you and charge at you. If you don’t move out of the way, those massive cleavers will come down on your Kong’s head and take them out of the picture. The only option you have, if you don’t have a projectile, is to dodge out of the way. When you do this, the force of Kutlass’ swing gets its cutlasses stuck into the ground for a few moments, exposing an opportunity to strike and defeat it, either by stomp or spin.
This enemy is an unique blend of the protected and basic types, and this makes it interesting to engage with. You need some amount of space where you can get near the Kutlass without getting immediately into its threat radius; otherwise, you have nowhere to dodge when it swings the swords at you. Even if you do have enough room to dodge, you have to react quickly, making the Kutlass a test of how well you’ve mastered using your movement over the course of playing the game.
Level Design Kase Studies
Having baddies, no matter how interesting they may be, is nothing without creating level designs that take advantage of how they behave, just like having good movement is nothing without a level design that makes those moves fun and entertaining. As with many other aspects, Donkey Kong Country 2 does a great job with enemy placements in its levels, starting with simple schemes to ease new players in and ramping up to complex challenges that truly test a player’s mastery of their moves.
There are a total of 40 levels in the game, each with enough depth to go many thousands of words into. For the sake of brevity, however, we’ll restrict our gaze to portions of a few levels. Even these microcosmic glimpses should prove illuminating as to how well DKC2 uses enemies in its level design.
Pirate Panic
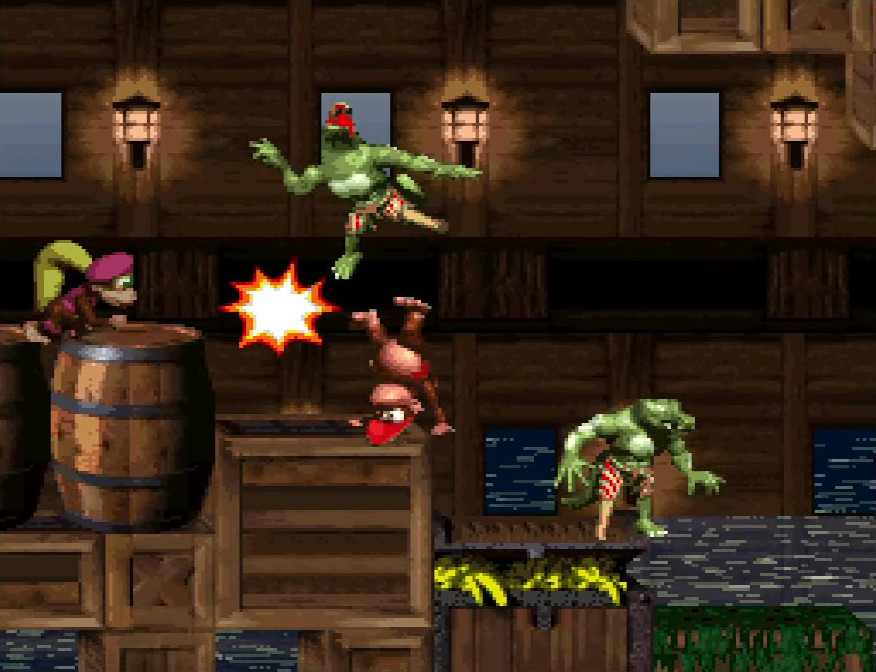
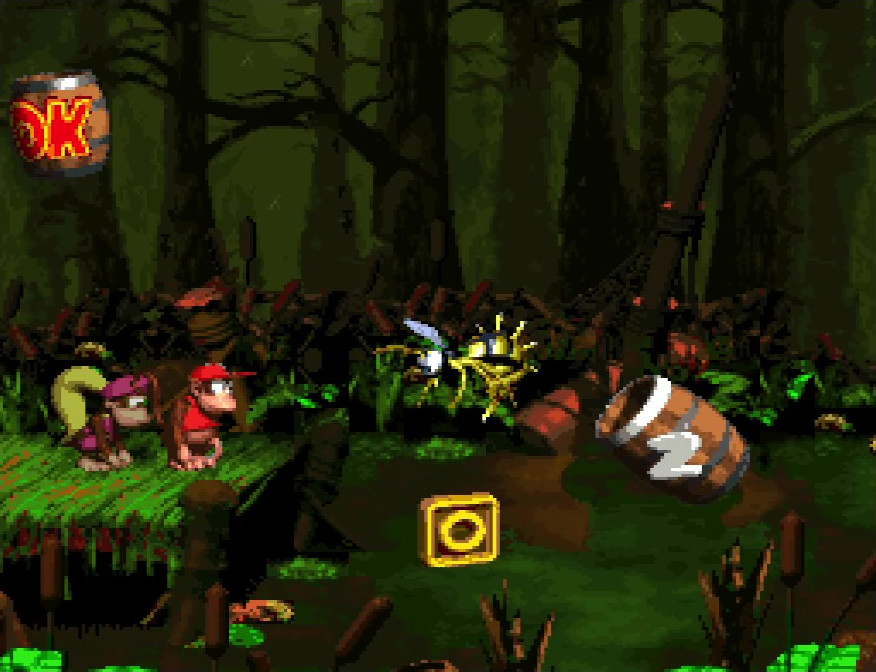
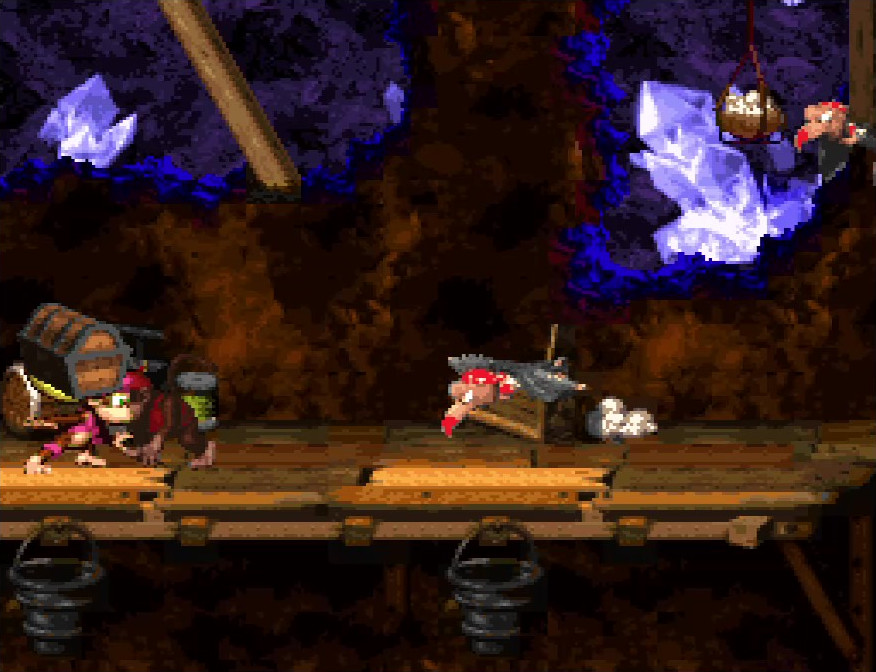
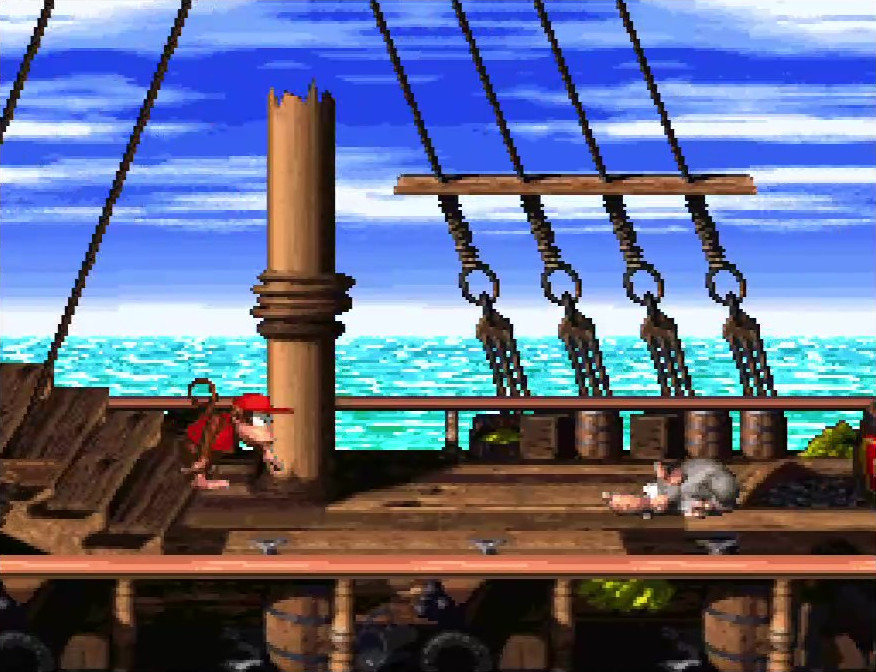
We’ll begin at the beginning: the first level of the game, Pirate Panic. As is typical of the first level of many games, Pirate Panic is designed to introduce you to the many mechanics you’ll be using for the rest of the game. Fittingly, the first enemy you come across is a Sneek, who is easy to jump on and moves slowly; he’s just begging for you to jump on him or spin into him.
Having the first enemy you encounter be simple, easy, and uncomplicated gives the player less to worry about. The Sneek isn’t going to suddenly rev up speed and charge into you, or jump super high out of nowhere; he’ll just keep moving your way until you either deal with him with your moves or let him run into you. It’s a great way to introduce the basic moves to you.
You encounter a pair of Sneeks as your next foes; you’ve already learned how to deal with one, so now the game asks you to deal with two of them. Hopefully, knowing what to do, this proves to be an easy task for you.
Afterwards, the next foe you see is the plodding Klomp. This is a new baddie, with a differently-shaped profile (and hurtbox), but the way you deal with him is the same as how you dealt with the Sneek; the jump just needs to be a little bit higher. Alternatively, if you’ve happened to learn how to hold down the Y button to run, you’ll pick up a crate projectile right before you see the Klomp. It’s not far-fetched to think from there that you might be able to throw this at the Klomp, or even hold it to run into him.
This Klomp is also on top of a row of platforming barrels, so you could even choose to run underneath him if you don’t feel like engaging him. It’s also an introduction to enemies on different height levels, something you’ll encounter often throughout the rest of the game.
Once you pass the Klomp, the next baddies you have to contend with are a row of Sneeks, but this time there’s a twist: the foes are advancing beneath a bunch of stacked platform barrels (so named to distinguish them from projectile barrels). If you try to jump on them, you’ll most likely land on top of a barrel instead of the Sneeks, avoiding them entirely. If you just want to progress, that might be good enough; for many players, though, it’s irking to leave any foe undefeated, if it was within their power to handle. That row of barrels serves as a discouragement against jumping, in that case. The way to defeat these Sneeks is spinning into them; hitting the first one will result in demonstrating the fun art of spinning through all the nearby enemies, exposing a new strategy for you to use and cementing it in your brain with a rush of fun gameplay.
By now, you’ve had multiple chances to practice your basic moves. The rest of Pirate Panic continues in much the same way, introducing slightly more challenging scenarios and foes, giving you a great taste of the gameplay to come.
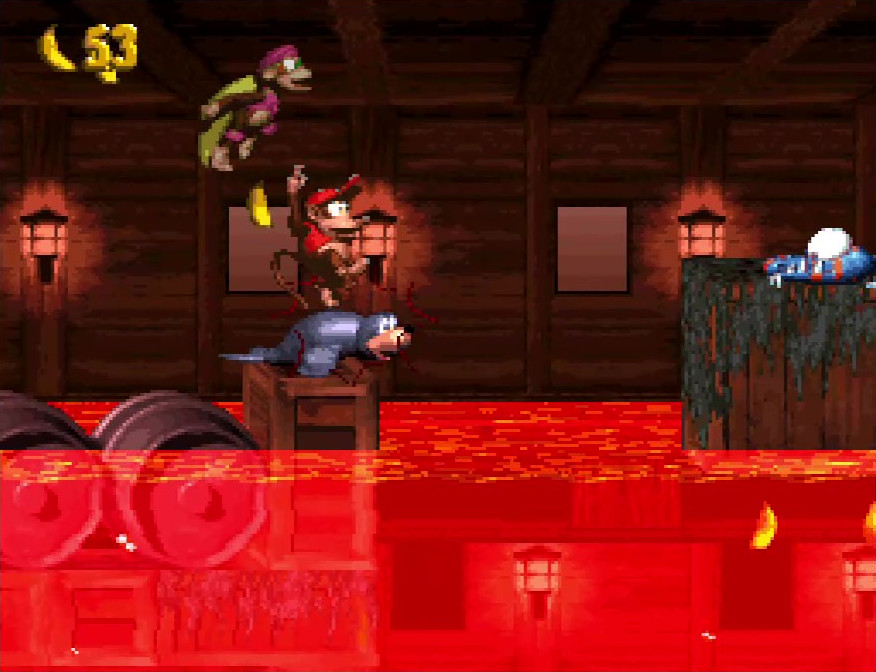
Lava Lagoon
Next, we visit Level 3 of World 2, Lava Lagoon. This is the first time a level gimmick gets introduced: the water is, literally, lava, and you must jump on the back of an all-powerful, almighty seal named Clapper to convince him to turn this lava into water, making it safe for you to traverse. You can’t stay in the water too long, however; after a brief period of time the water will start heating up, until it once again becomes lava.
If Clapper is powerful enough to turn lava into water, why doesn’t he help the Kongs out in more substantial ways? Good question.
The way this level gimmick is introduced is clever. You are presented with a small branching path. At the start of this fork sits Clapper, waiting for you. The path above is patrolled by a Klampon; the path below is lava-logged and, at the moment, impassible. Earlier in the level, you had to contend with a Sneek approaching you from a higher platform, so that jump to the upper platform feels dangerous. Meanwhile, Clapper the seal is barking at you, and, given how often jumping on things solves problems in this game, you’ll probably feel inclined to do the same here, just to see what happens. Thus, you discover Clapper’s magical powers of liquid and temperature transmutation, making the lower path accessible to you. It is far easier to swim through this area, so you’ll likely take it over the upper path.
This fork in the road thusly introduces the level’s gimmick to you in an intuitive way, inviting you to figure it out on your own. Even if you ignore Clapper entirely and brave the upper platform, it’s not a big deal; you’ll soon reach a point where you cannot progress further without using Clapper. Seeing him multiple times increases the odds that you’ll engage with him and figure out his shtick.
One other thing that underwater path teaches you: that you’ll have swimming enemies to contend with underwater, as a lowly Flotsam patrols the floor of the lower path. It’s easy enough to swim above him, but it prepares your expectations for what kind of gameplay is to come.
The rest of Lava Lagoon is an increasing progression of a simple pattern: introduce lava-water sections that you need to cool down with Clapper, then travel through before the water heats back up to the point of damaging temperatures. In each water section, you have a cadre of underwater foes to swim past and dodge; the combinations become trickier and trickier to navigate the deeper you get into the level, ending with a mad dash through a maze of puffing Puftups (the non-exploding kind) to make it to the end of the level before you run out of time. For good measure, you also get tossed a Klobber at the level’s end that you have to avoid or defeat, lest it push you back into the lava. Overall, the level is a good example of taking a level gimmick, teaching you how it works, and ramping up the challenge of that gimmick through good enemy placements.
Bramble Scramble
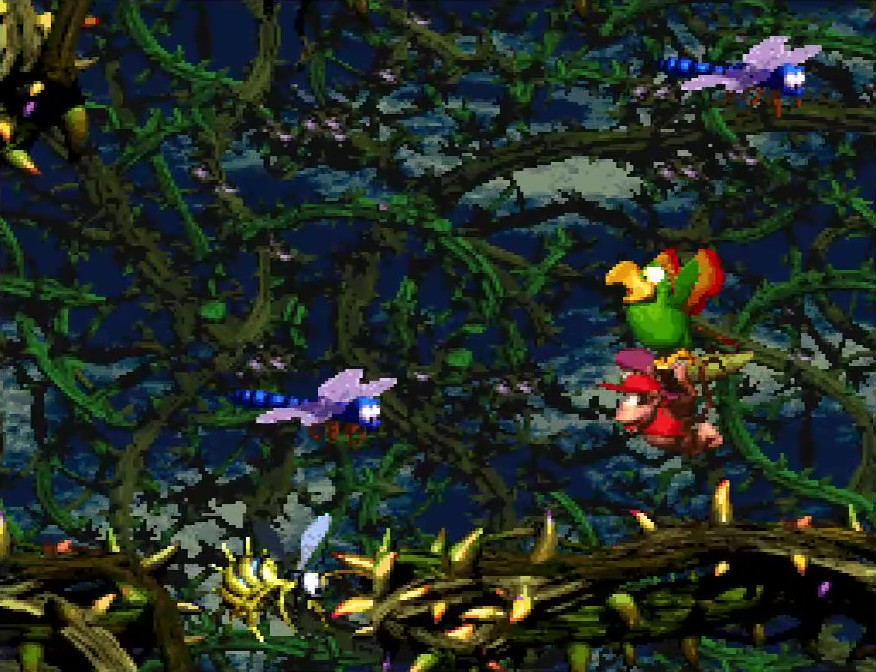
As you progress further into the worlds and levels of Donkey Kong Country 2, the challenges the game puts before you becoming increasingly more difficult. I think Level 3 of World 4, Bramble Scramble, is a quintessential example of the game giving you a great challenge to put all your skills to the test. This level is oriented both around climbing on ropes and flying with Squawks.
In the other two levels we’ve discussed, the opening enemy was something simple and easy to deal with. Not here; your first foe is a Krook, and you encounter him the moment you move forward in the level, needing to deal with his hook shot right away. Even if you beat him, though, he’s right on the edge of a thicket of brambles, so you have to be careful that your jump doesn’t lead you to fall into them. After a long jump to the next safe wooden platform, you’re faced with a tall, thorny vine, with a Zinger hovering on the other side waiting to sting you upside the face, assuming you manage to fly over the thorns without getting your Kongs’ butt pricked along the way. You get one DK barrel to try and take out the Zinger, and if you succeed your passage over the thorns is a little safer. The shot isn’t easy to make, however, and you only get one chance; the game is testing you to see how skilled you’ve gotten with your aim.
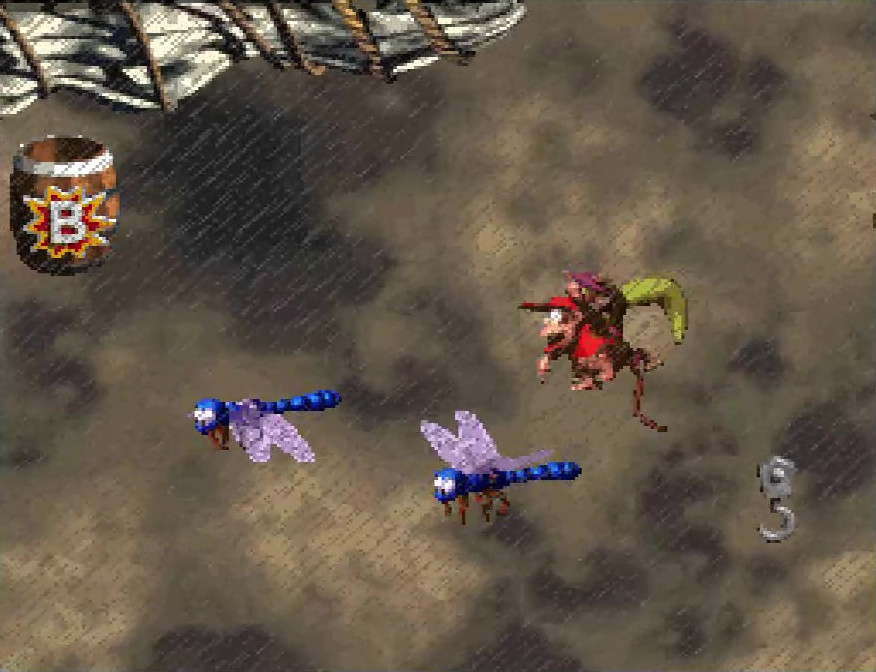
Skip past a climbing section patrolled by Zingers and a Krook, and another jumping section where you need to use running jumps to have any hope of making it between platforms, and you’ll encounter your first Squawks section. First, you ascend upwards, with a few Zingers floating off to the side which you can use as target practice for your egg shot. You’ll need it, too, because the next section is flooded with flying Flitters. Normally, these blue dragonflies are relatively harmless, but in such large swarms, you’ll quickly get overwhelmed if you don’t fire away your egg bullets to take them out. The eggs aren’t fired in a straight line, either, so you have to remember how the egg trajectory is arced and use that to guide your aim. While doing all that, you must also avoid flying into the brambles above and beside you as you move through the area.
Thankfully, while flying with Squawks you can rest on flat stretches of bramble without taking damage. Given how difficult it is to shoot down the Flitter swarm and keep yourself up in the air, this section might be where you learn this ability!
Eventually, you get to the no-Squawks sign and the halfway barrel, where the next climbing section starts. First, you climb upwards into the face of a squadron of waiting Neeks. Almost immediately after you see them, they dive bomb across your path. If you jump, you fall back down to the ground, so you have to shimmy up and down the rope to keep out of their way. At the top of the rope is a junction with a horizontal rope, allowing you to continue onward. Here, however, you encounter a Kannon firing a rapid burst of cannonballs; you cannot pass yet, as the rate of fire is too fast. Instead, you must wait until there is a short pause in fire, then dash across as quickly as you can before the Kannon begins firing anew.
You continue across the path of ropes, and soon you end up on another horizontal rope, square in the path of another Kannon. You don’t see the Kannon on screen, but you can hear him open fire, and soon you’ll see a cannonball flying across the length of rope, straight at you! Luckily, there’s some gaps in the brambles above that give you just enough room to jump up into in order to avoid the shot. You must advance down the rope to the next safe jumping zone, before another cannonball comes screaming across the screen to take you down. Do this a few more times and you’ll finally get close enough to the Kannon to take him out and end the threat for good.
There’s plenty more challenge left in this level, but there’s one more pattern I want to look at. At several junctions throughout this level, you’ll encounter a group of Zingers. Some of them will be red, meaning they are immune to your egg shot, while one or two will be normal yellow Zingers. With all the Zingers alive, the passage through will be near impossible; you need to shoot down the yellow Zingers to clear your path enough to make it through with relative ease. It’s a great way of presenting players with a simple, yet meaningful strategic choice that yields a tangible reward.
Castle Crush
Our final foray will be into the realm of World 6, Level 3, named Castle Crush. This is another gimmick level. This time, the floor is rising up beneath your feet, and you’ll quickly find yourself running out of head room! To stay alive, you need to keep your eye atop the screen to see where in the ceiling the continuation paths are, and position yourself to be under them before the floor smashes you into the ceiling.
I wasn’t intending for most of these examples to be Level 3s, but that’s how it shook out. 😛
As if that weren’t time pressure enough, the foes populating this level will do their best to come at you from nearly out of nowhere and force you to make quick decisions on how you’re going to handle them. The first enemy you encounter is, once again, a Sneek, dropping down on you from above; a quick and easy enemy to defeat that you’ve, by now, beaten dozens and dozens of times. It also introduces you to a pattern that will be very common in this level: small alcoves containing enemies that drop on you from above.
The next baddie you encounter is a Spiny, also falling down from above. You must defeat him with a spin attack, but you have to time it right; spin too early and you’ll finish the attack animation before the Spiny gets close enough to take damage, resulting in the Spiny landing right on top of you. Some time later in the level, you’ll encounter Klampons dropping in on you from above as well. These you cannot deal with by spin attack, so you must allow them to fall and land, then quickly jump in the air to stomp on them before they close in on you in the tight quarters you keep.
Eventually, shortly before the halfway point, you get introduced to a long hallway that contains both a Spiny and a Klampon. The Spiny is first; if you spin into him, you’ll wind up near where the Klampon patrols, so you’ll have to be careful to ensure you stop your spin in time to get airborne and stomp the Klampon. This section is specifically designed to introduce you to this particular pairing: Spiny and Klampon. It keeps it spaced wide enough that you have a good chance of surviving the encounter while teaching you how difficult it is to deal with both these foes in the same area.
Sure enough, later on in the level, you encounter your first section where a Spiny and a Klampon patrol right next to each other. The Spiny leads, with the Klampon right behind. You now have a difficult choice to make: do you try and leap over the Spiny to jump on the Klampon and defeat him first, or do you instead spin into the Spiny and try to jump right before your spin carries you into the Klampon’s gnashing teeth? Both maneuvers are equally challenging, and with the rising floor you are forced to decide quickly, lest you get squished. It’s one of the most challenging parts of the game, and it feels awesome to correctly execute whichever decision you made.
There are plenty more sections in Castle Crush where the Spiny and Klampon patrol is used. There is even one section where you have alternating Spinies and Klampons dropping on you from above, forcing you to time your attacks so you spin into the dropping Spiny, then quickly jump to stomp on the Klampon before the next Spiny falls onto your lap. All this challenge, and this is only one single part of the many myriad challenges Castle Crush throws your way. By the time you finally ascend to the top of the level and stomp that exit target, you’ll feel exhausted, yet exhilarated at having gotten through.
Kong-clusion
Whew! At last, we’ve made it to the end, not just of Part 3, but this entire series!
In this part, we dove headlong into examining the enemy design and how it was created with the aim of players using their fine-tuned moves on them. The ways each enemy can be defeated provides a framework for understanding what an enemy means in the context of the moves the player can do, from the basic stompable, spinnable baddies to the foes which embody special protections and attacks. Even enemies sharing the same defeat type can have differences in gameplay by exhibiting one or two special behaviors on top of that. Finally, each level in the game, of which we examined several, is tailored to take these enemies and place them in locations that make optimal use of what they do, all in the aim of providing a fun, challenging experience for the player.
Over this entire blog series, I’ve shown why Donkey Kong Country 2’s movement is special. The moves themselves are finely tuned and feel great to perform, and there’s a great many ways to modify the basic movement to provide fun gameplay variety. Every level is designed to take full advantage of these great movement mechanics, rewarding both skillful play and observant exploration. In each level lives enemies that are designed to make using your moves to conquer them, whether by defeating them or avoiding them, fun and exciting.
In short, I think Donkey Kong Country 2’s movement feels amazing. It’s why I loved playing the game as a kid, and it’s why I keep coming back to playing it, nearly thirty years after it was released. Nothing else I’ve played comes close to how this game feels.
As a game designer, it is my hope that I’ll one day get to make a game that pays homage to the movement mechanics of this game. After writing all these blog posts, I’ve certainly squirreled up enough techniques and ideas to take inspiration from!
No Comments